Sharing Student Portfolios: A Step-by-Step Guide for Educators

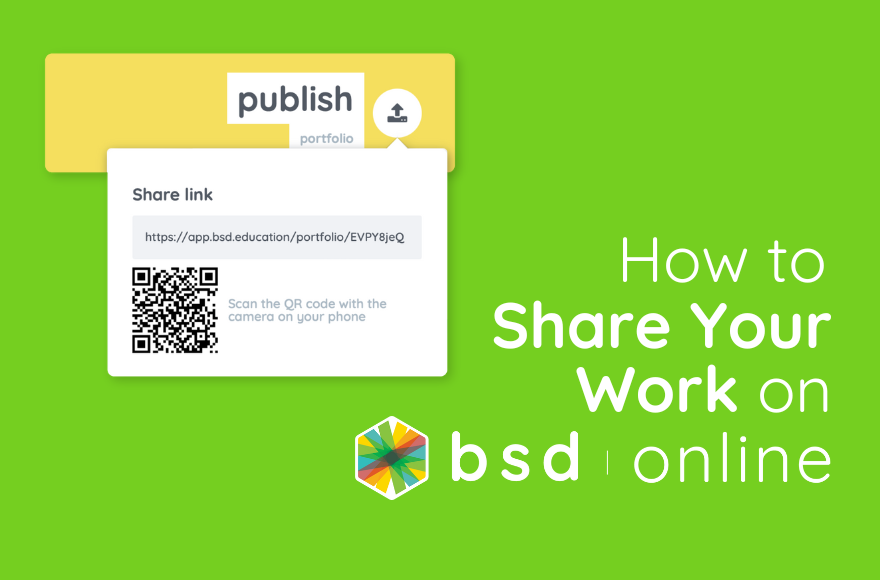
Students can share their sandboxes with everyone. Did you know that they can also share their whole portfolio? Sharing their whole portfolio means they can showcase all their sandboxes in one link! This can be used in term-end submissions or even when they are applying for a job.

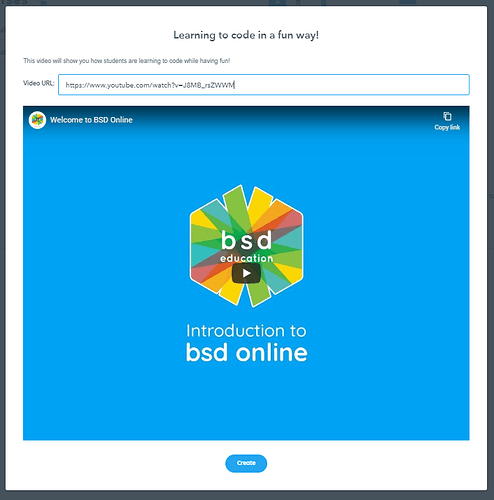
But first, what is a portfolio? Please watch this short video about what BSD portfolio is about:

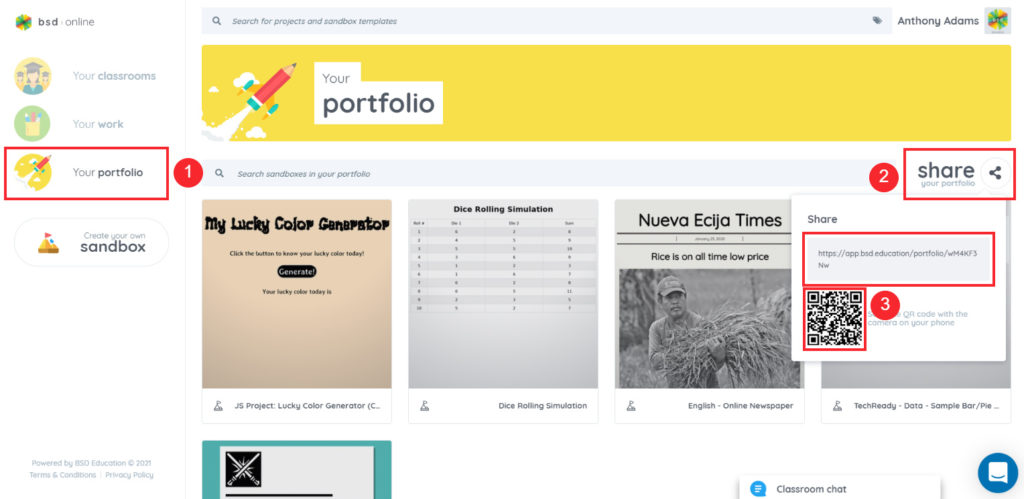
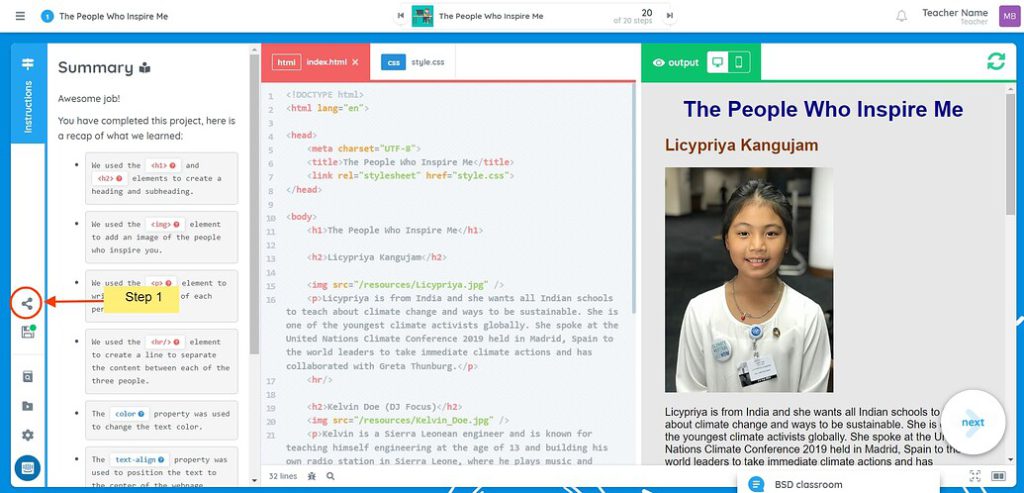
Sharing your portfolio can be done by following these steps:

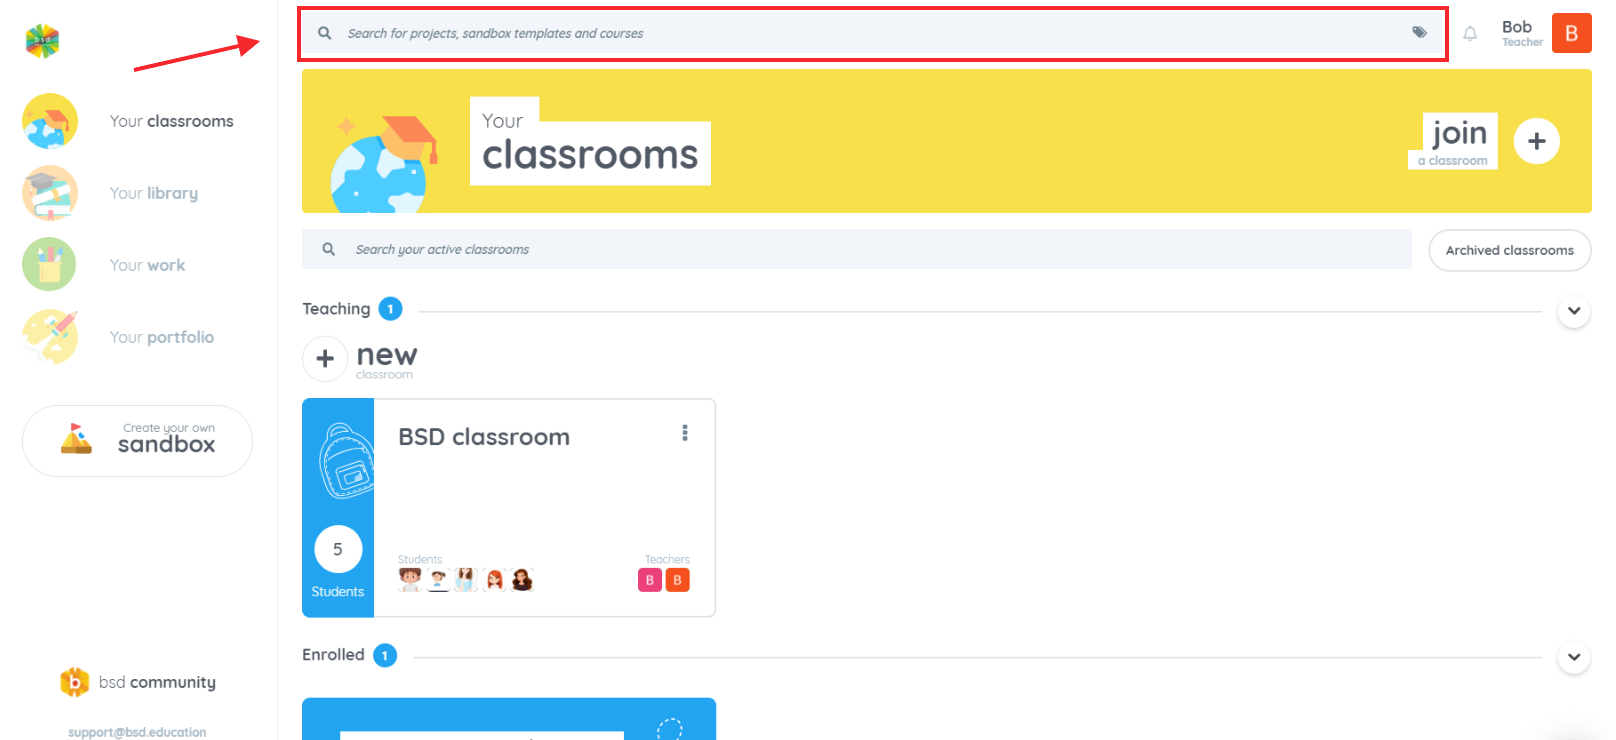
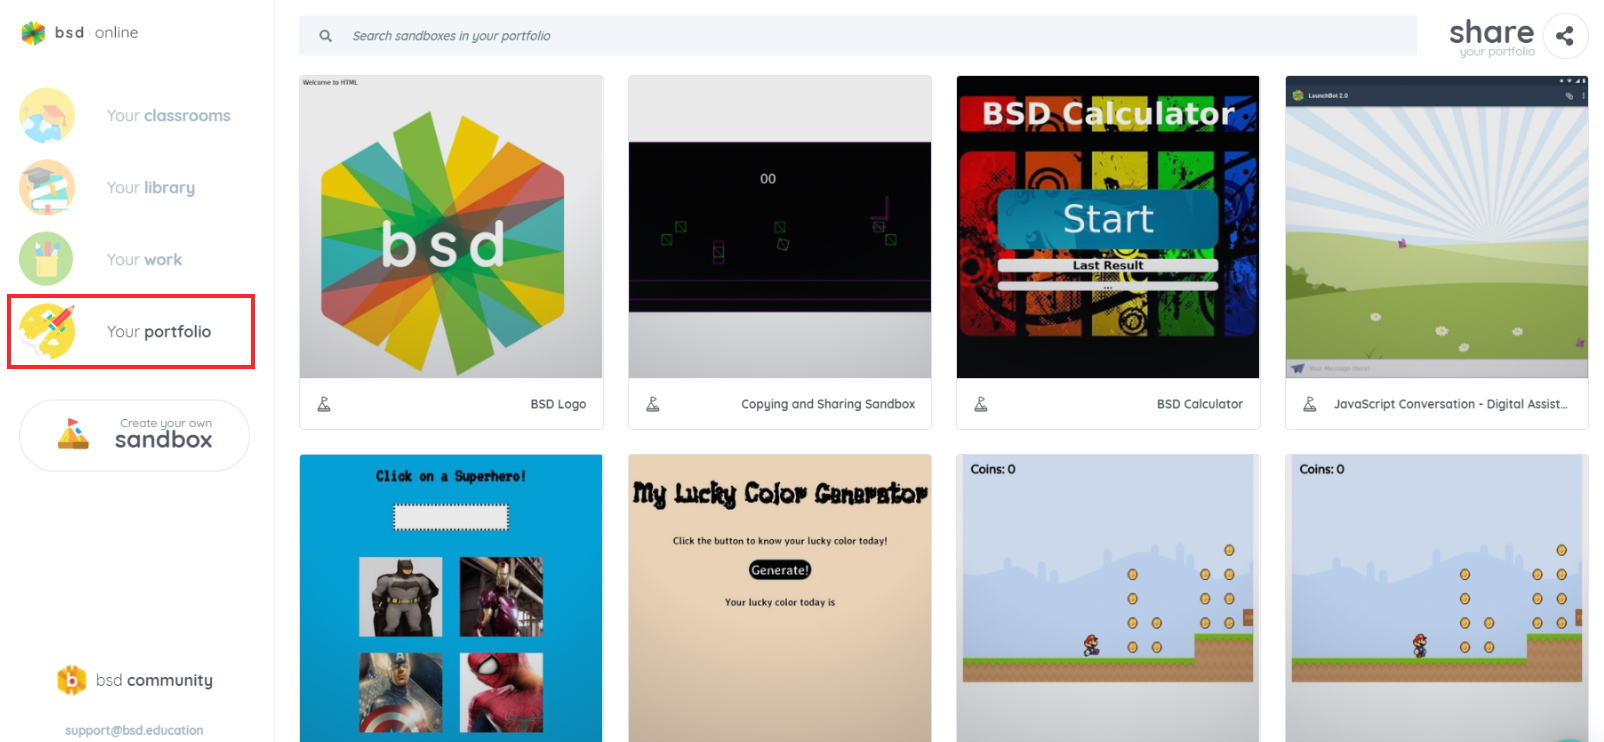
  1. On your homepage, click on “Your portfolio” from the left panel.
  2. On the right hand side of the screen, you’ll see a button that says “share your portfolio”.
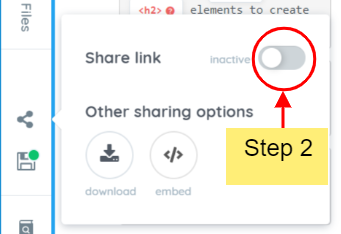
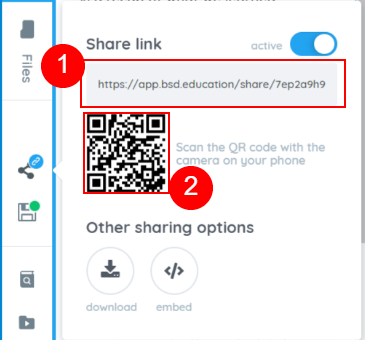
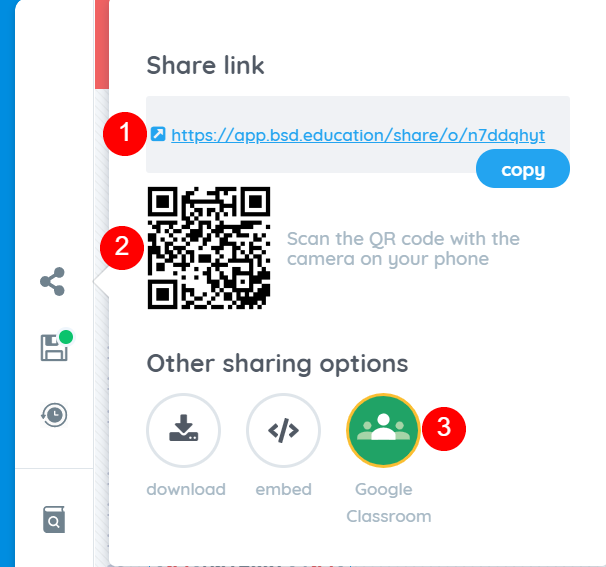
  3. You have 2 ways to share your portfolio, either via a unique share link or a QR code.

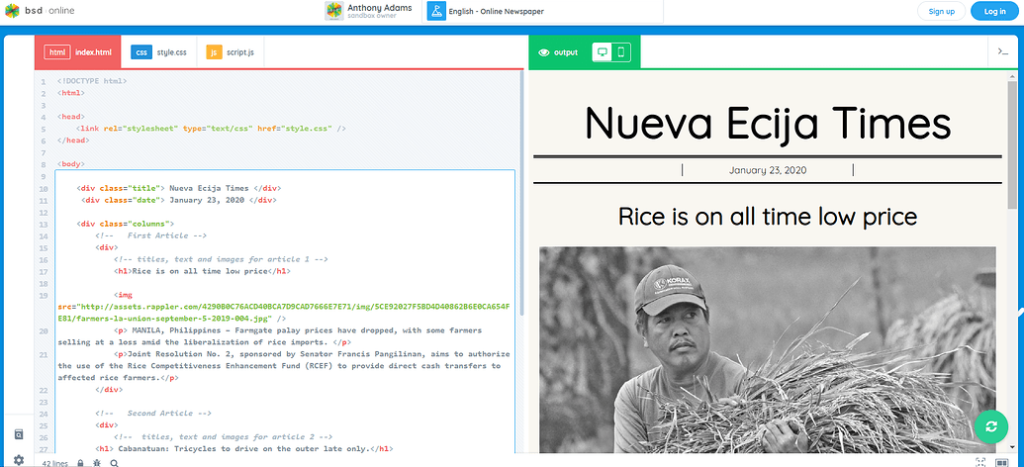
Copy the link and share it with anyone you want to share it with. This is an example of what they will see:

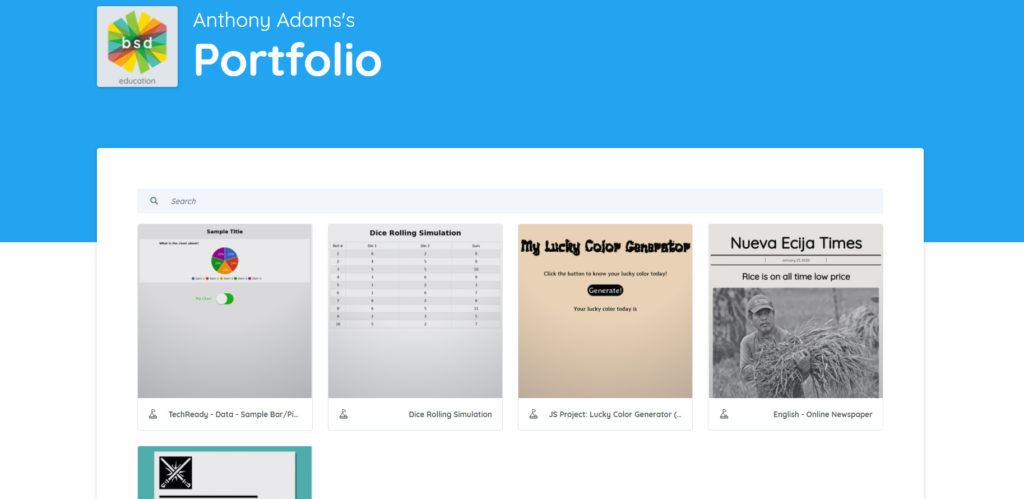
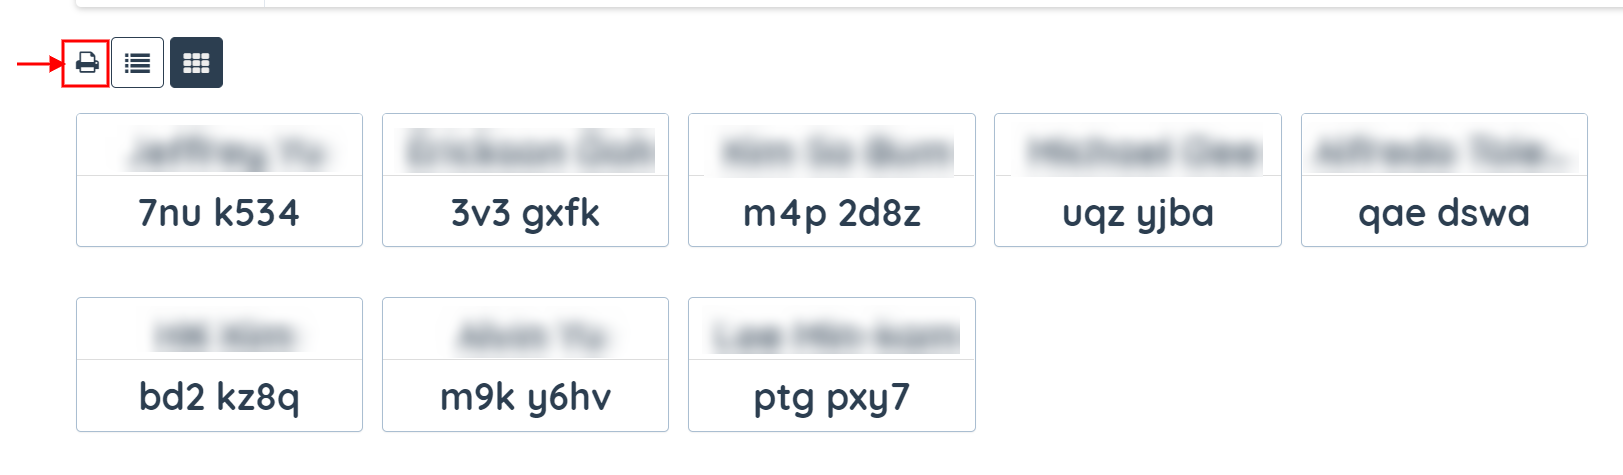
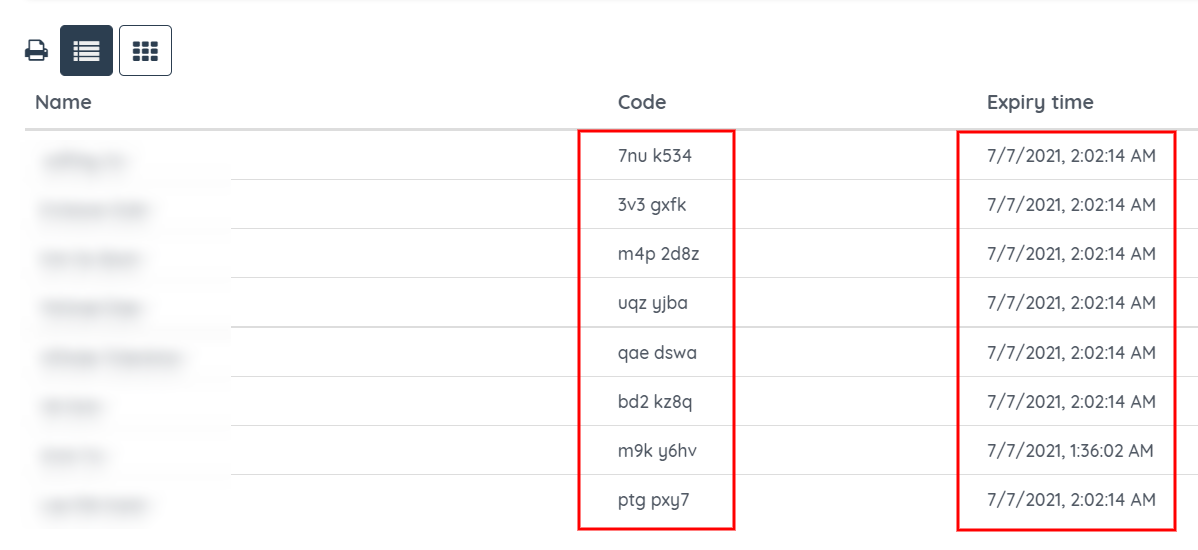
People who view your portfolio can also see the codes you used by clicking on the sandbox they want to view.

If you have questions or concerns, let’s talk! Feel free to send an email to support@bsd.education or “start a conversation” through chat support!

Creating Videos Steps on BSD ONLINE

The use of video to deliver content to students online has become increasingly popular. Video has proven to be a highly effective educational format especially for students who learn more with graphics or visuals rather than texts, in addition, videos are more appealing than the written format. Want to include learning materials in a video format? Be it from YouTube, Vimeo or other online video hosting sites, or even a video you created yourself while performing your lecture and others. Videos in addition to your existing teaching materials can definitely make learning more effective.

To create a video step:

  1. First, go to the classroom you want to add your video step.


    image
  2. Once you are inside your classroom, click on the plus icon “+” if you have an empty classroom.


    image

Or toggle the “Teaching” slider to “Editing” mode to unlock the classroom content, if you already have contents and materials added previously.


image

  1. After clicking on the add content button, a sliding menu should appear on the right side of your classroom. Select “Custom” then Video step.


    image
  2. This pop-up box will appear. This is where you input your video’s title, description and the URL or the link of the video where it is sourced.


    image
  3. Once you have all the information fulfilled, here’s a sample of what it looks like. You can now click on the “Create” button to save your Video step.


  4. Don’t forget to to re-lock your classroom content to avoid accidental and unwanted changes.

And you now have your video step ready for students to watch and learn! If you have questions or concerns, let’s talk! Feel free to reach out to us through support@bsd.education or “start a conversation” in chat support!

Enhancing Communication: The Classroom Chat Feature for Students and Teachers

Communication makes learning easier and efficient, it helps students achieve their goals, strengthens the connection between students and teachers, and creates an overall positive experience. However, in this incredibly challenging year where in-classroom teaching and learning may not be possible and virtual or blended learning becomes the best alternative, we want to make sure that communication will be maintained and easy for both teachers and students. We introduce the BSD student/teacher classroom chat!

This new feature enables teachers to communicate with their students inside the classroom, eliminating the need for a third-party communication channel in the process. This new feature will only allow teacher to student and student to teacher communication. Here’s a how it works:

The Chat box

The chat box is located on the bottom right side of the screen. It will always be available wherever you are on the platform for ease of access anytime a student sends in a message. Click this box to see all classrooms.

image

Classroom chat

All classrooms that you created or a part of will be listed here, including classrooms from other organizations if you have any other affiliations.

Classroom Announcements

This feature works as a group message to send a general message or class announcement once inside a classroom chat. All students inside the classroom will receive the message but if ever students responded, only the teacher will receive it as a personal message.

Example:

All 5 students will receive the same message from the teacher.

Students will receive this message. Classroom announcement logo will show up to indicate that the message was meant for the whole class.

When a student responds to a Classroom announcement, the teacher will receive it like a personal message.

Aside from communication, a student can also send an Ask for help through chat! This will enable the students to send in the exact step of a project that they have questions with. Whenever a student is on a project, they will have an option to click the Ask for help button and it will send a notification to the teacher through chat.

We hope you find this new feature helpful and we are excited for you to experience using this chat feature in your next class! If you have any questions or feedback about this new feature, please feel free to send in a message through our support channels support@bsd.education and chat!

How to Share Your Work on BSD Online?

Every piece of work or output created in BSD Online is not only saved in the student portfolio but may also be shared with anybody online.

When you’ve finished your guided project or customized sandbox and want to share it with others, click on the â€śShare output” icon.

1. Sharing a project:

A popup will appear when you click on the â€śShare output”; click on the slider to activate sharing.

step0.2

The button will turn blue, and you will be given two options for sharing the project: â€śSHARE LINK” or â€śQR” code.

Clicking the link will immediately direct you to the shared output. Hovering over the link will reveal the copy link button, which you can use to share it with others or post to social media.

Scanning the QR code with your smartphone or tablet will display the project on your device.

step2

2. Sharing your sandbox

If there are just 2 options for sharing a project, there is a third way for sharing your sandbox: sharing it to your Google Classroom.

To understand more about Sharing a BSD Sandbox to a Google Classroom 5 click the link.

This way, we encourage students to put their personal taste into their work because they will be able to share it with others.

If you have any questions or feedback, please feel free to send in a message through our intercom chat or email us at support@bsd.education.

Teacher Tips: Quick Login

For easier login, your students can use their Quick Login (QL) codes instead of using their email and password. This method is only available for students and please note that login codes expire after seven days.

Here’s how you can generate QL codes for students in your classroom:

  1. Go to your classroom.screenshot-app-staging.bsd.education-2021.06.30-01_41_03
  2. View the class list and click the Quick Login code link. A new page will open displaying the QL Codes of all the students in the classroom.ezgif.com-gif-maker (5)
    On the next page, you will see the date and time of QL code expiry.
    screenshot-app-staging.bsd.education-2021.06.30-02_06_10
    You can toggle the grid view by clicking the highlighted icon on the image below.screenshot-app-staging.bsd.education-2021.06.30-02_10_29If you want to print the list, click the Print icon.
    screenshot-app-staging.bsd.education-2021.06.30-02_12_44

You can also view QL codes individually by following the step below. For this example, we will take a look at Alvin Yu’s QL code:

  1. Open the student list from the right panel and view the student’s profile by clicking his picture.
  2. Click the Generate button at the upper-right corner of the dialog box.
  3. The student’s QL code will then appear.

See the animation below to see how it is done:

ezgif.com-gif-maker (6)

Please note that clicking the copy button will copy the quick login link. The QL link looks like this:

screenshot-docs.google.com-2021.06.30-20_32_46

Once you copied the QL link, you can send it directly to the student. If a student copies and pastes this to the URL, he or she will be redirected to your classroom.

If you want to just send the QL code, just highlight and copy the code. The student can then use this code on the login panel as shown in the picture below:

screenshot-app-staging.bsd.education-2021.06.30-02_34_23

If you have futher question about QL codes, or help regarding BSD Online, please get in touch with us using Intercom.

How to search for content

There are 2 ways to search for content i.e. projects or sandbox templates. The first way is by using the search bar at the top when you are in your BSD Online account homepage.

image

When using the search bar, you can enter keywords or the subject of the project/sandbox template you are looking for.

image

You can also use the toggle project tag chooser to filter out the projects by subject relevance. This will help narrow down your search to the specific content you are looking for.

image

Please note that projects and sandbox templates have different icons:

Project icon

Sandbox template icon

Another way of searching content is by browsing the “Your library” section that can be found on the left-hand side of your BSD Online homepage. This houses all the available courses in your organization.

image

You can also get back to your projects that are still in progress by clicking on Your work. This also lists down all the projects you have completed.

image

Access the sandboxes you want to customize by choosing “Your portfolio”,

image

If you have questions or concerns, let’s talk! Feel free to send an email to support@bsd.education or “start a conversation” through chat support!

How to Add PDF in a classroom

Have you ever thought of customizing your BSD classroom by adding a PDF of your choice? Here at BSD Education, we help support the creativity of the teacher and to make them feel that they have a personal touch to their own online classroom. Introducing the addition of PDF custom to your classroom. Simply follow the steps after logging into BSD online:

Step 1: Click the lock icon to unlock the classroom content.

screenshot-app-staging.bsd.education-2022.03.18-15_45_20

Step 2: Now that the classroom is unlocked, click the â€ś+” icon to add the additional content.

screenshot-app-staging.bsd.education-2022.03.18-16_08_25

Step 3: A sliding menu will appear on the right side of the screen. At the extreme right of the menu, the Custom tab is located, click to view the available custom add-ons.

screenshot-app-staging.bsd.education-2022.03.18-16_12_31

Step 4: Click on Resource to upload a PDF from your computer.

image

4a: Hit the upload button.

screenshot-app-staging.bsd.education-2022.03.18-16_29_41

Step 5: Finally, the PDF is added to your classroom. Don’t forget to lock the classroom content to avoid any accidental changes.

Note: Custom PDFs can be added in a classroom as stand-alone content. This means that you can add a Custom PDF even if your classroom does not contain any BSD course or project.

screenshot-app-staging.bsd.education-2022.03.18-16_32_04

The added PDF is visible to both teachers and students. Thus, if a teacher wishes to move it to â€śteacher-only” view, here are the steps to follow:

Step 1: Make sure the lock icon is set to unlock.

Step 2: Hover over the PDF and you will see the three vertical dots next to the resources icon. Click that to see the options – Move to teacher-only and Remove.

screenshot-app-staging.bsd.education-2022.03.18-17_31_19 (2)

2a: Move to teacher-only – this allows the teacher to make a PDF visible only to teachers. After clicking the â€śMove to teacher-only” button, notice that the resources icon was removed.

Teacher-only view

screenshot-app-staging.bsd.education-2022.03.18-17_47_32

Student and teacher view

screenshot-app-staging.bsd.education-2022.03.18-18_30_55 (1)

2b: To remove – click the â€śRemove” option and confirm the action.

image

If you have further questions regarding this feature, don’t hesitate to reach us through chat!

Navigating Backwards: A Guide to Returning to a Previous Step

If you want to go back to a previous step in your project, you can use the time machine feature of BSD Online. You can use this feature to change something you have entered from the previous step. Just note that this feature is completely different from resetting a step of a project and restarting a project. Resetting a step of a project will just reset the current step. Restarting a project means that you will start the project back to the first step.

For this post, I will show you how you can go back to a specific step in your project. So if you want to do otherwise, please have a look at the following posts:

In this post, we will go back to Step 2 of a student’s project which is currently at Step 8.

  1. Go to BSD Online and log in to your account.
  2. Go to your classroom and open the project. In this example, notice that the student is now in Step 8 of the guided project.
  3. You can use the back arrow button to navigate through previous steps until you reach the desired step.

The other way to do this is to use the time machine feature. To access it, click the project title to display the list of steps and select the step you wish to go to. The view will refresh and you will then be taken to the step you have selected. See the sample video below:

How to go to a previous step

If you have further questions about this feature, please feel free to reach us through chat.

How to Change Your Student Password

If for whatever reason, a student cannot sign in with their quick login code and you cannot find their generated password, you can try manually changing their password.

Here are the steps that you can follow:

  1. Go to the classroom where you added the student and open the student list.
  2. From the list, find and click the student’s avatar or picture from the list to bring up the student’s profile dialog. (If the student has not changed their avatar yet, then it will be the first letter of their email address by default.)
  3. In the Profile tab, click the Change password button and enter a new password and confirm by clicking the Change password button once more.

Advise the student to change his or her password upon logging in and to make sure to store their new password securely or if they want, they can use a password manager application.

Here’s a demo that you can see how it is done:

Notes:

  1. If a student you want to change the password of does not belong to any of your classrooms, please contact your school’s BSD coordinator or you can also reach BSD Support through chat or email.
  2. Changing the password on BSD Online does not affect the user’s Google or Microsoft account password. If the student usually uses Google or Microsoft single sign-on method to log in, ask the student to follow the password reset procedures for Google or Microsoft account. In the meantime, you can set a BSD Online password for the student or give them a Quick Login (QL) code to get them logged in easily. To know more about QL Codes, please refer to this post: Teacher Tips: Quick Login 1

Creating Info Steps on BSD Online

Want to personalize or add your own content in your BSD Online classroom? It is possible, as we have the “Info step” which allows you to post a platform or content link and image right inside your own classroom. The Info step is a standalone content that can be added with or without a project or course content in a classroom. Here’s a step by step guide on how-to:

Step 1: Go to â€śManage classrooms”

Step 2: Click â€śYour classrooms” and go to the classroom you want to add the â€śInfo step”.

image

Step 3: Click the â€śTeaching” mode to toggle from Teaching to Editing mode

screenshot-app-staging.bsd.education-2022.02.10-23_11_51

Step 4: Click the â€ś+” icon to see the list of contents available to the classroom.

screenshot-app-staging.bsd.education-2022.02.10-23_35_52

Step 5: Click the â€śCustom” tab and select â€śInfo step”.

screenshot-app-staging.bsd.education-2022.02.10-23_54_02

Step 6: Rename the â€śInfo step” and then click â€śCreate” to confirm.

image

6a: Here is a gif to show you what you can put in an Info step.

6b: The Info step will go directly at the bottom of the course list.

screenshot-app-staging.bsd.education-2022.02.11-00_00_17

6c: Adding the info step inside the specific lesson is possible. First, click the lesson where an info step wishes to be added. Then click the + icon right next to the lesson title and select the info step from the custom tab.

Note: There are two resource sections per lesson – teacher’s resource section (section with a light blue background where the teacher resources are placed) and student’s resource section (section with a dark blue background where the activities are placed). The info step can only be added to the student’s view section. However, for the teacher’s resources section, only custom “Resource” is available to use.

Student’s view section

screenshot-app-staging.bsd.education-2022.02.11-00_15_33

Teacher’s view section

screenshot-app-staging.bsd.education-2022.02.11-00_21_28

Step 7: To resequence, drag the info step to the place you want it to be. To delete and edit, hover over the Info step to see the three vertical dots.

screenshot-app-staging.bsd.education-2022.02.11-01_16_16

Step 8: Toggle to switch the mode from “Editing” to “Teaching” mode.

screenshot-app-staging.bsd.education-2022.02.11-01_19_15

There you go, you have now learned how to add your own step into your classroom and customize it. Keep posted here in the BSD community to learn more about BSD Online features and how you can use them in your classroom.