Check out our
BSD Online User Manual

Welcome!

Whether you’re just starting out or have been building something different with us for awhile, we created this page to help answer your questions. 

BSD Education provides content, software, training, and support that enables educators to teach students digital skills. Through our platform, BSD Online, you have direct access to courses, the coding environment, classroom management tools, and our chat support. Learn more about your journey with BSD in our Teacher Welcome Pack.


Get Support

On BSD Online, click the chat icon  to connect with BSD Support. We welcome all questions, suggestions, and feedback.

Support can also be reached at support@bsd.education


Explore BSD Online with the guides below

QuickStart Guide

Welcome to the Quickstart Guide! This resource is designed to get you up and running in no time. You’ll find step-by-step instructions and essential tips to help you navigate our platform with ease. Let’s jump right in and make the most of your experience!

BSD’s platform and curriculum is designed with all learners in mind and have been successfully implemented in special needs classrooms. The platform is also equipped with immersive reader for students with learning disabilities.

https://www.youtube.com/watch?v=y9QsKIayNiQ


https://www.youtube.com/watch?v=AIP0IzToqUs


Step 1: Go to “Manage classrooms” and click “new classroom”.

INSERT IMAGE

Step 2: Name your classroom

Step 3: Click the “+ add content” button to add courses, projects, and other contents to your classroom.

INSERT IMAGE

Step 4: Click the content category you want and search for the specific content under that category.

INSERT IMAGE

4a: Select the content you want to add i.e. a course.

INSERT IMAGE

4b. Hover over the course and it will give you two options – “preview” and “add”.

INSERT IMAGE

4c: When you click “preview” you will see the full list of lessons and all the activities included in the course. To add the content, click “add course”.

INSERT IMAGE

Step 5: To add students, click the bar with “students” text located on the right-hand side of the screen.

INSERT IMAGE

5a: Click the “add students”, search for a student’s name then click “add”.

INSERT IMAGE

5b. From the user list, you will be able to see who has a teacher account. The role of a teacher will display right beside their name.

INSERT IMAGE

Once you have successfully added all your students, you can sort them based on your preference. The sorting function has 3 options, First name, Last name and Errors. The sample below is sorted based on their first names.

INSERT IMAGE

And this is how the student list will look like after sorting by the last name:

INSERT IMAGE

NOTE: A BSD Online classroom has a limit of 900 students and 10 teachers. If a classroom exceeds 100 students then real-time student progress reporting is disabled.

Now that you have a classroom, prepare to meet your students and teach. Keep posted for more updates here in BSD Community that will surely be helpful for you and for your students.

For more assistance, please send us a message through our chat support. To have an efficient reporting/messaging using the chat support, please read When to use “New Conversation” and “Report

Adding new students to BSD Online is their first step to unlocking new knowledge in technology.

Here’s how:

  1. Log in to your BSD Online account and navigate to Your classroom and select the classroom where you will add the student.

    INSERT IMAGE
  2. Click to toggle the student list.

    INSERT IMAGE
  1. Click the + add student button to see the Register a new student button as shown in the animation below:

    INSERT IMAGE
  1. Fill out the form that pops up. (Note: Email or username and Name are required fields before you can click the Register a new student button.)

    INSERT IMAGE

Notes:

  • You can use an email or a username for a student’s
  • For students that use Google and Microsoft accounts can log in using the single sign-on methods. Click here 4 to know more.
  • In case of the student you registered forgets the password for his or her account or there is no password created for the account, he or she can still log in using the Quick Login (QL) code. Here’s a post about QL Codes: Teacher Tips: Quick Login 1

If you have questions or concerns, let’s talk! Feel free to start a conversation in Intercom!

Preparation is the key to a smooth and productive classroom. Before you jump into your class and teach you should at least review your lesson. BSD gives you guidance by providing Teacher Prep Guides for each course pack or lesson.

There are two ways to check the TechConnected prep guide – inside a classroom or directly via the project card outside the classroom.

Inside the classroom

You can see the prep guide before the guided project.

INSERT IMAGE

When you open the prep guide you can see these options.

INSERT IMAGE

Outside the classroom

Watch this video for an easy guide on how to find a teacher’s prep guide outside the classroom.

INSERT IMAGE

Now that you know where to find the prep guide, you can start studying the project before teaching your students. This way, you will be able to manage your classroom discussion well and answer your students’ queries in regards to the project. In case you need further assistance you can reach out to the BSD support team by sending a message through chat or by emailing support@bsd.education.

Teachers can add projects to their classrooms anytime they want. Below are the steps on how:

Once you logged in, click “Your classrooms”. Under your “Teaching” classrooms, select the classroom you want to add project/s.

INSERT IMAGE

Currently, you are in teaching mode. Switch to editing mode to edit the classroom contents.

INSERT IMAGE

After that, you will see that you are in editing mode. You will now see the “add content +” icon, click on it.

INSERT IMAGE

Click the lesson where you want to add the project.

INSERT IMAGE

For example, if you click on Lesson 2, you will see the “+” icon, click on it.

INSERT IMAGE

Then a box will show and give you two options: “Projects” and “Custom”. Click on “Projects” then it will show the different projects available in the organization. Scroll or search to find the project you want to add. Hover your mouse over the project you want to add and click the “+ Add” button to confirm.

INSERT IMAGE

Note: Please ensure to add the project in this section for student visibility.

You can now see the project you added to your classroom.

INSERT IMAGE

If you have any questions and other concerns, feel free to reach out to us through chat or send an email to support@bsd.education.


Can students access their account from home?

Yes, students simply need an Internet browser (we recommend Google Chrome) and an internet connection to access their work at home (or anywhere else!). This way, you can assign your students Projects for homework and be rest assured that they can complete it at home.

Here are the ways users can log in to BSD Online.

Using Google single sign on:

This method is designed only for Google email addresses or accounts. In this method, you will use your Google account to log in. Follow the steps below to do so:

  1. Go to BSD Online 73. You can enter “app.bsd.education” to your browser’s URL or click the following link: https://app.bsd.education/ 73

INSERT IMAGE
You will see the login panel on the homepage.

INSERT IMAGE

  1. login panel459×648 28.3 KB
  2. Click on Google

INSERT IMAGE

  1. Type your Google username and click the Next

INSERT IMAGE

  1. Enter your account password then click the Next

INSERT IMAGE

Microsoft button single sign-on

Like Google single sign-on, you can use Microsoft single sign-on method to log in to BSD Online. To do this, follow the following steps:

  1. Go to BSD Online.
    INSERT IMAGE
  2. On the homepage, you will see the login panel. Click the Microsoft button .
    INSERT IMAGE
  1. Enter your Microsoft email address and click the Next button.

INSERT IMAGE

  1. Enter your account password then click the Next button.
    INSERT IMAGE

Using email and password:

If your email address is not Google nor a Microsoft account. You can use this method.

  1. Just like in the first and second methods, go to BSD Online. button.

INSERT IMAGE

  1. Enter your email and password then click the Log in button. If your school provided a username and not an email address. You can use it instead.

INSERT IMAGE

Once logged in, you will be able to see the homepage.

If you have further questions about logging in to BSD Online, don’t hesitate to contact us using chat.

BSD Online has added a new tool to support teachers in bringing their own teaching resources right inside their classrooms. Customizing the classroom the way they wanted with this new custom content called “Lesson”. Here’s a guide on how you can use this tool:

Step 1: Unlock the classroom content.

INSERT IMAGE

Step 2: Click the “+” icon and go to the Custom tab and select “Lesson”. The number that is on the “Lesson” pertains to what number this new lesson will take into the course if it will be added.

Example: A TechReady classroom has 20 lesson folders in its course content and a Techconnected classroom doesn’t have a lesson folder in its course content.

Sample of a TechReady classroom

INSERT IMAGE

Sample of a TechConnected classroom

INSERT IMAGE

For this example, since it is a TechConnected course and no lesson incorporated, the lesson folder to be added will count as 1st.

Once the new Lesson folder has been added, it will go at the bottom of the classroom content list.

INSERT IMAGE

Re-ordering the lesson folder is possible by dragging it within the content list. Here’s a gif to show how:

INSERT IMAGE

Like the usual lesson folder, this added lesson also consists of 2 sections for student resources/activity section which is both visible to students and teachers or teacher resources section which is only visible to teachers.

INSERT IMAGE

This section is visible to the students. You may put resources here that students can access.

INSERT IMAGE

While in this section all the resources are visible only to the teacher.

INSERT IMAGE

To add resources inside the folder, click the + icon. Resources for the student’s resources section are the following:

Projects available on the organization

INSERT IMAGE

Custom contents for student resources section

INSERT IMAGE

While for the teacher resources section is the resource or PDF file.

INSERT IMAGE

Please feel free to ask questions to our support team via chat or email at support@bsd.education.

When a classroom has been created, you can add TechReady units/courses and customize your classroom’s content. Follow these easy steps on how to do it:

First, log in to BSD online and follow the steps below:

Step 1: Click “Your classrooms”

Step 2: Click the classroom you want to edit

INSERT IMAGE

Step 3: Toggle the “Teaching” slider to “Editing” mode to unlock the content of the courses.

Step 4: Click the “add content” button to show the add-ons like courses, projects, sandboxes or steps.

INSERT IMAGE


A sliding window will appear on the right side and will give you a selection list including TechReady courses/units available for you to choose from!

INSERT IMAGE

INSERT IMAGE

When you hover on the course you want to add, you have an option to either get a preview of the summary of the whole 20-hour lesson plans and projects, or you can also add this direct to the classroom.


INSERT IMAGE

INSERT IMAGE


After you finished reviewing the course’s content, click on the “add course” button at the top right to add it to your classroom. The course’s contents are always customizable and can be arranged depending on your class’ schedule.

Step 5: After all desired changes have been placed, don’t forget to lock the courses to avoid unnecessary and unwanted changes in the classroom.

Here’s a short video tutorial of how to add contents to a classroom:

https://www.youtube.com/watch?v=AIP0IzToqUs

Whether actual or online teaching, teachers want to see or know what their students are doing in their class. They want every student to learn from each lesson or project they are assigned to.

The BSD Online classroom, not just where you can add curriculums, projects, and students. But it also allows teachers to monitor what their students are doing in real-time.

Various icons can be found on the student dashboard. You’ll be able to check whose in class or who isn’t. Below, we’ll explain what these icons imply.

  1. Active students will be represented with a green dot, students who are logged in but inactive will be yellow, and non-logged in students will appear gray.

INSERT IMAGE

  1. PDF icon – the student has access to the PDF content of your classroom.

INSERT IMAGE

  1. PDF icon + trees – the student accessed a PDF content of the classroom and is outside of the classroom.

INSERT IMAGE

  1. On sandbox mode – the student is currently working on a specific sandbox template.
    For example, Virtual Pet Complete

INSERT IMAGE

  1. On a guided project – the student is currently working on a guided project in a specific step
    For example, Eye Chart step 1 out of 12 steps.

INSERT IMAGE

  1. Your portfolio – the student is currently on Your portfolio page under Your Dashboard.

INSERT IMAGE

  1. Your classrooms – the student is currently on Your classrooms page under Your Dashboard.

  2. INSERT IMAGE

Another way to check your students’ progress is by clicking on the profile of the student.

INSERT IMAGE

Then this will appear.

INSERT IMAGE

Click on the Progress tab. You can see on the Overview the student’s classrooms and percentage of project completion, the projects and sandboxes created outside the classroom (Free time), and all the classroom contents. And by clicking the Open portfolio, you will see your student’s customized sandboxes.

If you have more questions and other concerns, feel free to reach out to us through chat or send an email to support@bsd.education.

At some point, all of us write some code that breaks or doesn’t work. When you run into an error, you may feel that you don’t know what to do. Don’t worry, this post will help improve your debugging skills.

Debugging is the process of identifying and removing errors in order to make your code run as expected. It is a challenging but fun task that encourages problem-solving, attention to detail, and working in a sequence. It requires practice. Let’s take a look at the debugging tools you can use to fix code errors.

  1. Color coding – On BSD online, every code is color-coded. These colors can help you spot errors easily. Take a look at the examples below:

Missing Quotation marks after the word name. This causes the rest of the code to have the wrong colors.

The color theme in Default mode:

INSERT IMAGE

It should be like this:

INSERT IMAGE

  1. The use of the tidy code button – this is located at the bottom left corner of your screen beside the bug button. Tidy code helps you to organize your code. But in order for you to use it, the code must be unlocked.

INSERT IMAGE

Here is a gif to guide you

INSERT IMAGE

  1. Pairing tag – Most HTML tags require a pair: an opening and a closing tag. Remember that the closing tag has a forward slash (/) which indicates the closing tag. (Note: <img> tag is an example of an exception – it does not require a closing as it is a self-closing tag). Click on the opening or closing tag to see a highlight on its respective pair:

INSERT IMAGE

  1. JavaScript error message over the run code.

When JavaScript code is incorrect, you will not see the intended output.

INSERT IMAGE

Note: You may not also see the intended output when something is missing in your HTML or CSS tags. Look at the image below:

(HTML: <div> closing tag is missing) Broken output

INSERT IMAGE

Intended output:

INSERT IMAGE

(CSS: Incorrect spelling) Broken output

INSERT IMAGE

Intended output:

INSERT IMAGE

  1. Using the debug button

Step 1: Identify the error.

As you click on the bug icon on the bottom left of your screen, which is known as the “Display Code Errors”, it will display errors in your code.

INSERT IMAGE

Step 2: Find the error

Check if there are any errors in HTML, CSS, and JS. In your script, having a red “X” sign (red circle) beside the line number means there is something wrong with your code that needs debugging. The image below shows an example of the errors displayed.

INSERT IMAGE

Step 3: Analyze the error

Hover over these signs to identify the error/s. Read the error message to understand which part of the code needs to be fixed.

INSERT IMAGE

Step 4: Try fixing the error

Step 5: Lastly, after debugging, run your code and see if you get the correct output that you want.

Step 6: For teachers:

If you are not able to resolve errors that you may encounter, you may reach out to our Support Specialists through chat support.

INSERT IMAGE

Want to learn more about common coding errors and how to recognize them? See this document: Recognizing Common errors

Let’s first define what is a sandbox. A sandbox is an empty code file on BSD Online that you can use to create your very own digital artifacts like a website, game, mobile app, and more using coding languages like HTML, CSS, JavaScript, Python, etc.

To find a sandbox template, on your homepage, scroll down and click the “Create your own sandbox” tab at the very end of the tabs.

INSERT IMAGE

Then it will give you options, click on “Choose a sandbox template”.

INSERT IMAGE

After you click it, there will be a pop-up box, you will see all the sandbox templates your Organization has access to. Here is an image of how your sandbox template library could look like:

INSERT IMAGE

The first sandbox is a blank sandbox.

INSERT IMAGE

Below is an example of a blank sandbox template. With this, you can create a new sandbox of your own or practice coding.

Empty HTML:

INSERT IMAGE

Empty CSS:

INSERT IMAGE

INSERT IMAGE

On the other hand, the rest of the sandbox templates contain pre-written code and have locked lines for scaffolding. They can be used for customizing a project or for practicing some code. See the images below for reference.

HTML with code: The arrow is showing the editable part.

(Note: In sandboxes, once you unlock code you can only re-lock HTML)

INSERT IMAGE

CSS with code:

INSERT IMAGE

JS with code:

INSERT IMAGE

Sandboxes and sandbox templates are a great opportunity for students to practice coding or unleash their creativity and build something different. If you are looking for a specific sandbox template, please reach out to your school’s BSD representative.

Teacher Center

This is your go-to space for resources, support, and inspiration. Whether you’re looking for lesson plans, teaching strategies, or ways to engage your students, we’ve got you covered.

“I would like for my students to create a full (multi-page) website from the HTML/CSS/JavaScript sandbox (or another blank sandbox), but I can’t figure out how to create new pages in that sandbox. I could have them use the multi-page website sandbox, but so much is already done for them in that template. Any suggestions?”

Thanks for reaching out! I understand that you want to make the sandbox a little more challenging for the students. What I can suggest is that once you saved the sandbox template, make edits (i.e remove some codes that you want your students to create themselves) to it. You can also add comments to the sections you want your student to modify or develop. You can share the sandbox link to your students and have them “make a copy” of it so the sandbox template will be saved onto their accounts for them to further customize and create their full websites.

I hope all is well! You can certainly achieve a multi-page website in BSD Online’s sandbox! The trick is for students to link multiple sandboxes together. Effectively, each page of the website (home, about, contact, etc.) will be a separate HTML/CSS/JavaScript sandbox.

When students create the links in HTML, they’ll want to use the sandboxes’ share links, as opposed to the edit links. Please see this linked guide on generating sandbox share links 4.

I created this simple example sandbox 10 for reference. Feel free to share with your students.

Looking forward to seeing what they build!


Are you wondering when is the right time for your child to start learning code? It’s a question that’s on the minds of parents, teachers, and students everywhere. Well, let me tell you – there’s no need to wait for a specific age or grade level. In fact, students can start learning code as soon as they can read!

Here at BSD Education we’re all about making code accessible and easy to understand. We believe that anyone, regardless of their unique interests, can learn code and apply it in ways that enhance their academic and extracurricular pursuits.

Think about it – learning to code is like learning a new language. And just like with any language, the earlier you start, the easier it is to pick up. Plus, coding is a skill that can be applied to so many different areas – from creating websites and apps to analyzing data and solving complex problems. It’s like having a superpower that can open up a world of opportunities.

So, whether students are into art, music, science, or anything in between, learning to code can complement their passions and take their skills to the next level. Imagine creating interactive art installations, composing music with computer algorithms, or conducting scientific research using data analysis – the possibilities are endless!

But it’s not just about the practical applications. Learning to code also teaches valuable skills like problem-solving, critical thinking, and creativity. It’s like a mental workout that strengthens the brain and prepares students for success in any field they choose to pursue.

Now, I know what you might be thinking – “But I don’t know anything about coding! How can I help my child learn?” Well, fear not! There are plenty of resources available to help both you and your child dive into the world of coding. From online tutorials and coding games to local coding clubs and camps, there are endless opportunities to explore and learn.

And let’s not forget the power of trial and error. Coding is all about experimenting, making mistakes, and figuring out how to fix them. It’s a process of discovery and growth that encourages resilience and perseverance – valuable life lessons that extend far beyond the computer screen.

So, whether your child is just starting to read or well on their way to becoming a bookworm, there’s no better time than now to introduce them to the exciting world of coding. Who knows, they might just discover a passion that shapes their future in ways they never imagined. And hey, you might even learn a thing or two along the way!

So go ahead, embrace the digital age, and let’s code our way to a brighter future – one line at a time.

Whether you’re working on a project or just experimenting with pixel art, our platform ensures your work is saved securely and accessible anytime. Let’s walk through the simple steps to save your Piskel images on BSD Online, making sure your creations are always just a few clicks away.

image

Step 1: Click the “Export” button on the right side of the screen. This will cause the Export menu to slide out, allowing you to choose further options.

image

Step 2: Slide the “Scale” up to “20.0x”. The numbers in the “Resolution” boxes should be in the 400-700 range.

image

Step 3: If the image is a gif (moving), click the first “Download” button. The text next to the button will say “Download as an animated GIF.” This will prompt you to save the image to your computer.

image

Step 4: If the image is a PNG (not moving), click the PNG tab, then select the first “Download” button. The text next to the button will display information about the image, including its size (“px”). This will prompt you to save the image to your computer.

image

Note: You can control the speed of GIFs in Piskel. This is done using the “FPS” slider in the upper right corner of the website. Above it, the animation you are creating will display as a preview.

If you’re looking to integrate a Google Slides presentation into your BSD Online classroom, we have a convenient solution for you. Our platform now includes a feature that allows you to seamlessly add custom links to your classroom materials. This means you can easily share your Google Slides presentations with your students. Let me guide you through the process step by step.

Step 1: Under “Your classrooms”, select and click the classroom you preferred to add a custom link step.
Step 2: Inside the classroom, click the + icon. On the resources, the section is custom steps – links and resources or PDF files. Click the “link
Step 3: After clicking the “link”, you will then ask to add the text or title to be shown in the link.
Step 4: On this step, you will now add the URL link of your google slides. Please make sure to share it with anyone on the internet with the link so your students can be able to view your slides.

Here is a short video to guide you.

Adding Google Slides to your classroom

And if you have further questions, feel free to message us through our support team via chat or email at support@bsd.education.

Yes, students simply need an Internet browser (we recommend Google Chrome) and an internet connection to access their work at home (or anywhere else!). This way, you can assign your students Projects for homework and be rest assured that they can complete it at home.

To convert your website project into a mobile application (iOS or Android), we are going to use the website, GoNative.io 18.

These are the steps you can follow:

  1. Open your browser and logon to GoNative.io.

INSERT IMAGE

  1. Enter the URL of your web app and click on “Build”.

INSERT IMAGE

  1. Fill in the details of your app and click ”Build my app!”

INSERT IMAGE


You will see the following screen after a successful build:

INSERT IMAGE


After this, you will need to wait for GoNative’s email.

  1. Check your email. In the email that you will receive from GoNative, click the Private management URL.

INSERT IMAGE

Clicking on the above-mentioned link will direct to the following website:
From there, you will do two things if you want to run your app using an iOS and Android devices.

INSERT IMAGE

For Android:

Click on Download APK.

INSERT IMAGE


You have to download and transfer this file (APK) to the Android device where you want to install your app. You will need to allow the installation of this app before you can proceed. Once done, open the app from your app drawer.

For iOS:

To use your app in an iOS device, you would need to have an Apple Developer Account. You will also need to download Xcode before you can deploy your app. Xcode only runs on macOS devices.

  1. Sign up or Login to your Apple Developer Account.

INSERT IMAGE

  1. Download Xcode.

INSERT IMAGE

Click the following link to download Xcode: Download Xcode

  1. Download iOS Source Code.

INSERT IMAGE

  1. Open the code using Xcode.

INSERT IMAGE

  1. Make final changes.


INSERT IMAGE

  1. Choose a device and deploy your app.

INSERT IMAGE

“I am a Google Classroom user. I deliver and manage instruction with Google Classroom. My school district is saying that I must use BSD for online learning. Other than coding what does BSD do? I am not interested in giving my students coding assignments when they really need to be reviewing for their AP exams.”

Can I upload videos? How can I make BSD more meaningful for my students without using the canned coding projects?

Hi Lena, welcome to the BSD Community! Thank you for reaching out!

With the rise of distance learning around the globe, we’re working with many non-coding teachers who are adopting BSD Online tools alongside LMS platforms like Google Classrooms. I’ve included 3 of the most common use-cases below:

  1. Custom, sequenced presentation of classroom materials
    One nice feature of BSD Online’s classroom dashboard is that it allows teachers to present their existing material as a cohesive experience. By uploading your own content to a classroom 5 on BSD Online, students can transition seamlessly from one resource to the next. As opposed to with a shared folder of documents, you have control over the sequence in which your students access the information.
  2. Tracking student activity and progress
    Once your material is hosted on BSD Online, you will be able to track exactly where your students are in real time. The image below shows 3 sample students:

INSERT IMAGE

  • The green, yellow, and gray dots next to the student avatar correspond with active, inactive and signed out respectively.
  • Each progress bar shows the students’ current positions in real time. Han is not in the classroom, Alicia is on page 1 of a custom PDF, and Clark has finished an assignment.
  1. Linking to external software
    Finally, many teachers use BSD Online a centralized hub for linking to various online resources. Feel free to check out this support video 8 for a detailed walkthrough of this process as well as a template classroom portal that you can use.

“Hi to be honest i don’t have any clue what is BSD all about can someone briefly inform me what is the major function of this community “


Hi Mjsalman,

Thank you for reaching out! BSD Community contains articles that will assist you in getting started with BSD Online. For example, How Can Users Login to BSD Online, Creating Classrooms, Adding Contents & Adding Students, and many other articles that may be useful to you while exploring BSD. If you have any issues or concerns that you can’t find answers to on BSD Community, please contact us at support@bsd.education or send us a message through our chat support.

-Grace

Minecraft is a versatile, yet sometimes challenging game to teach with. In the event that there are times in your lesson plan that you need to diverge from the planned activity, we have a number of alternate games and activities that you can use to supplement your schedule. Please share any ideas or activities that you have found useful in the thread below!

Linked is a document filled with activities you can run mostly regardless of server, internet, or device availability.

docs.google.com

“Java Script struggles… I have my students working in the sandbox with the Endless Runner game. They are following the Customization Tips document. When my students try and change the sprite, they keep getting a black box that drops down the screen and disappears. Not sure how to help them. What are they doing wrong? Please help.:”


Hi Cindi,

Thank you for reaching out! We apologize for the delayed response. Could you please share one of your student’s sandboxes so we can go through it and see the output on their end? By the way, you could reach out through our support email at support@bsd.education.

-Grace

“How do i check the progress on a project for every kid? there is a progress bar but it stays at 0%”

Hi Yves, great question! The progress bar in classroom mode determines how much progress a student has made on a particular course. If there is no course attached to the classroom, student progress will remain at 0%.

Also, please keep in mind that progress is checked against guided projects and sprints only at this time.

To learn more about setting up courses for your class, please refer to this guide.

One of the most fulfilling moments teaching code with Launchbox came from teaching at a high functioning autism school. It was with a group of teenage boys in a two hour extra curricular class after school. Shortly into the lesson, I begin to teach game design with a game engine that works with Launchbox (Phaser.js), and almost immediately I noticed all the energy in the room being directed towards figuring out how to make this game we were creating together work. I had a couple students encouraging others to listen to me and eventually had the entire classes undivided attention without having to ask. It was amazing to see all the creativity, excitement, and knowledge spawned from Launchbox curriculum. Some of the quieter kids in the class began asking questions, brainstorming game mechanics, and even asking about other game making resources for outside of class. Can’t wait to see what other ideas come from this group of students!

“I recently had a student who completed the Eye Chart and Online Poster Projects, and for some reason it will not save her progress. Each time she logs back in and goes to continue the course, it takes her back to the beginning of the Eye Chart Project that she has already finished.”


Hi Sarah, thanks for reaching out. I’m sorry to hear about the trouble with your student’s progress. I will follow up with a direct message to gather some details about your specific situation. Once we resolve the issue, I will post back here for anyone else having a similar problem.

Hello Sarah,
Thanks for reporting this.
According to scenario she already completed project, but she reach at the beginning of the project. That’s why we think _

Did the student restart project? (Or) Did the student restore revision history?
May I know some details please?

Hello,

She did the project twice from what she told me, and when I sat with her to continue the course onto the next project it took her back to the beginning of the first project.

In the course, I have it set that the first project is the eye chart, then the PPT about CSS and HTML fundamentals, and then the Poster Project. As soon as she finished the Poster Project, rather than continuing onto the next project, it took her back to the Eye Chart.

Is there anything else I can try with her and get back to you with?

“On step 4 of the Single-Page website, my student has entered the correct answer, but is unable to move on. Attached is a screenshot of the student’s answer, which matches the model answer. One difference that I see is that the student’s answer isn’t in a white textbox as it normally would be. I’ve never had this happen before and I’m not sure what to tell him.”

Hi Margaret,

Thank you for reaching out! We’re sorry your student experienced this issue. Can you advise the student to reset the current step? Here’s a step-by-step instruction on how to do it: https://community.bsd.education/t/how-to-reset-the-current-step-of-my-project/449 9

Please let me know if this will be resolved. If not, we’ll try something else.

Thanks,
Bob

Daniel is the only kid I know who gets visibly excited at the idea of mathematics. When we introduced the Math Quiz project to the class, he was thrilled to build it. We had a fun time, and Daniel enjoyed the lesson.

However, he surprised me a few weeks later when he pulled up the Math Quiz sandbox again. Not only did it have a new coat of paint with snazzy fonts and images, he also implemented multiplication and subtraction problems to the quiz. There is nothing cooler than seeing a student use the knowledge you taught to create something on their own, and I can’t wait to see what else Daniel comes up with!

“hi… i just start to teach coding today, may i know where i can fine the lesson plan or teacher guide for the people who inspire me?”


Hi Eti,

Sorry for the late response. Regarding your question, the only lesson plan for the projects in the Code is Your Voice package can be found in the overview document, you may see the overview after adding the course to your classroom. You may watch this short video to guide you.

https://www.youtube.com/watch?v=IC91-sWod7o

Patterninja lets you easily create tiled patterns online by combining images from an integrated library of predefined graphics or by uploading your own. Click here 8 to view a guide on using colors in Patterninja.

function preload() {

scene = this;

// preload background image

scene.load.image(“bg”, “/resources/forest_BG.png”);

scene.load.image(“floor”, “/resources/forest_floor.png”);

scene.load.spritesheet(“dino_run”, “/resources/Dino_RunAnim.png”, { frameWidth: 442, frameHeight: 455 });

scene.load.spritesheet(“dino_fall”, “/resources/Dino_FallAnim.png”, { frameWidth: 632, frameHeight: 402 });

// preload rock image

scene.load.image(“rock”, “/resources/rock.png”);

scene.load.image(“restartButton”, “/resources/restart_btn.png”);

}

This is a great question! In this day and age, ensuring that your students build their learning journey through a portfolio is more important than ever. With each Guided Project and Sandbox students create on BSD Online, it is automatically stored inside “Your Portfolio”.

INSERT IMAGE

If your student leaves the school and/or completes their schooling, they will still have access to all the Sandboxes they have created and they are free to share this with friends, family, prospective schools, and employers. For this reason, make sure your students “Export to sandbox” and make it their own after they complete each Guided Project

INSERT IMAGE

So, in short, yes! Students will be able to keep their work forever

In this post, we will talk about the BSD Online database feature. It is a built-in feature that you can use to introduce databases to your students.

The following video will explain how you can use this feature.


https://www.youtube.com/watch?v=tVj-LIeDXQM&embeds_referring_euri=https%3A%2F%2Fcommunity.bsd.education%2F&source_ve_path=MzY4NDIsMjg2NjY&feature=emb_logo


In the next video, you will learn more about the database feature. We will create a sandbox using the methods that were discussed in the first video and learn more methods that you can use to build your own database application.


https://www.youtube.com/watch?v=73xL5xMWFOE&embeds_referring_euri=https%3A%2F%2Fcommunity.bsd.education%2F&source_ve_path=MzY4NDIsMjg2NjY&feature=emb_logo


I hope you are able to learn about the BSD Online database features by watching the videos!

If you want to practice or learn more about this feature, here are some resources and the sandboxes that you can use:

  1. Working with BSD Online Database Slides 14
  2. DEMO DB Sandbox 10
  3. Birth Date Record Sandbox 20

If you have further questions, please reach us through chat!


Workplace Settings

Your workspace is customizable and can be adjusted to your preference. To access the Settings, click on gear icon on the lower right hand side of the screen. See below:

INSERT IMAGE

INSERT IMAGE

This settings window is mainly for visual and performance preference changes. Let’s get into the items in detail.

1. Auto-refresh output panel

When the Auto-refresh output panel is enabled, the “Run code” button will automatically run and the changes will show on the output screen real-time. On the other hand, when it is disabled, you have to manually click on the “Run code” button to display the changes.

Run code button

2. Font size

This refers to the font size of the text in the Instructions and the Code box. Options are Small, Medium, Large and X-large. This is very helpful especially when presenting in front of your students using a projector.

3. Code folding

Code folding when enabled can make the code collapsible/expandable. This is another way of tidying and organizing your code.

annimation

4. Code indentation

This gives the code an indentation from the left. This will only take effect when you click on the “Tidy code” button. The images below show the difference between 1 and 6 indentation.

INSERT IMAGE

INSERT IMAGE

5. Color theme

You can choose between Light mode (default) and Dark mode to match your color theme preference.

INSERT IMAGE

INSERT IMAGE

  1. Platform language

You can toggle between languages that are set up for your organization(if available).

If you have questions or concerns, let’s talk! Feel free to send an email to support@bsd.education or “start a conversation” through chat support!


Coding Resources

Our collection of resources is here to help you at every step. Whether you’re a complete newbie or just want to level up your skills, we’ve got tutorials, tips, and fun projects waiting for you. Let’s get coding and unleash your creativity!

The console reads the JavaScript code, evaluates it and prints out the result of the expression. It can be used also as a debugging tool for the code in a program. We use the console.log() function to display information on the console.

Where can you find the new JavaScript console? Here is a step by step guide on how you can find and use the JavaScript console on BSD Online.

When you open a sandbox, by default you will see the output of what you have coded.

1536×706

Step 1: Click the “>_” button to switch to the console.

1536×706

Step 2: You should now see the console.

Step 3: There are two ways to clear information in the console.

3a) By clicking the “clear” button on the console.

3b) Type the function console.clear();

To learn more about JavaScript, here’s the cheat sheet 1 for you.

Whether you’re a budding developer, a curious learner, or an educator seeking to impart valuable skills, grasping the basics of how websites are built is a fundamental step. This brings us to the core of web development: HTML, CSS, and JavaScript. These three languages are the pillars that support every website you visit, each playing a unique and crucial role in bringing web pages to life. Let’s dive into what each of these languages does and why they are so important.

What are They?

HTML, CSS, & JavaScript are the three basic languages that make up a website.

To describe the function of each language, imagine a webpage as a house:

  • HTML is the structure of the house. It determines what content is on the webpage, and where they belong. In our analogy, HTML would decide things like how many bedrooms are in the house and how many tables and chairs go in the dining room.
  • CSS is how the house looks. It declares the contents’ size, shape, position, and more. If a webpage is a house, CSS would determine things like the size of the living room, what color the chairs are, and whether the dining room floor is carpet or hardwood.
  • JavaScript is how a house reacts to its owners’ actions. JavaScript handles the interactive elements of a webpage like buttons and forms and uses a set of rules to determine what happens next. JavaScript uses logic to tell the webpage how to respond to user interaction, similar to how a house determines which lights to turn on/off when a flip is switched.

Why HTML, CSS, & JavaScript?

But why did we choose HTML, CSS, and JavaScript for teaching code? The idea of learning just one programming language may seem hard enough, much less three all at once.

It seems daunting at first, but our decision to focus on web development solves many issues that other computer science curricula struggle with.

Accessible to Everyone

Many other languages require special compilers and environments before they can be run on a computer, whereas HTML, CSS, and JavaScript only require a web browser. This ease of execution makes BSD Online easily accessible to anybody with an internet connection, whether they are on a school computer or a personal device.

A Visual Approach

Languages like Java & C++ don’t possess simple means to create graphics. Since webpages are inherently visual, HTML and CSS are a quick and easy way to create eye-catching projects. For many students, the ability to visualize code is essential to understanding the concepts being taught.

Seamless Classroom Integration

As web development languages, HTML, CSS, & JS make Computer Science easy to integrate with other subjects; with just a few weeks of coding experience, students would be equipped to create web-based projects for any class, from Spanish to AP Biology. As a technological artifact, code has the potential to go beyond the confines of a computer science class; web languages offer a clear path towards the kind of ubiquity BSD Online seeks to achieve.

In conclusion, HTML, CSS, and JavaScript form the trifecta of web development languages that not only pave the way for creating dynamic and visually appealing websites but also ensure that learning these skills is accessible and integrated into broader educational goals. By focusing on these languages, BSD Online not only demystifies the process of web development but also opens up a world of possibilities for students and learners across disciplines. As we move forward in an increasingly digital world, the knowledge of HTML, CSS, and JavaScript becomes not just valuable but essential for anyone looking to understand or contribute to the vast expanse of the internet.

Debugging is the process of identifying the error or bug in a program. This is a vital tool to use that can save time in finding and correcting a bug or error in the program to make it run in the way it is desired.

To debug errors on BSD Online we can make use of the button that displays the errors in the code. Here’s a guide on where to find this tool and how to use it.

Step 1: 

Click on the icon that looks like a bug to display code errors.

Step 2: 

When an error is found a red X mark is found next to the line where the error occurs. When you hover over the red X mark you will see what error has been made.

“Display Code Errors” button can be toggled on and off as when you want to utilize its function.

So every time you want to ensure or check that your code is error-free, please feel free to make use of the “Display Code Errors” tool.

CSS might seem daunting at first, but it’s a powerful tool for styling your website once you understand it. Let’s explore the basics.

Selectors in CSS act as detectives, allowing you to pinpoint specific elements on your page. You can target elements by their type (e.g., <h1><p>), class (.classname), ID (#idname), or their relationship to other elements.

With your target selected, you can then apply styles using properties and values. Properties describe the appearance or behavior of an element, such as colorfont-size, and margin. Values specify the property details, like “red” for the color property.

This overview introduces key CSS concepts: selectors, properties, and values. Now, you’re ready to start styling!

Below is a glossary of CSS concepts, selectors, properties, and values.

Vocabulary

These are the terms most used when discussing CSS.

Cascading Style Sheets (CSS) read more
Cascading Style Sheets are the file type that our styles are written into. In the early web, before it became its own language, styles were simply added as attributes of individual elements. This method was clunky, ugly, and most importantly, not scalable. The purpose of CSS is to apply styles to our page en mass with as much efficiency as possible. To do this, we use selectors (below) that target whole groups of objects and apply consistent styles across our page. 
The “Cascading” part of the name refers to the fact that styles can be written and overwritten. For instance, if I set the width of an <img> tag to 300px, but further down in the page set the width of images to 100px, the most recent mention takes precedent. However, there are many rules and interactions determining what styles take charge.
Selector read more
h1 {}

#gallery {}

.icon:hover {}
html::after {}
CSS works symbiotically with HTML. It exists to style and augment HTML elements, but can’t do anything without them. 
The way we target specific elements are with selectors. A selector can have the name of a tag, class, ID, or combinations of those so you can find exactly the element you want to style.
All selectors are followed by a pair of curly brackets, which is where your styles go.
Property read more
h1 {
  color: lime;
  background: royalblue;
  font-size: 300%;
  margin: 10px 30px;
  padding: 20px;
}
Selectors choose which elements to style, and the properties are what you change.
There are hundreds of CSS properties that can be changed. You’ll never memorize them all, but this glossary will cover the most common and helpful of them.
Value read more
button {
  color: purple;
  background: black;
  padding: 20px 15px;
  animation: blink 5s linear 100ms infinite both;
  position: fixed;
  top: 0;
  left: 100px;
}
With every property comes a value. By default every element comes with a value attached to each property, usually “initial”, “default”, “none”, or “0”. It depends on your browser’s default settings.
By writing your own values you are over-ruling the default values that come with every property.
Comment read more
button {
  color: purple;
  background: black;
  padding: 20px 15px;
  /* Add animation for button to fade in and out */
  animation: blink 5s linear 100ms infinite both;
  /* position: fixed;
  top: 0;
  left: 100px; */
}
Just like with HTML, comments are passages of text that are ignored when the coe is read. They are just there for developers to see. Comments are helpful for leaving yourself (or others) notes, marking sections of your page, or temporarily “crossing out” code that you don’t want, but you don’t want to delete either.
The only difference of comments between languages is how it is written.
The Box Modal read more
div {
  background: black;
  width: 100px;
  height: 50px;
  padding: 20px 15px;
  border: 5px solid red;
  margin: 10px;
  /* this div’s box is 160px wide and 120px tall */
}
The box modal is the idea that all elements on a page take up some amount of room in a rectangle. The “box” is the total amount of space between four measurements. These are the element’s set height/width, plus the height/width of its padding, border, and margin combined. The border makes up the edge of the perceived box, the padding is the space inside, and the margin is the space outside.
Color Mode | read more
div {
  color: rgb(255, 255, 255); /* white */
  color: rgb(0, 0, 0); /* black */
  color: rgb(255, 0, 0); /* red */
  color: rgba(0, 255, 255, 0.5); /* transparent purple */
}
RGB values tells the computer how much Red, Green, Blue to mix together. Each can be mixed to make a different shade of color with a maximum of 255 of each color.rgba adds “alpha” or transparency to your color.
div {
  color: #ffffff; /* white */
  color: #000000; /* black */
  color: #ff0000; /* red */
  color: #f0f; /* shortened purple */
}
Similar to RGB value, HEX values uses letters and numbers. First two, second two, and last two are respectively red, green and blue. They mix to create a color you desire.
div {
  color: hsl(0, 0, 100%); /* white */
  color: hsl(0, 0, 0%); /* black */
  color: hsl(0, 100%, 50%); /* red */
  color: hsl(320, 100%, 50%); /* purple */
}
HSL stands for Hue, Saturation, and Lightness. This is a common color mode if you use color pickers online, since it gives you one slider for hue (color), and a range of brightness (+/- white/black) and saturation (+/- gray).
div {
  color: white; /* white */
  color: black; /* black */
  color: red; /* red */
  color: rebeccapurple ; /* Rebecca purple */
}
You can also just write the names of the colors you want! CSS is pretty smart, and understands dozens of color-words.
It is still important to understand how other color modes work, but if you don’t need a precise hex code this is a good option too.
Units of Measurement | read more
div {
    width: 100px;
}
There are many ways to measure in CSS, some are distance, some are time, some are rotational.Pixels are the smallest whole unit of digital screens.
div {    height: 5em;
}
An em is the size of the font you’ve set (by default 16px), and is a generally scalable and nicely sized unit.
div {    margin-left: 50%;
}
A % measures the percent of the container an element is in. At the biggest level this is the width/height of the page, but can change depending on how big the box is.
div {    transform: rotateZ(200deg);
}
deg measures degrees of rotation. 0-360.
div {    transition: 0.5s;
}
s measures seconds. ms is a measure of milliseconds (1/1000th of a second, and the generic scripting time unit)

Selectors

More specific information on how to target different parts of your HTML.

All read more
* {
    margin: 0;
}
The * symbol selects all elements at once.
Elements read more
p {}Add styles to all HTML elements with the given name.Element names can be written the same as they are in HTML.
div {}
button {}
Classes read more
.pageItem {}Selecting objects in html that have a class name by using a period.
IDs read more
#bestPage {}Selecting an element with an ID by using a hashtag before the ID name.
Groups read more
h1, h2, p {
      text-align: center;
      color: red;
}
You can use more than one selector to add styles to more than one element at a time, for instance if you wanted to align the text of all h1, h2, and p tags at once and change their color.
Children read more
#header .nav {
  background: crimson;
}
#header .nav img {
  width: 30px;
}
You can be more specific with your selectors by targeting only elements inside of other elements (children of that element). For example only setting the width of imgs that are inside the header ID.This is very different than separating the selectors with commas: using just a space means it will target the element within the previous selector, not both the #header and img.
Pseudo read more
button:hover {
  background: red;
}
You can add selectors that only apply when the element has other conditions applied to it. For instance this code would change the background color of all buttons that you are hovering over with your mouse.
div:active {
  background: blue;
  width: 25%;
}
Complex read more
#gallery .imageBox:not(p):hover h3, a:hover {
  color: green;
}
You can string together any number of the techniques covered above into very specific selectors that will get you the results you want. This selector targets the <h3> tag within the imageBox class within the gallery ID, only when you are hovering over it and not the <p> tag also inside that .imageBox. It also targets all <a> tags when you are hovering on them.
Specificity read more
* {
  color: blue;
}

h1 {
  color: red;
}

.greenText {
  color: green;
}

#purpleText {
  color: purple;
}

#purpleText:hover {
  color: lavender;
}

* {
  color: blue !important;
}
Generally, CSS uses a system of cascading from one style to the next: the most recent instance of a property will be the one used.
That is, IF they have the same selector. If two snippets try to set the same property on the same element and they have different selectors, CSS settles the dispute by looking at which selector is more specific.
The All selector (*) is the most vague selector possible, so it gets overridden by everything. After that, generic tag names, then classes, then IDs, then pseudo-selectors and various compound selectors take over. 
There is a lot of nuance that can go into specificity, however, there is a way to override that order and force your style through, which is the !important attribute after your value.
In this example all text will be blue no matter what, because we told the all selector to override everything. However, if you have more than one use of !important on a conflicting property then cascading/specificity takes over again.
Note: needing !important is usually due to poorly planned code. Don’t use it if you can avoid it.

Properties & Values

The types of styles that are being changed, and the values they are being set to.

Color read more
h1 {
    color: blue;
}
Changing the color of text
Background read more
body {
    background-color: blue;
}
Changing the background color of the selector, there is three ways to name your color:Hex-Code aka: #1F2A4BWord aka: blue, turquoise, crimson, .etcRGB aka: rgb(255,150,110)
body {
    background-image: url(link/to/image.jpg);
    background-size: cover;
    background-repeat: no-repeat;
}
Your background can also be an image. You can use a live link to an image hosted somewhere on the internet, or the relative path to an image you have stored in your project files.
Height & Width read more
div {
    height: 200px;
    width: 200px;
}
Giving a height in pixels to the selector
Giving a width in pixels to the selector
Font read more
p {
    font-size: 30px;
}
Change the size of text.
@import url(‘https://fonts.googleapis.com/css?family=Roboto’);
p {
    font-family: ‘Roboto’, sans-serif;
}
Changing the font of text. To add special fonts from the web you must either download or link to their files using an @import line. 
The second font listed is what’s called a fallback, (a universal web-font as a second option for if your first choice doesn’t load)
Border read more
div {
    border-width: 5px;
    border-style: solid;
    border-color: blue;
    border: 10px dashed red;
    border-radius: 10px;
}
Border Width: The border thickness.
Border Style: The type of border, aka: solid, dashed, groove, double, dotted, ridge, inset, outset, none, hidden.
Border Color: The color of the border.
Border Shorthand: You can combine these three properties into one line as long as they are list as width, style, color.
Border Radius: Rounds the edges of your box on a curve.
Margin read more
div {
    margin: 10px;
    margin: 10px 20px;
    margin: 10px 15px 20px 25px;
    margin: 0 auto;
}
Spacing outside of the element. You can generalize one value that will be used for all four sides of the container, or specify two values (y & x in both directions), OR specify all four sides (top, right, bottom, left).You can also set a margin to auto, which will evenly space the element on the page, making it centered.
Padding read more
div {
    padding: 10px 15px 20px 25px ;
}
The spacing inside of an element. You target the different sides the same way, but you cannot set an auto padding the same as margin. 
The difference between padding and margins is like this table right here: it has padding on the inside to keep the words from touching the border, and the table has margins outside of it to keep it from touching the edge of the page.
Text Align read more
h1{
    text-align: center;
}
Organizing the text left, center or right.
Position read more
img{
    position: absolute;
    top: 100px;
    Left: 200px;
}
Where an element sits in the flow of the page. By default all elements are relative, meaning they appear in the order they are added to the page. However, you can make an element fixed to the top of the screen (think website headers that don’t scroll away), or absolute to one section (they scroll, but are stuck to whatever location on the page you say.
If you give an element position fixed or absolute, you must also specify where it will go relative to the sides of the page (top, left, bottom, or right), since it is outside of the normal formatting.
Animation read more
div {
    height: 200px;
    width: 200px;
    background-color: blue;
    animation: myAnimation 4s linear 0s infinite;
}
To use an animation, you apply several values to the element you want animated.
In order, they are: @keyframes nameAnimation length in secondsTiming, linear or eased in-outDelay in secondsHow many times it plays before stopping.
@keyframes myAnimation {
0%{
    margin-left:0px;
}
32%{
    margin-left:500px
}
100%{
    margin-left:0px;
}
}
Keyframes are the individual steps for an animation.
On each frame, you can apply whatever style changes you like to the affected element.
You can create however many keyframes you want your animation to have, and how far apart to separate them (it doesn’t have to be even). The only rule is that it begins at 0%, and ends at 100%.
Flex Box read more
div {
    display: flex;
    flex-flow: row nowrap;
    justify-content: space-around;
    align-items: center;
}

div h2 {
    flex-grow: 1;
}
The display option flex is a more advanced, but a very powerful tool. Flex is a property given to containers that can arrange the contents in any orientation. It works like text align, except it works on any elements, in any direction, in either axis.
To use it, declare the display as flex, then say which flow you want (row: horizontal, column: vertical) and whether if not you want content to wrap if it would overflow. Justify content will arrange things forwards or backwards on the chosen flow (space-around means that everything is spaced evenly from front to back) and align-items aligns the content in the opposite axis.
In this example, my items would be arranged left-to-right, with even spacing between, and are vertically centered, making a nice row of content.

Learn HTML Basics with BSD Online: Your Introduction

Linked is a glossary of HTML concepts, syntax, and commonly used tags and attributes. Refer to this document for a crash course in HTML, and leave any questions and suggestions here!

docs.google.com

BSD Online Introduction to JavaScript

Linked below is a glossary of JavaScript concepts, terms, methods, and functions. Refer to this document for a start to the language of JavaScript, and post here with any questions and suggestions!

docs.google.com

Below is a PDF of frequent code errors that you or your students will probably encounter. If you need troubleshooting help when debugging code, this guide is a good place to start.

drive.google.com

Using BSD Online

Whether you’re a student or a professional, our courses on topics like AI, Data Science, and Web Development are designed to help you gain practical knowledge. Join our friendly community and start your learning journey today!

Restarting a project is different from resetting a step on a Guided Project. “Restart project” can be used to take the user to Step 1 of a Guided Project and delete all progress in that particular project. Whereas “Reset Step” is used to delete the progress and start over on the current step only.

To reset the progress of a step, you can do the following:

  1. Click the project’s title at the top of the code and output panel.
  2. Click the reset step button below the current step title.
  3. A confirm dialog box will appear. Click the “Reset step” button to continue.

Here’s an animation showing how you can do this:

Please note that you can only reset the current step of the project. Additionally, only code steps can be reset; video and text info steps cannot be reset.

Students can share their sandboxes with everyone. Did you know that they can also share their whole portfolio? Sharing their whole portfolio means they can showcase all their sandboxes in one link! This can be used in term-end submissions or even when they are applying for a job.

But first, what is a portfolio? Please watch this short video about what BSD portfolio is about:

Sharing your portfolio can be done by following these steps:

  1. On your homepage, click on “Your portfolio” from the left panel.
  2. On the right hand side of the screen, you’ll see a button that says “share your portfolio”.
  3. You have 2 ways to share your portfolio, either via a unique share link or a QR code.

Copy the link and share it with anyone you want to share it with. This is an example of what they will see:

People who view your portfolio can also see the codes you used by clicking on the sandbox they want to view.

If you have questions or concerns, let’s talk! Feel free to send an email to support@bsd.education or “start a conversation” through chat support!

Our chat support is available to all teachers after logging and can be found on every page of BSD online. The chat support will allow every teacher to report an issue or start a new conversation. Whether you report an issue or start a new conversation you will be hearing back from a member of our support team.

“Send us a message”, means you are asking the support team general questions like “How can I manage my classroom?”, “My student cannot log in with my email, what could be the problem?”, etc.

While “Report an issue” is when you have experienced a problem/issue on BSD Online and want to communicate this to our support team. When reporting an issue, do remember to explain clearly what problem you are experiencing with details like the title of the project, the step number, etc.”

If you have more questions and other concerns, feel free to reach out to us through chat or send an email to support@bsd.education.

BSD continues to develop new features for you teachers and your students. With our new and more friendly user interface, you can view all available courses and content of your organization in one place. Now you can browse projects and add activities directly to your classrooms with the new “Your library” section.

Here’s a quick step that will guide you on how to use “Your library”.

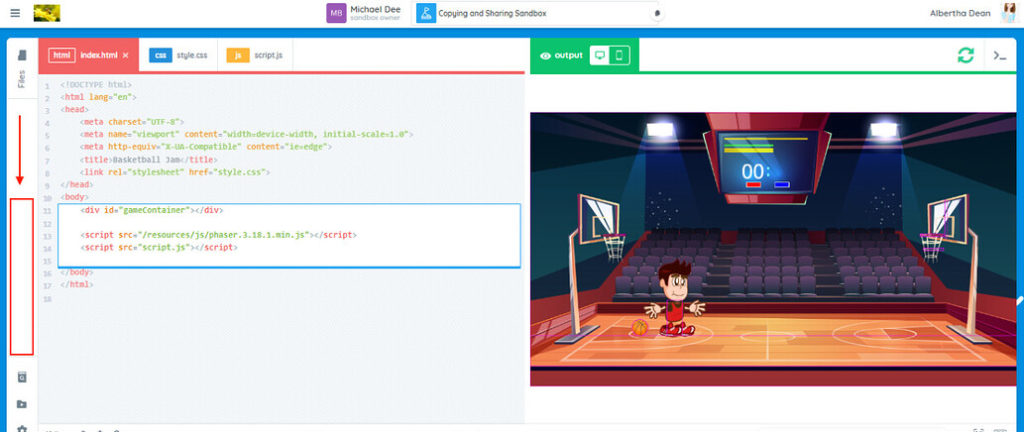
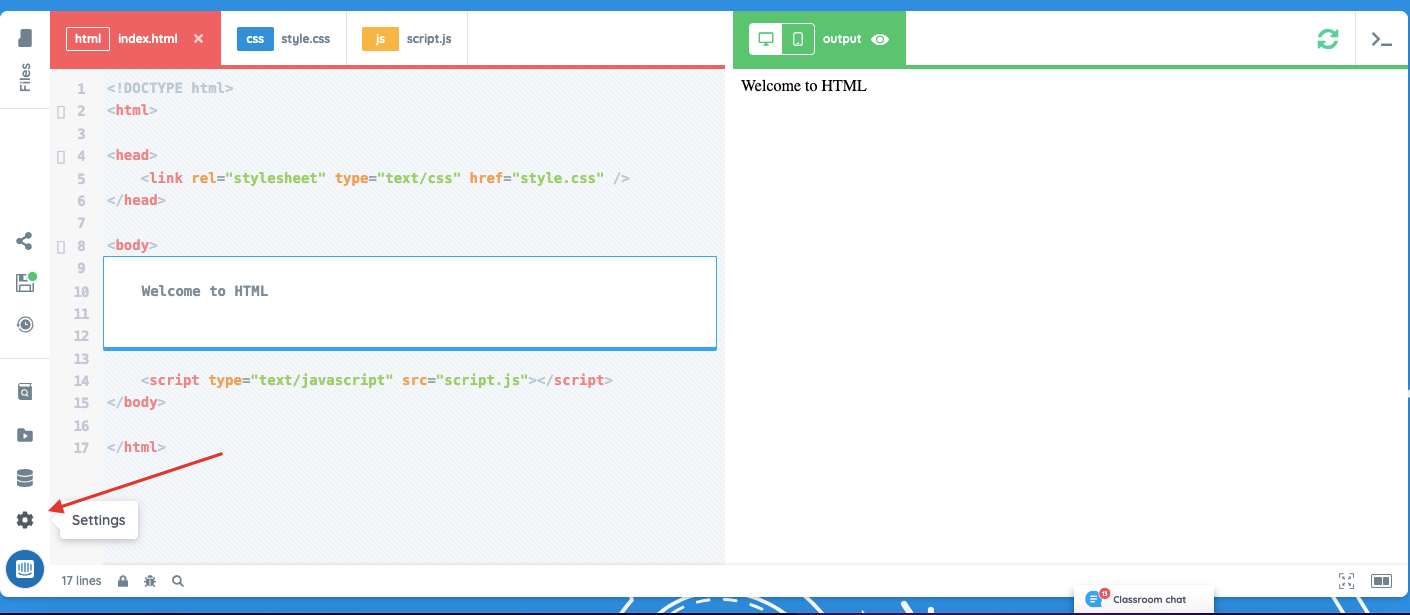
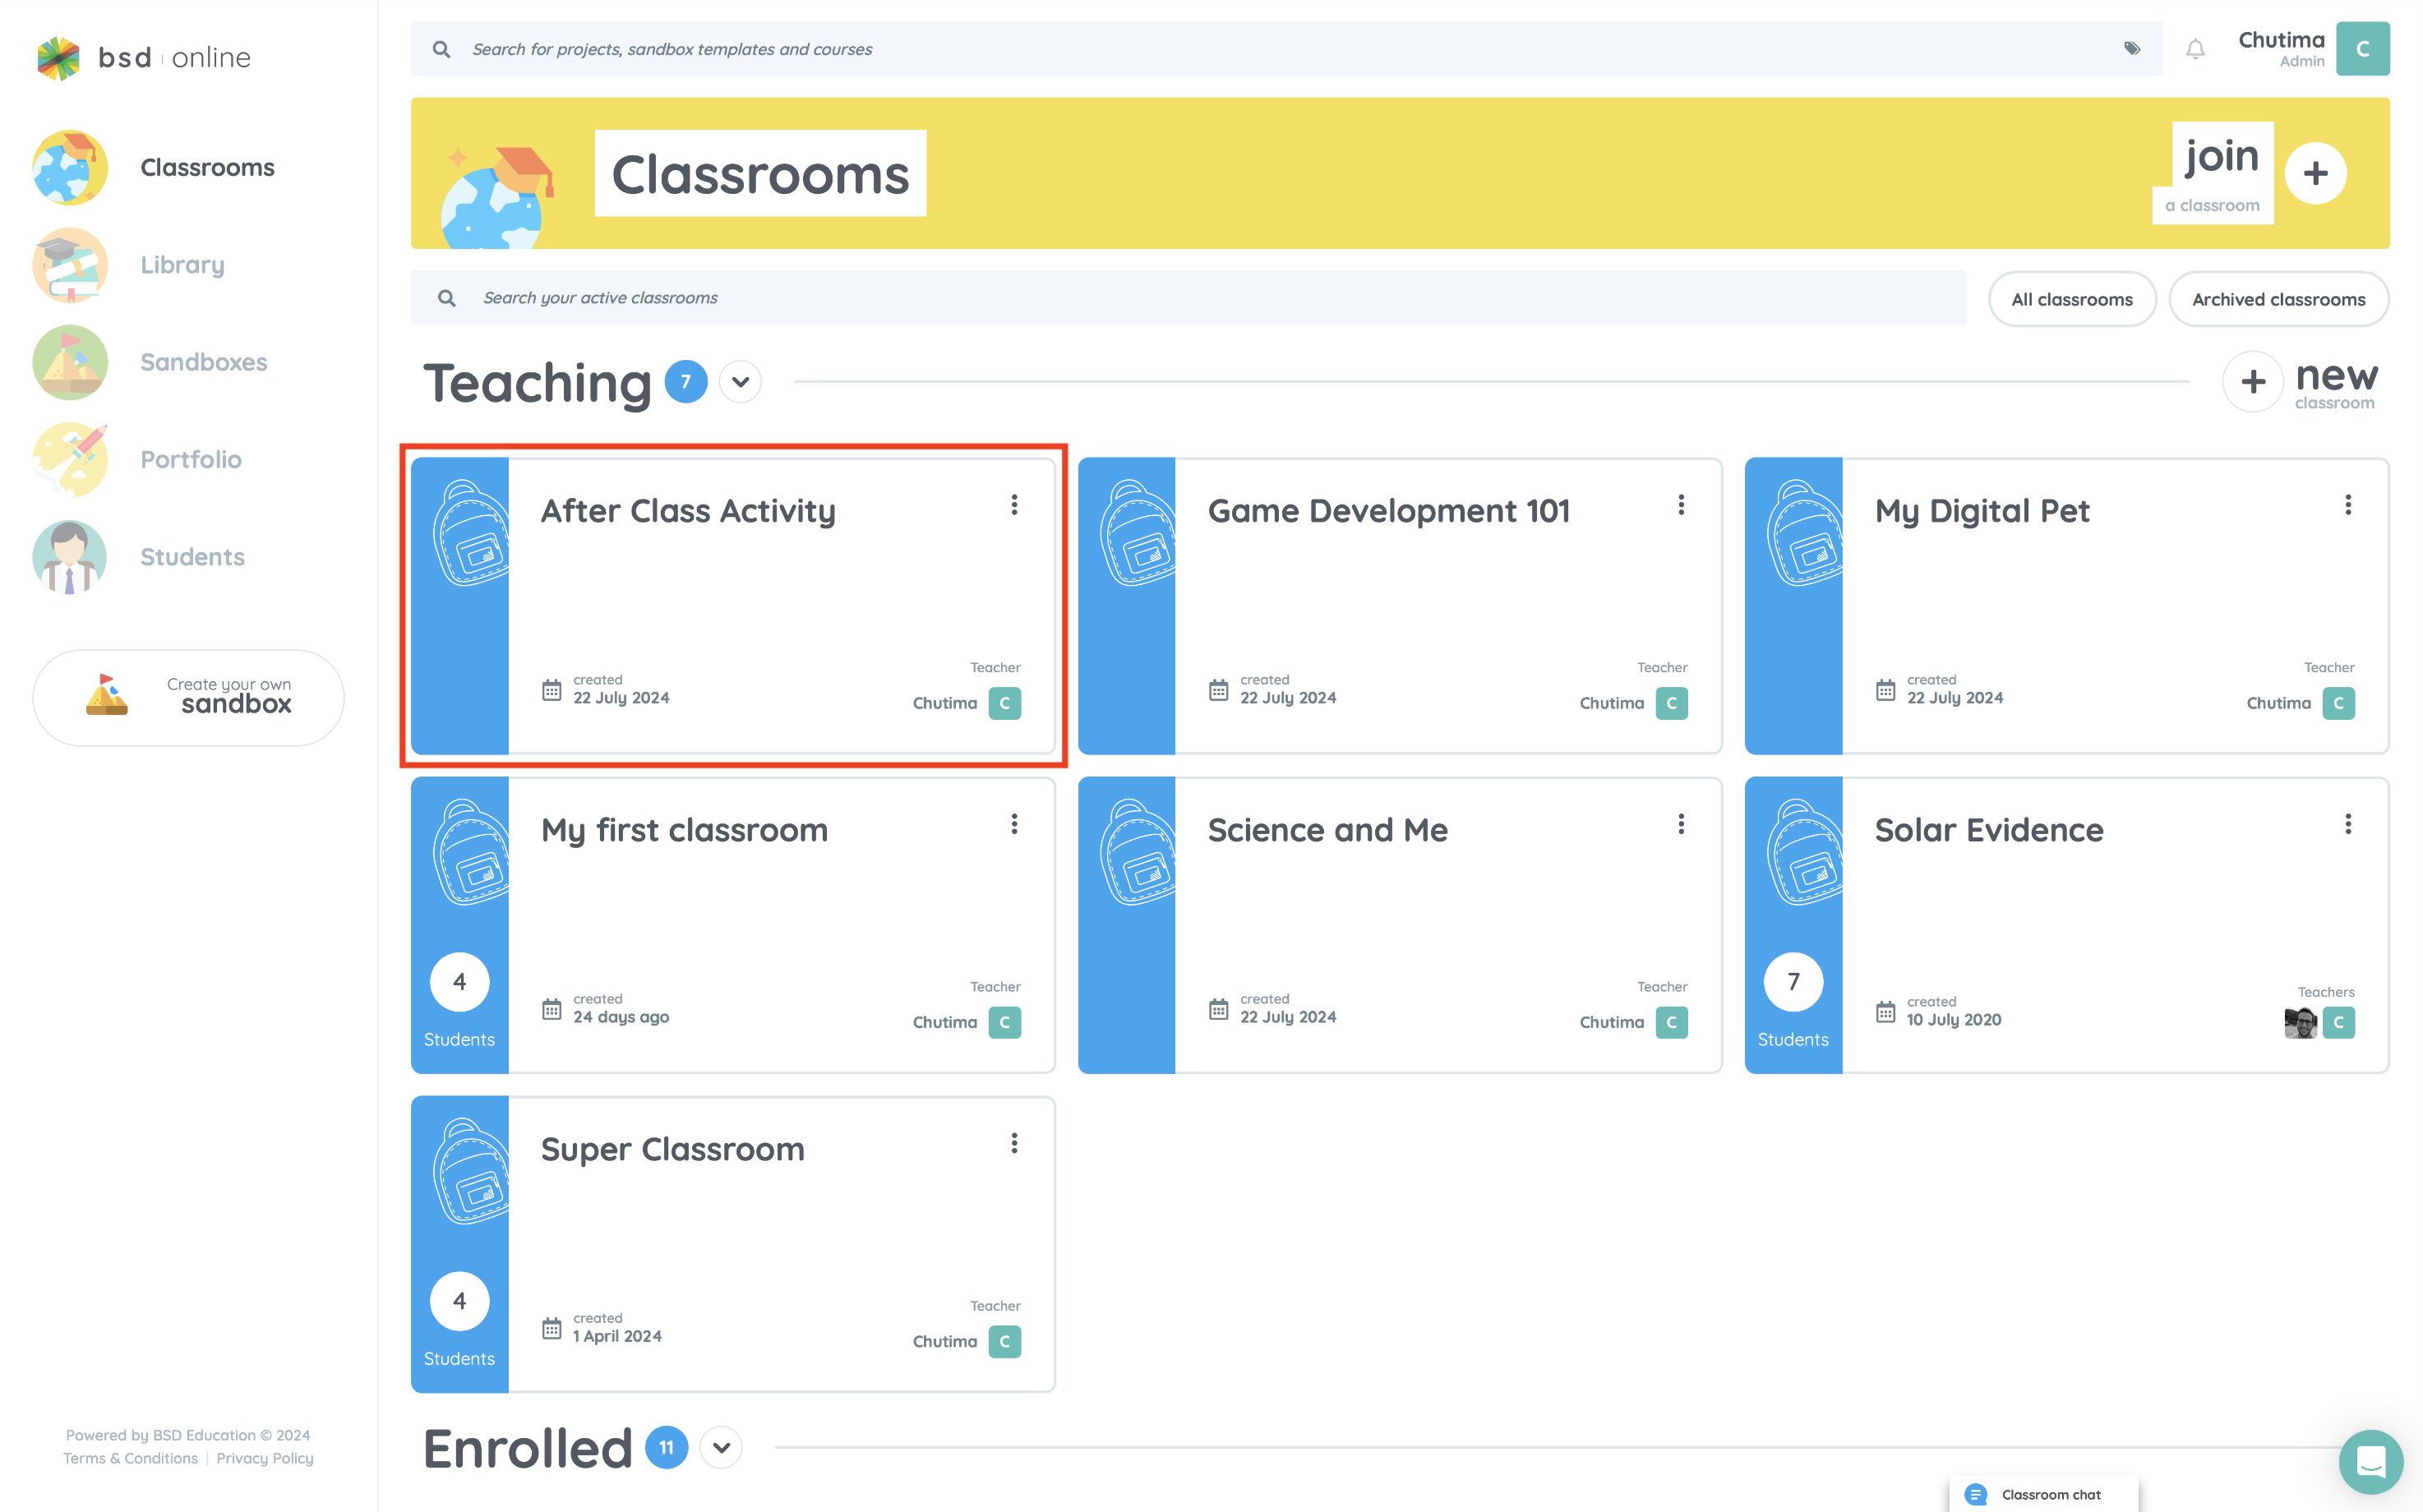
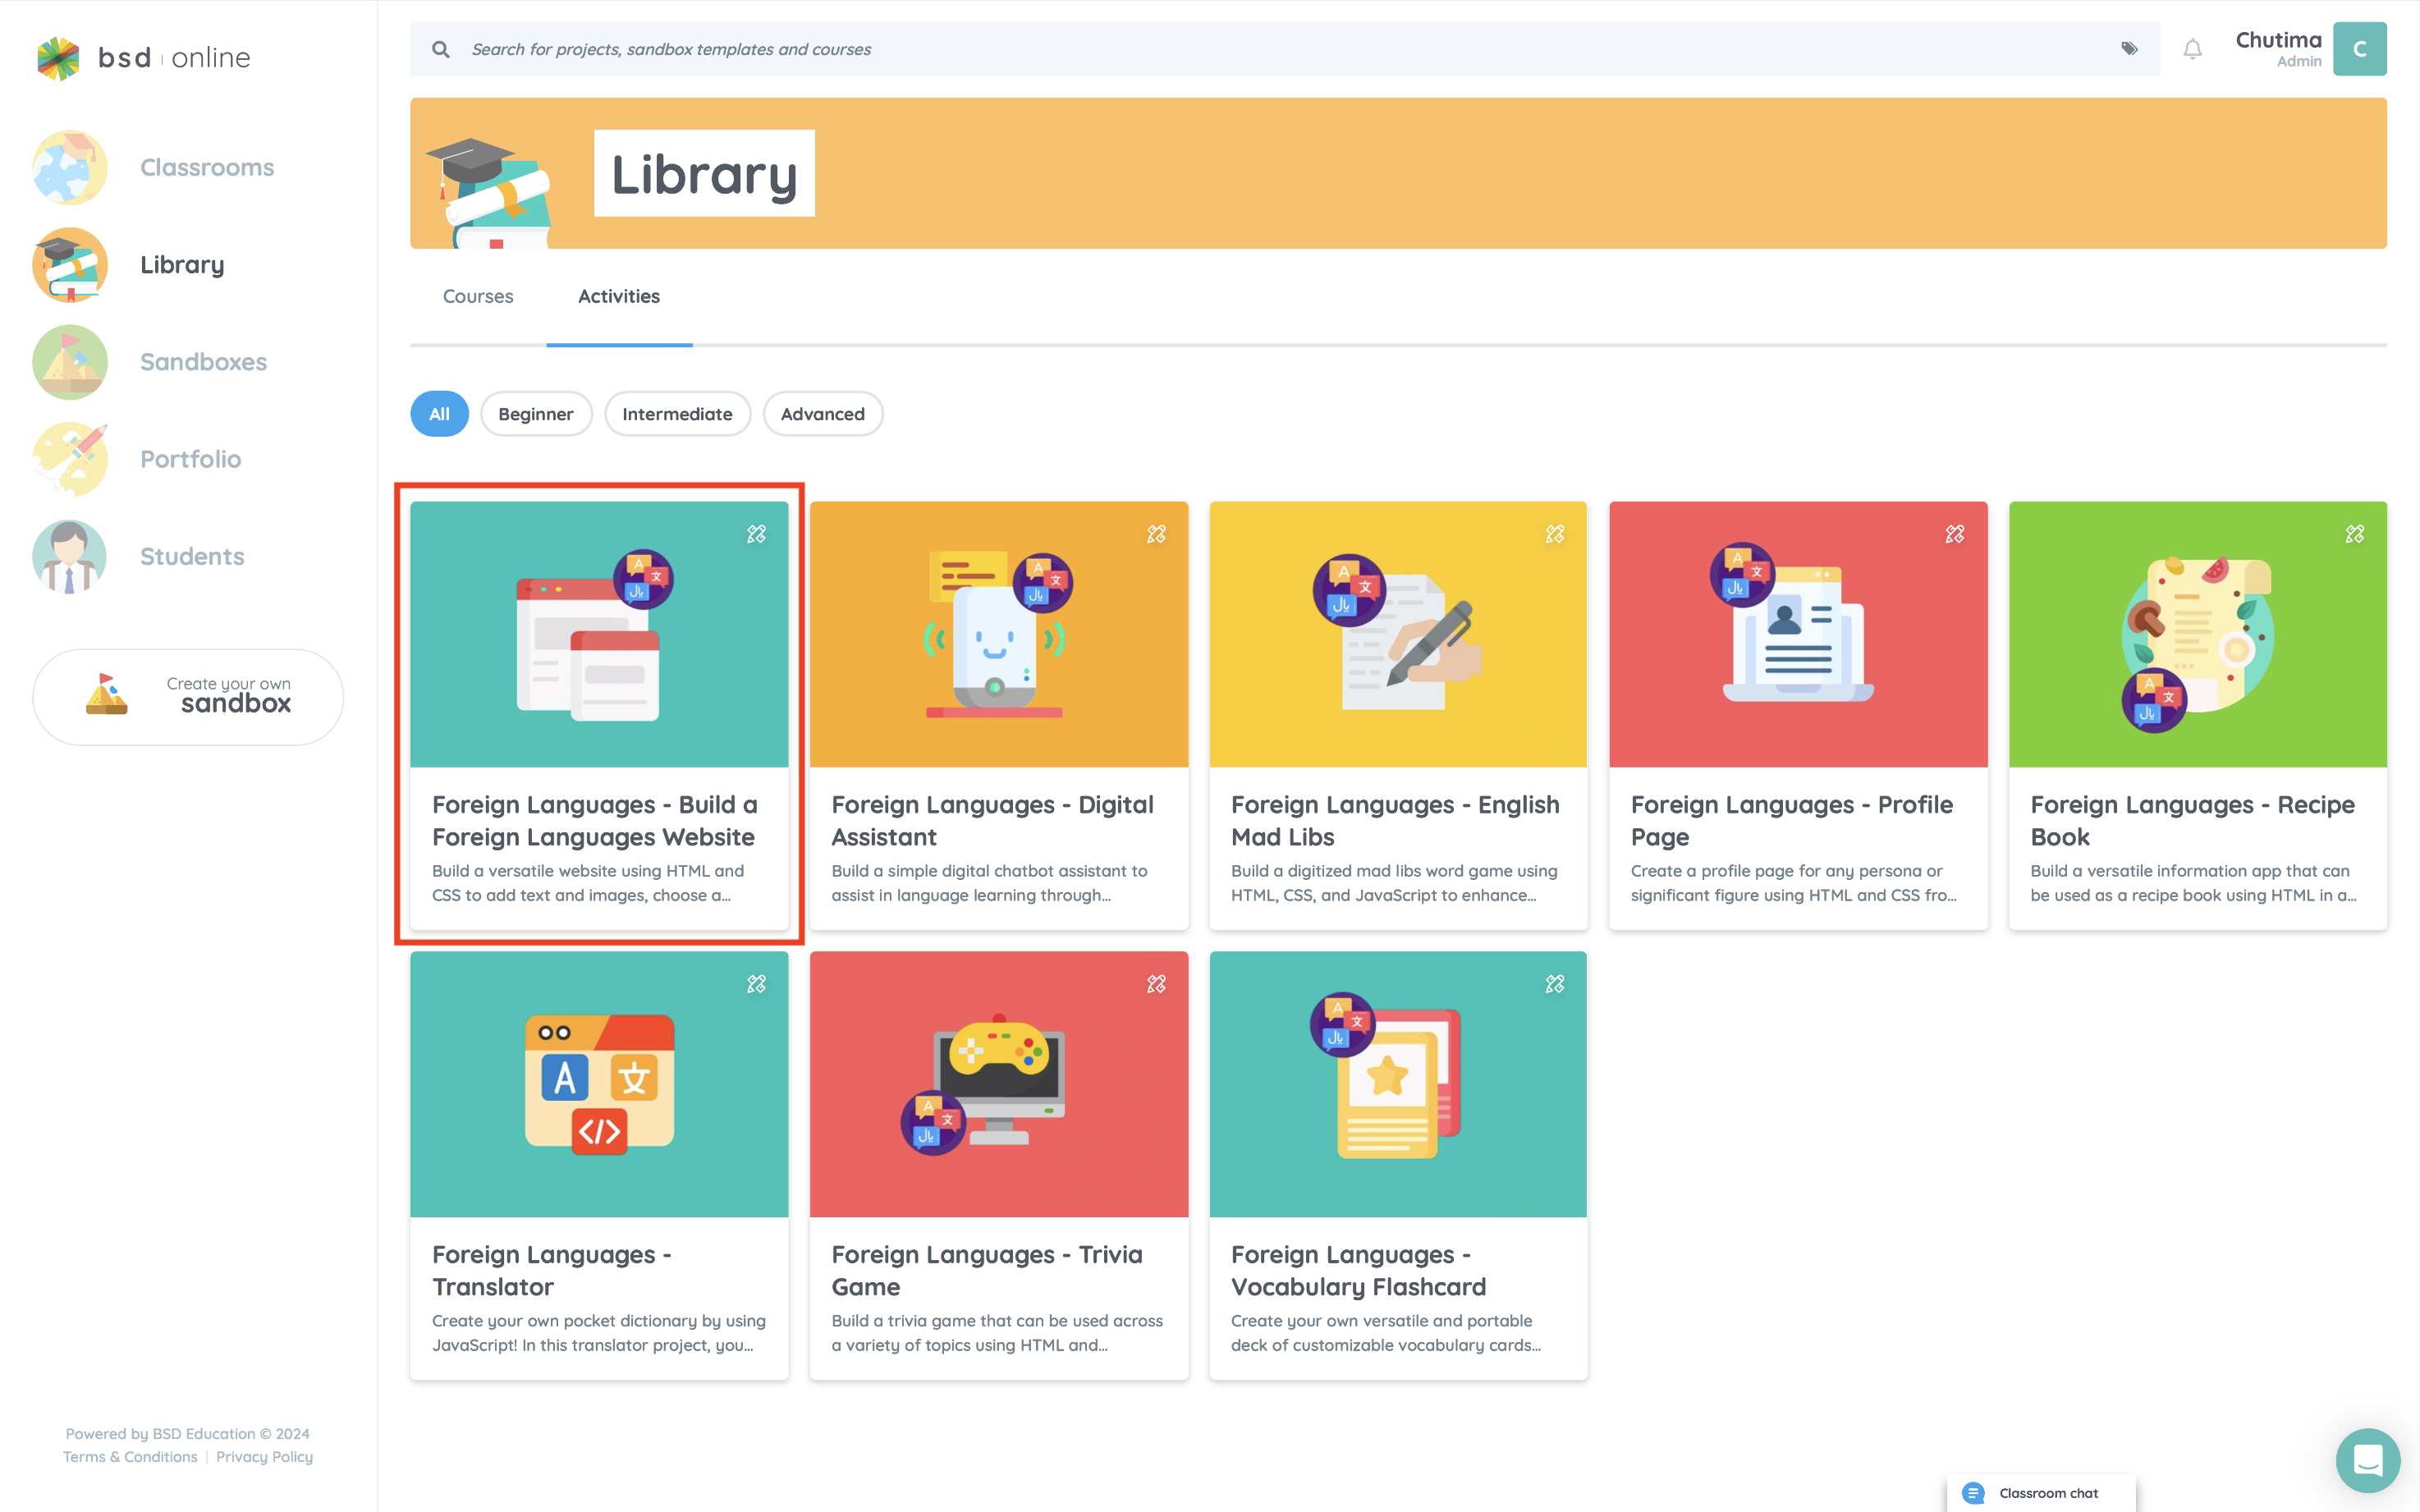
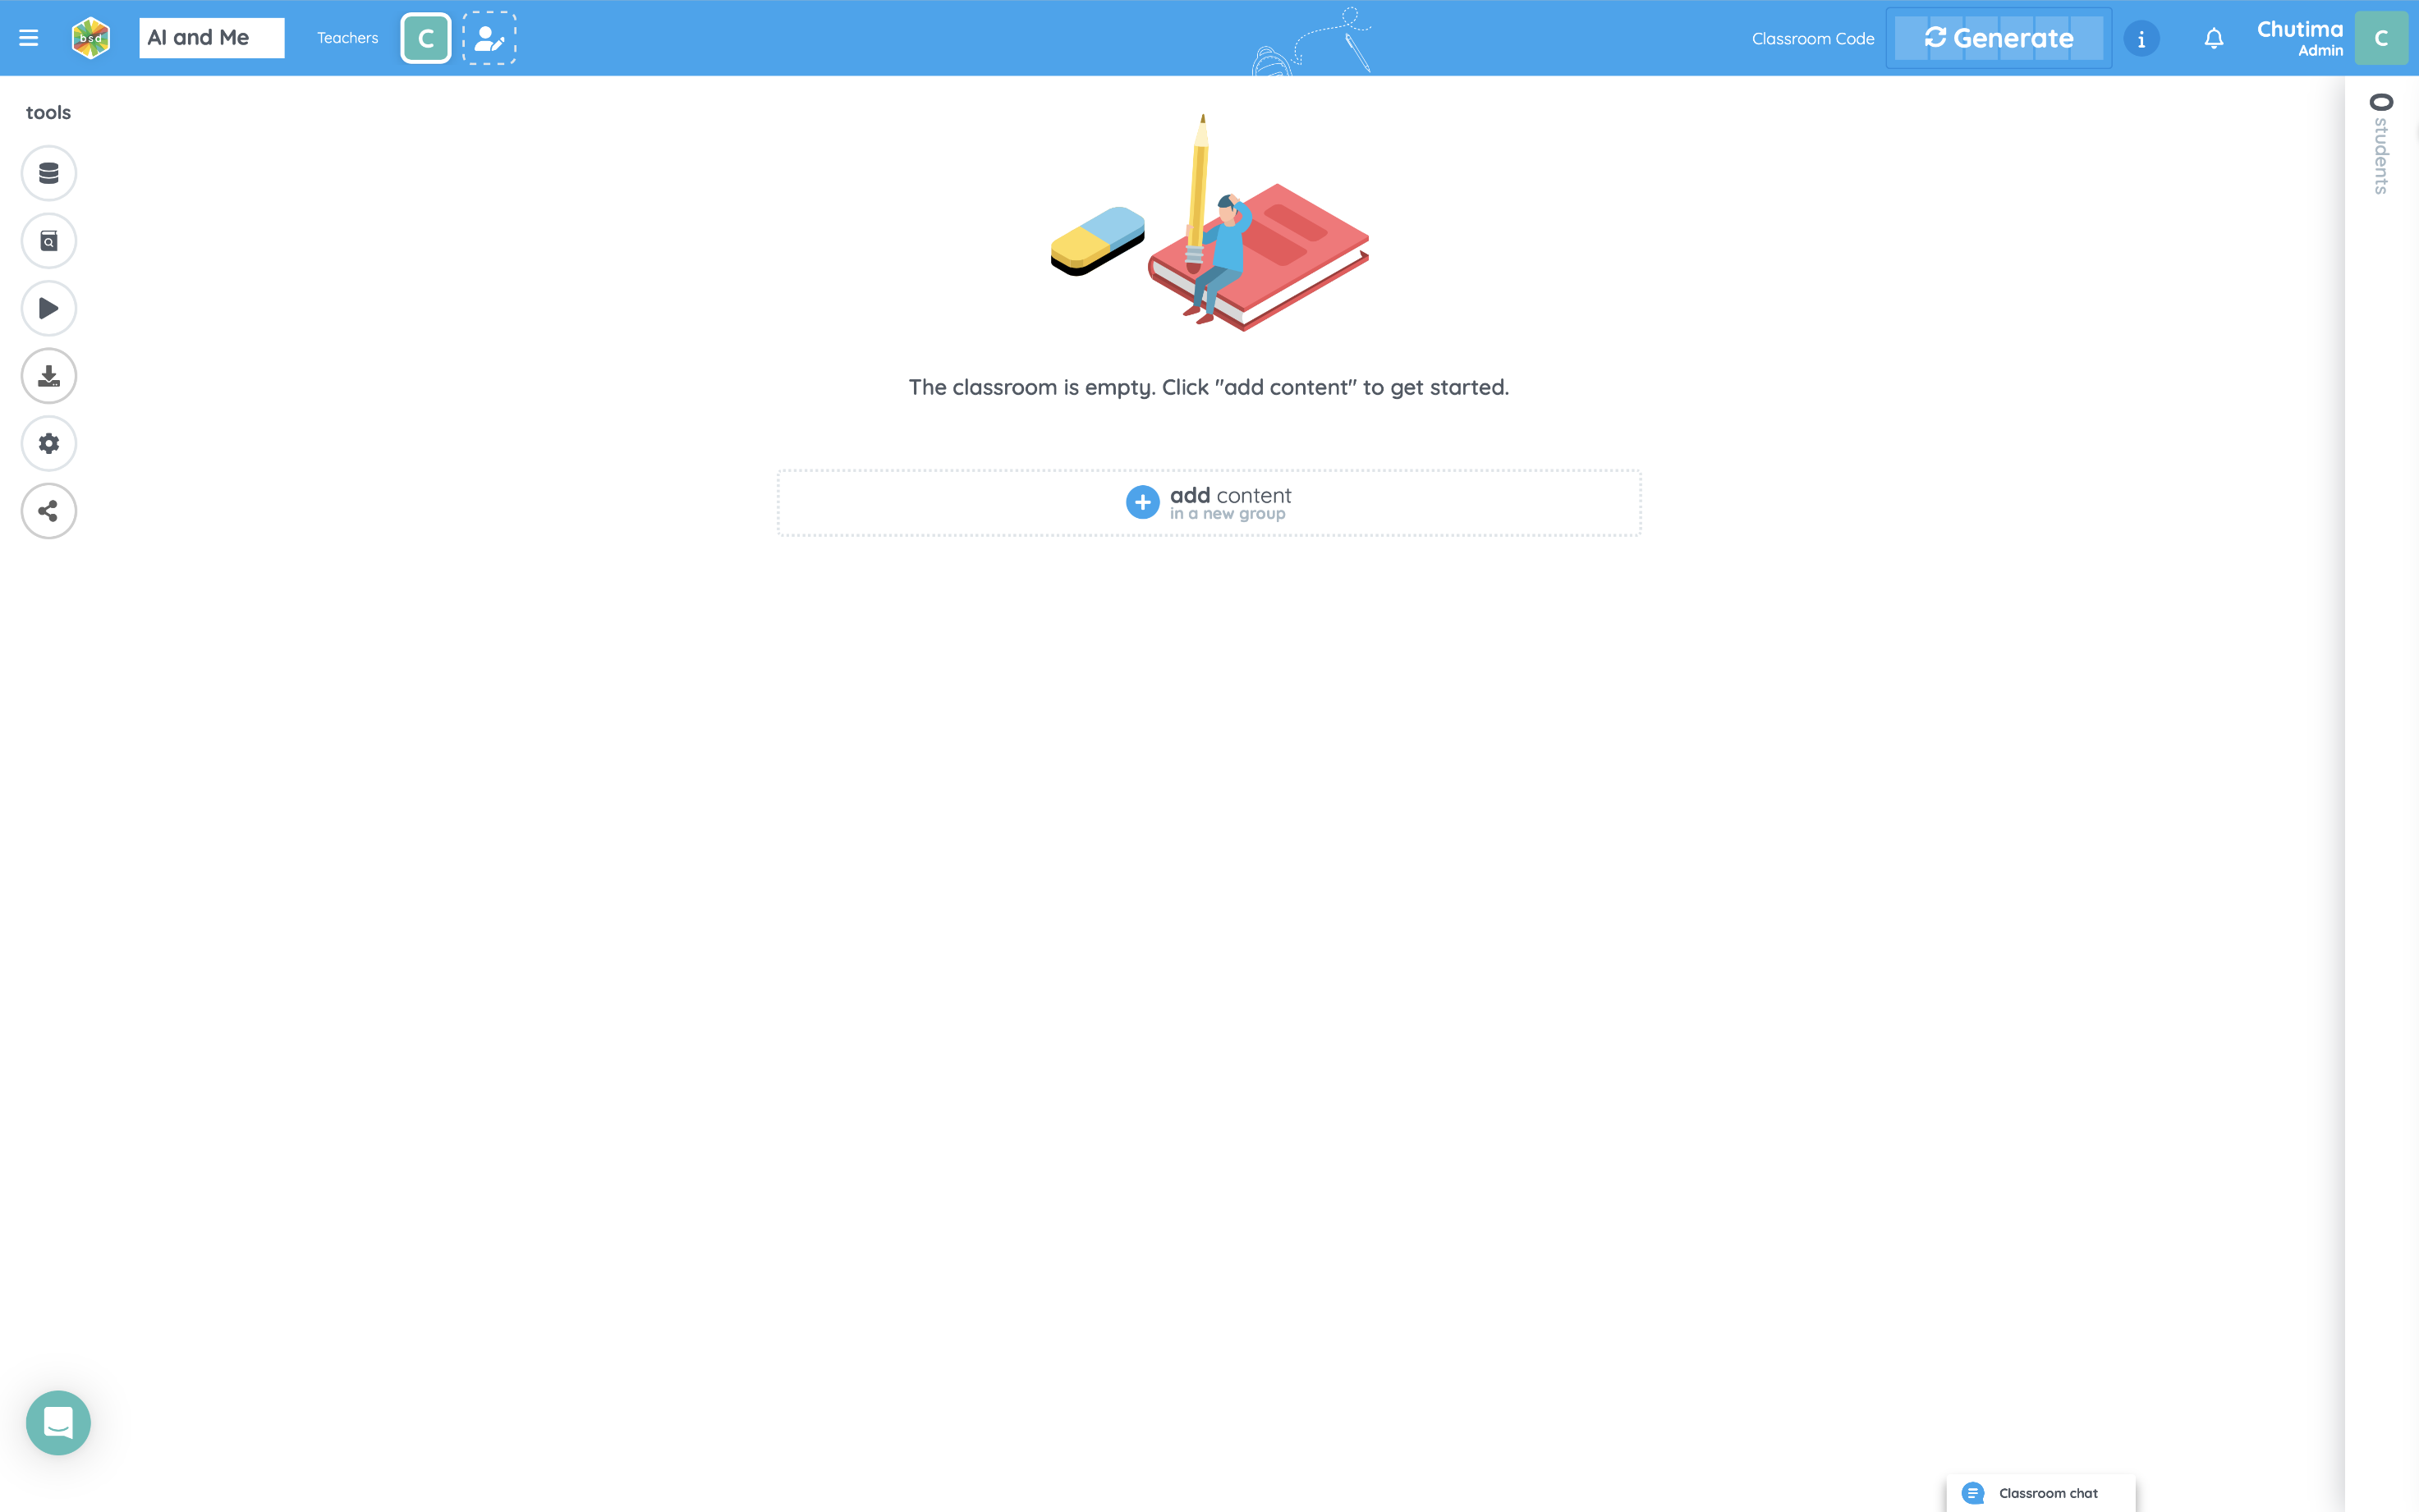
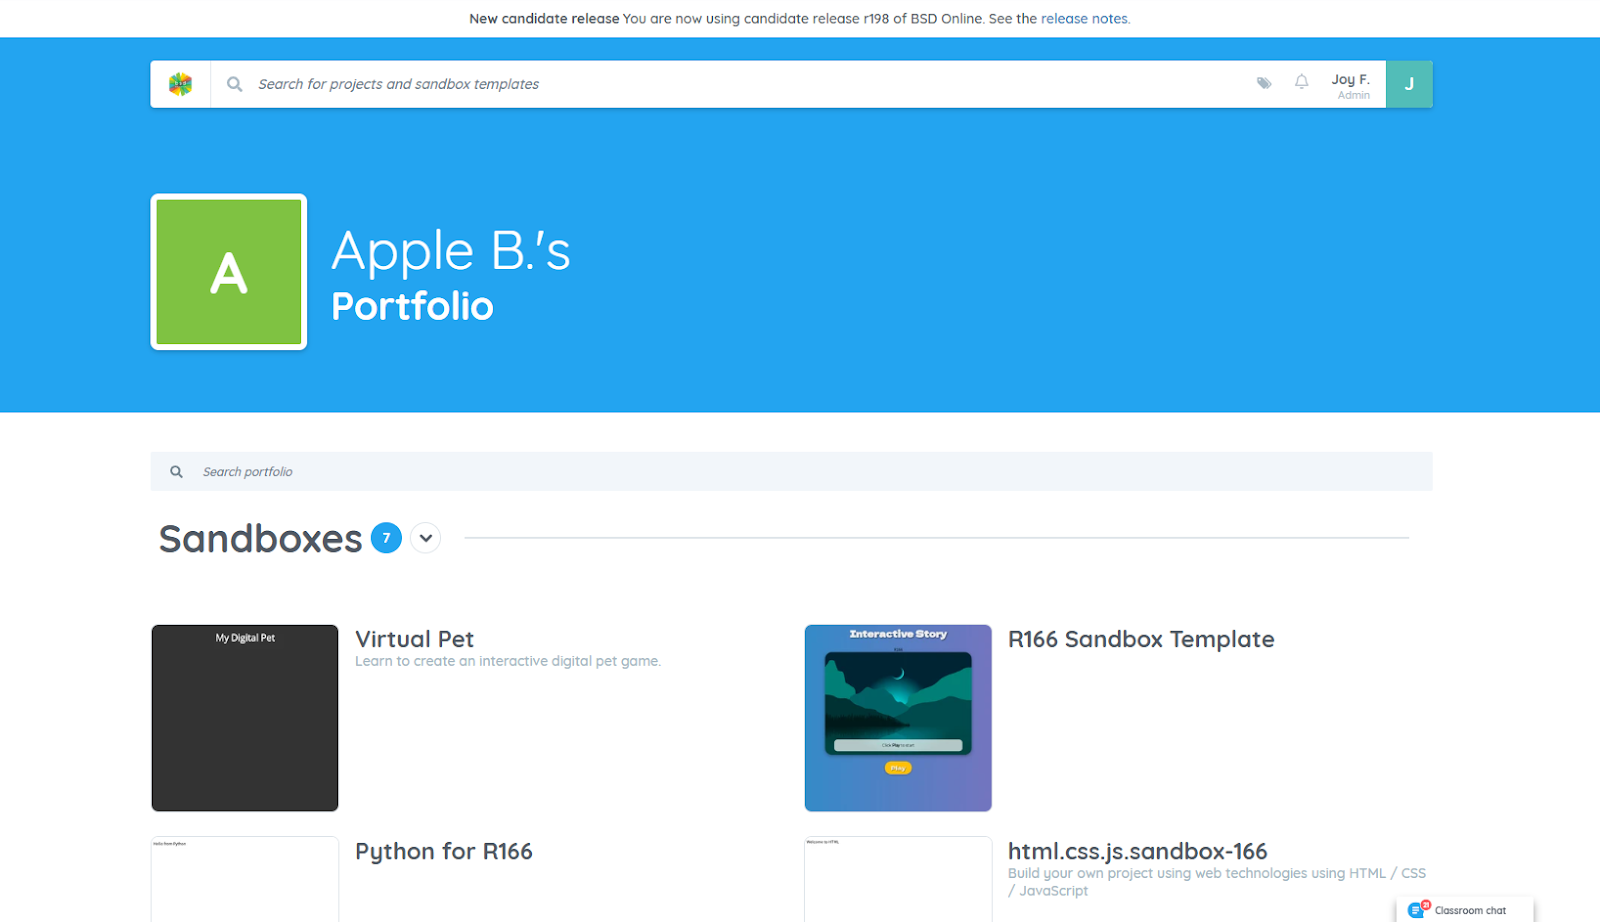
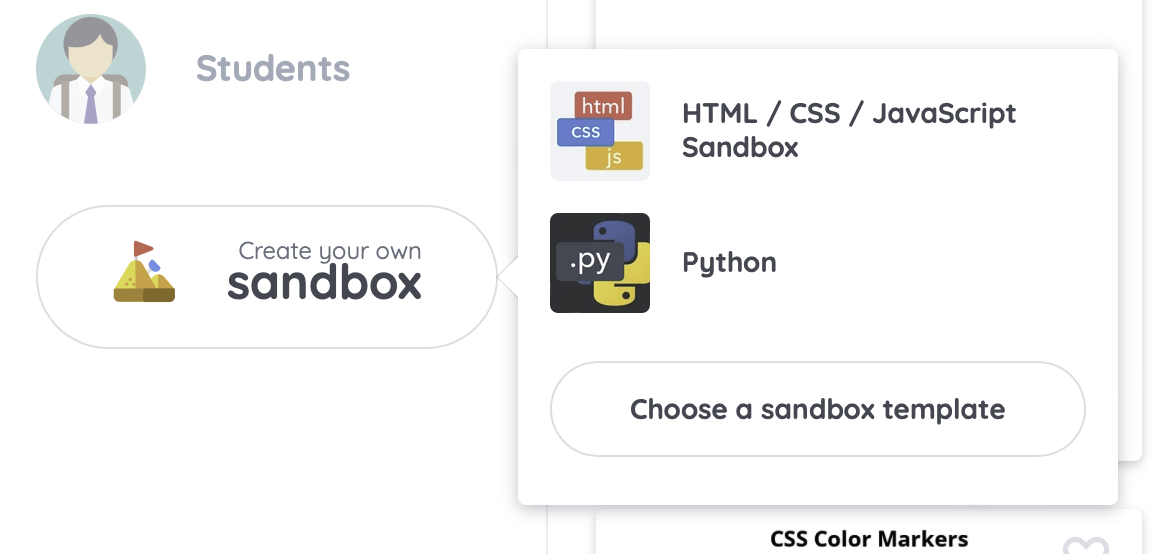
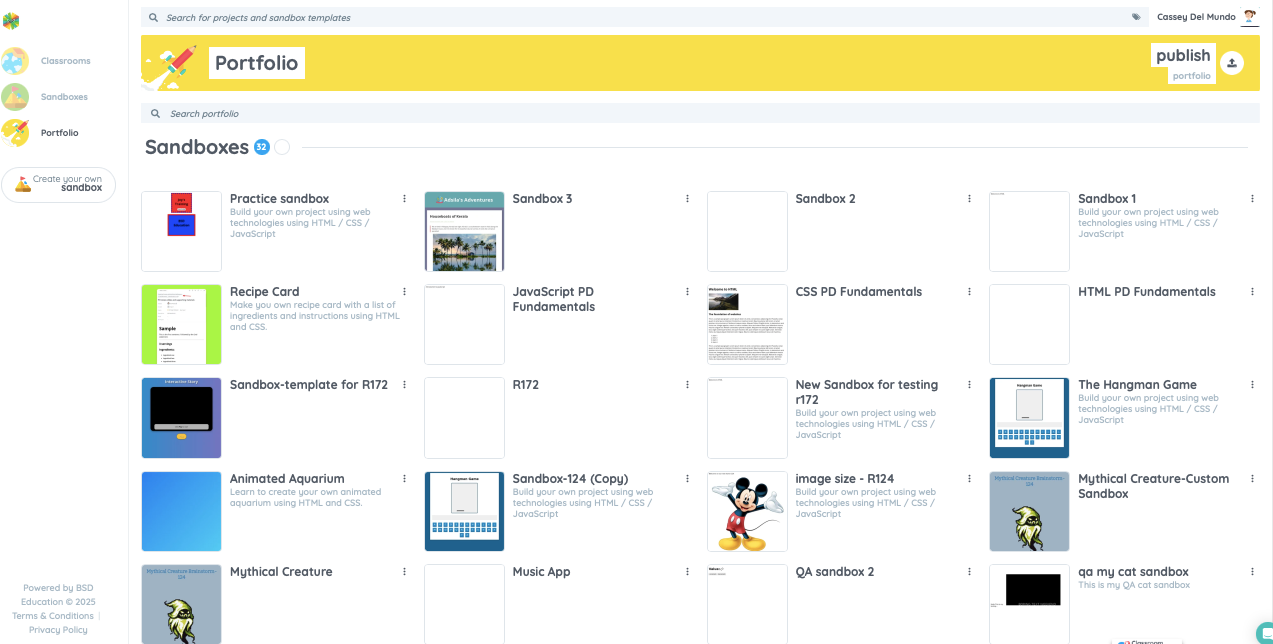
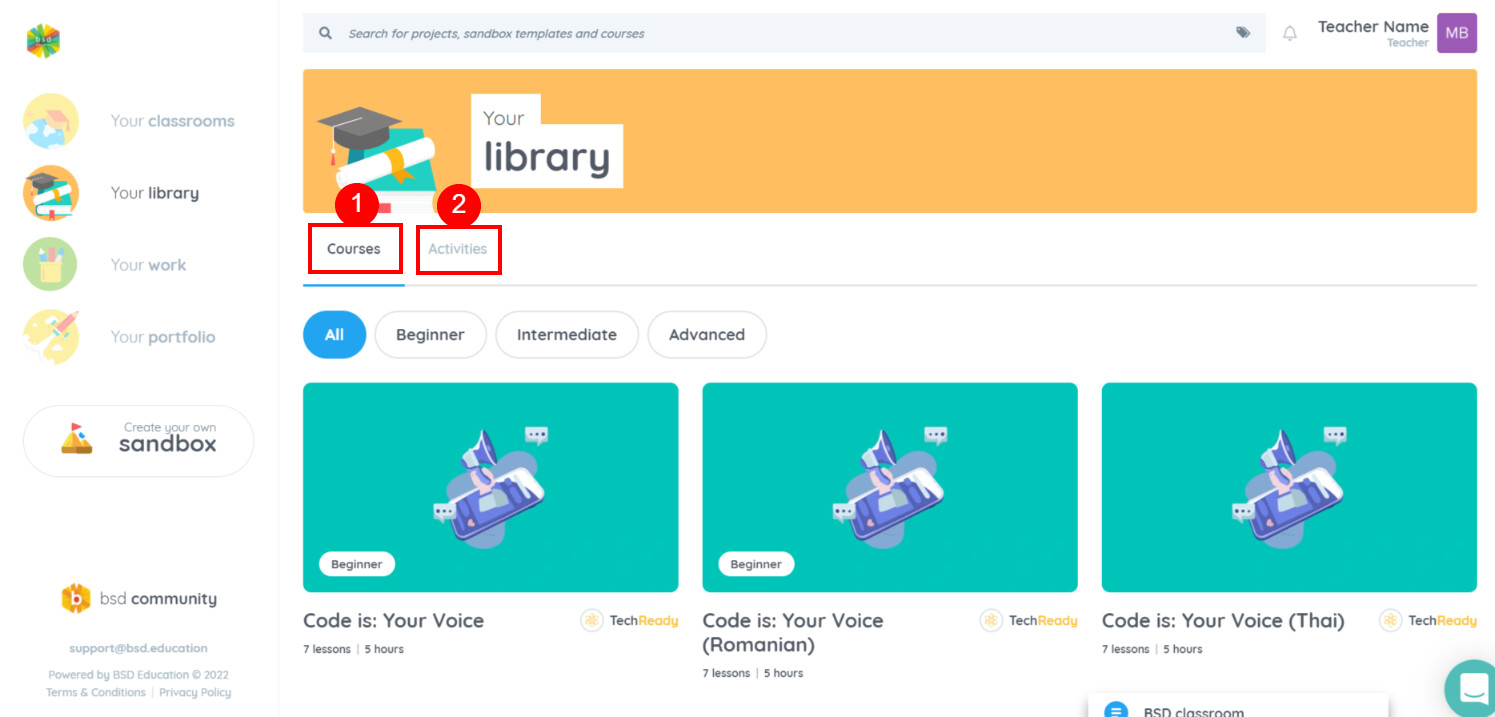
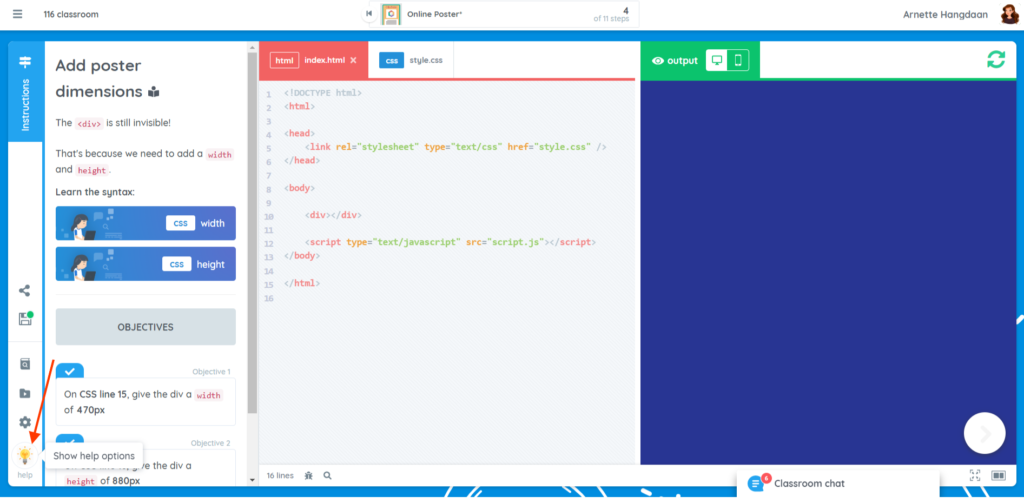
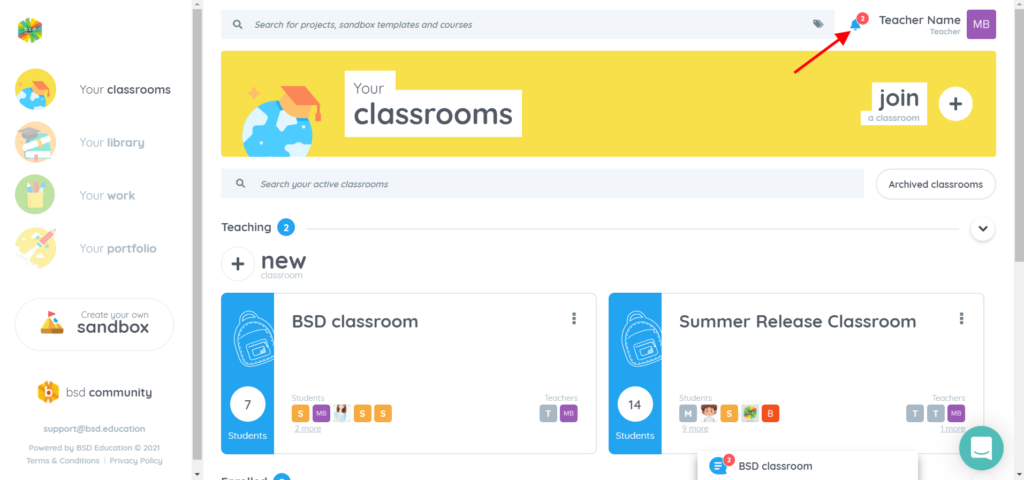
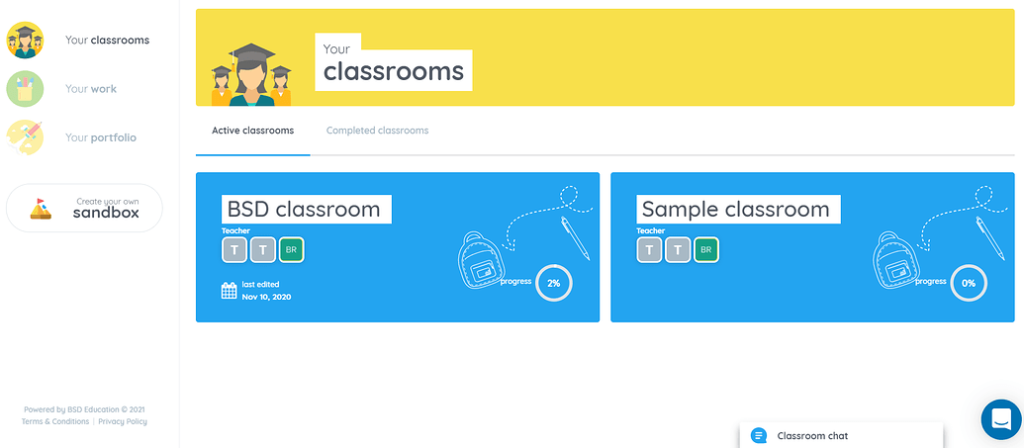
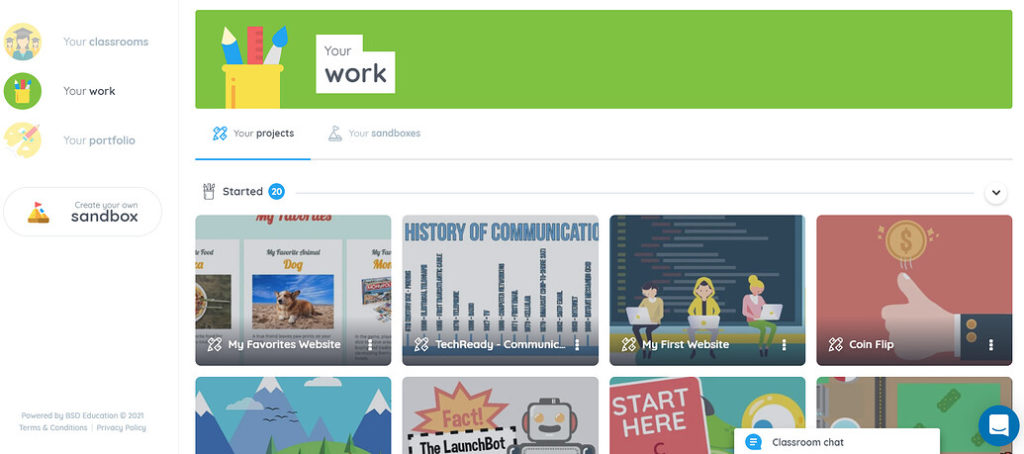
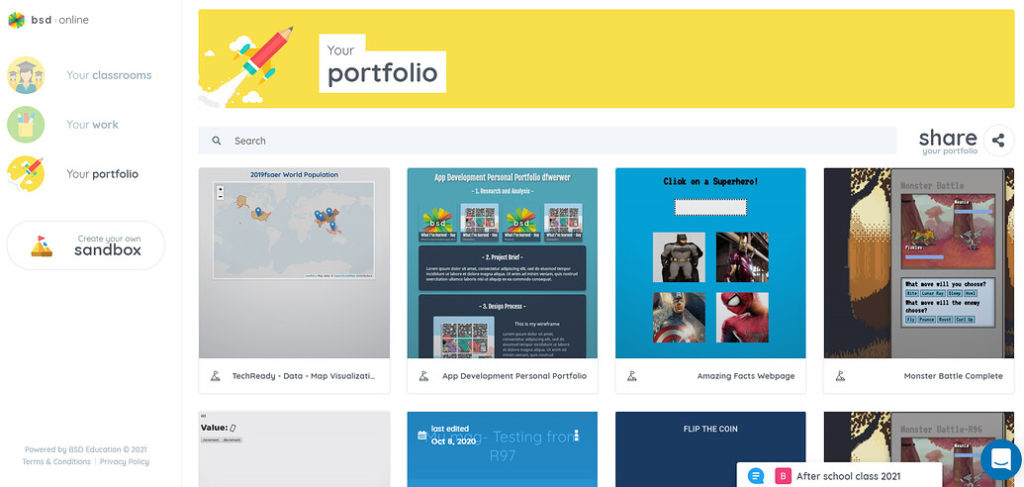
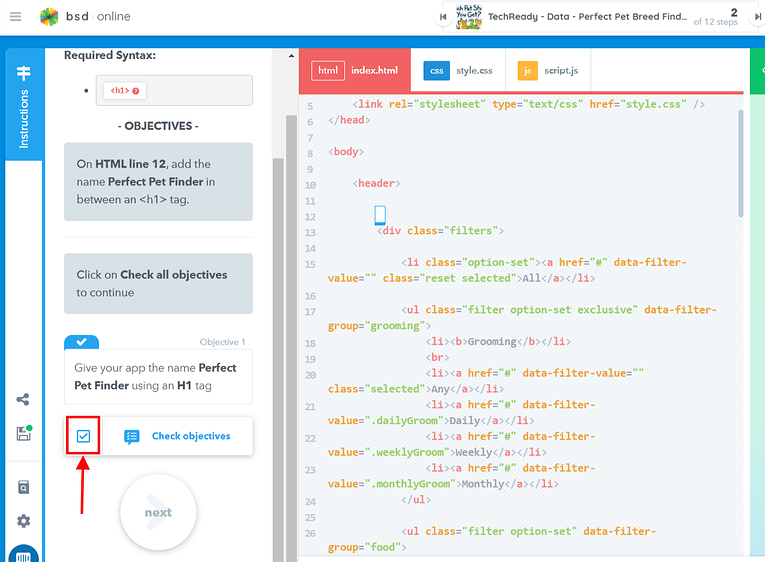
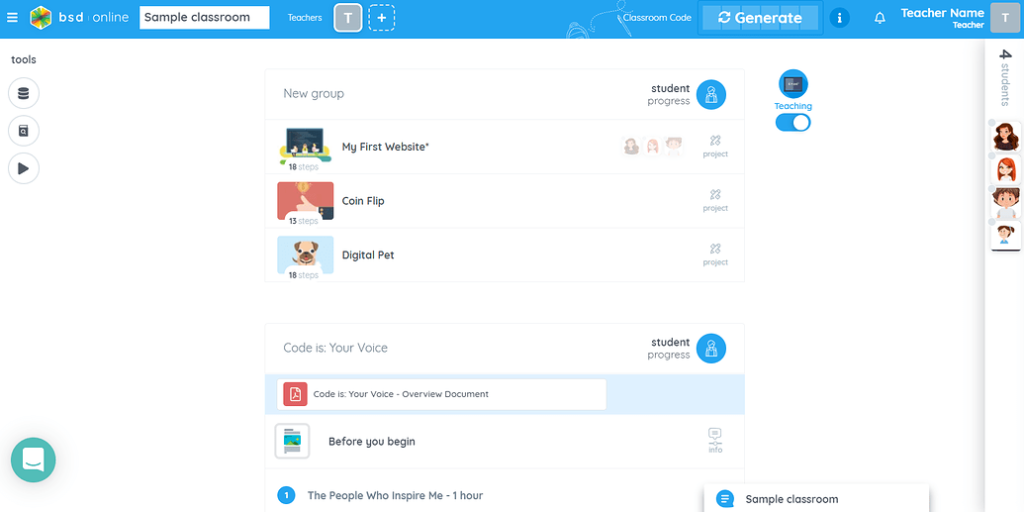
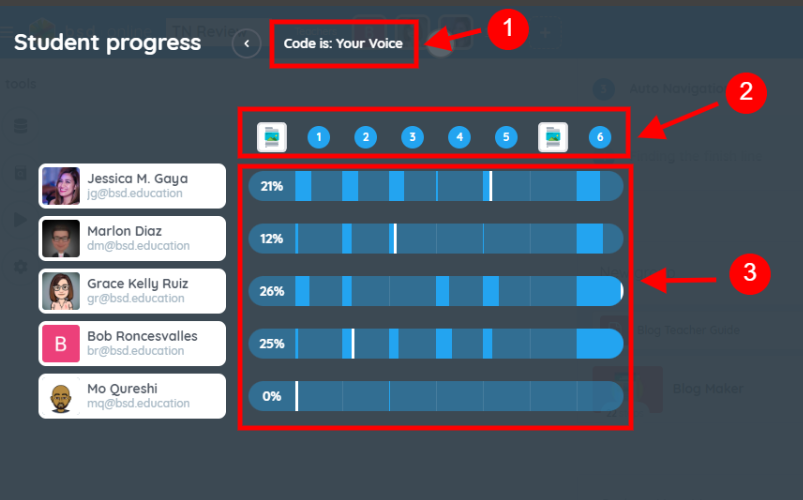
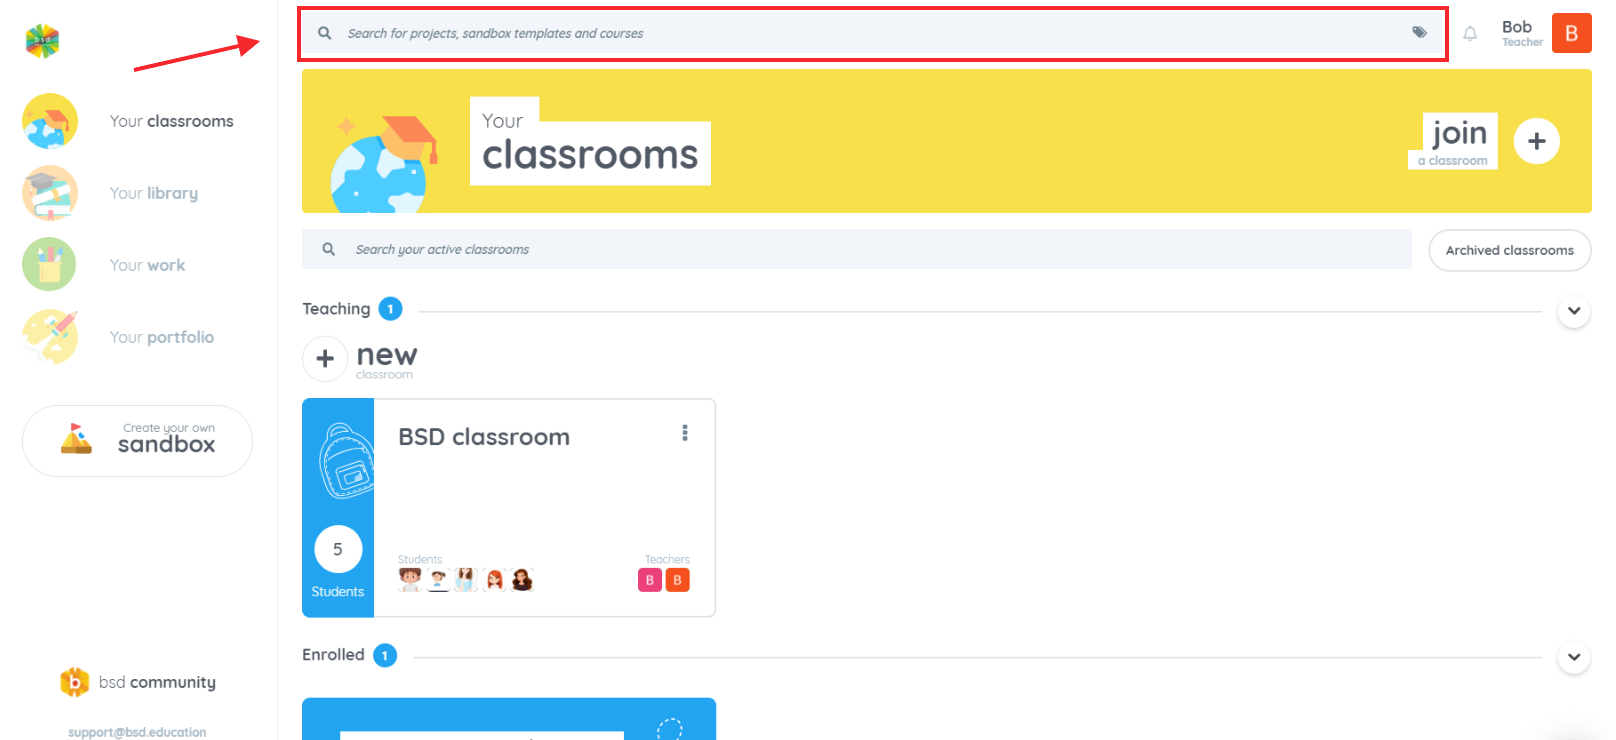
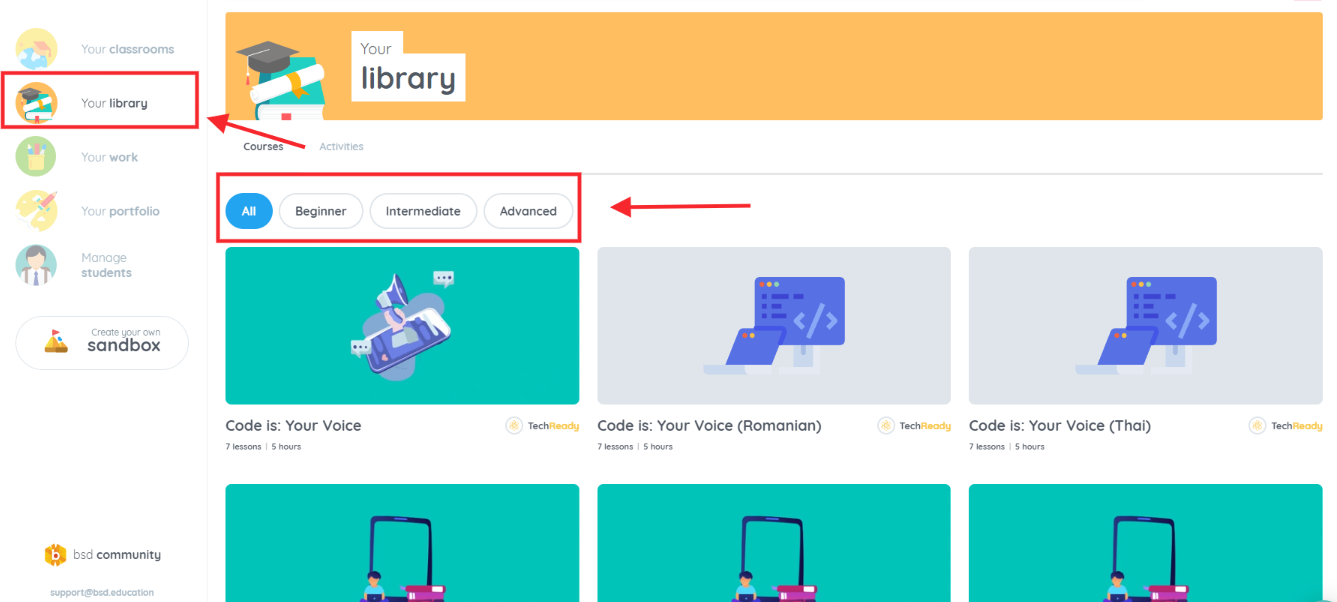
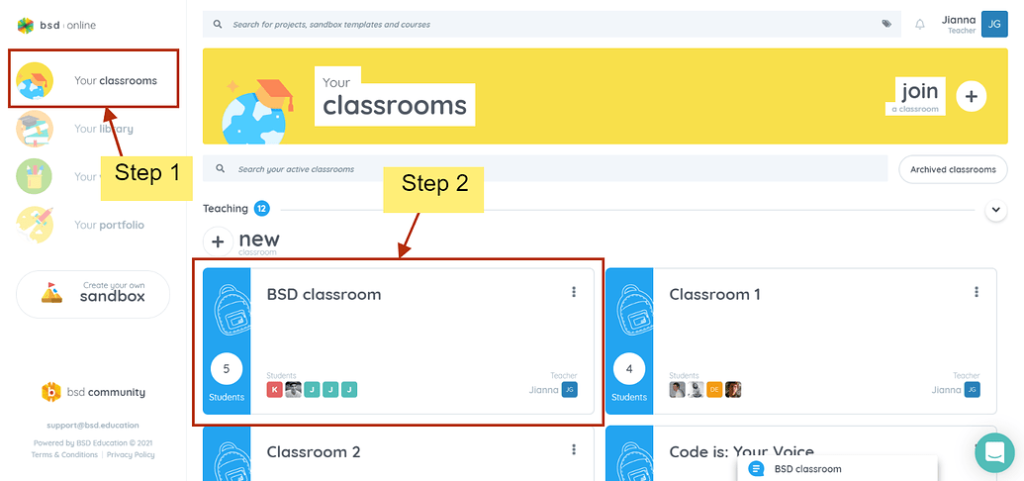
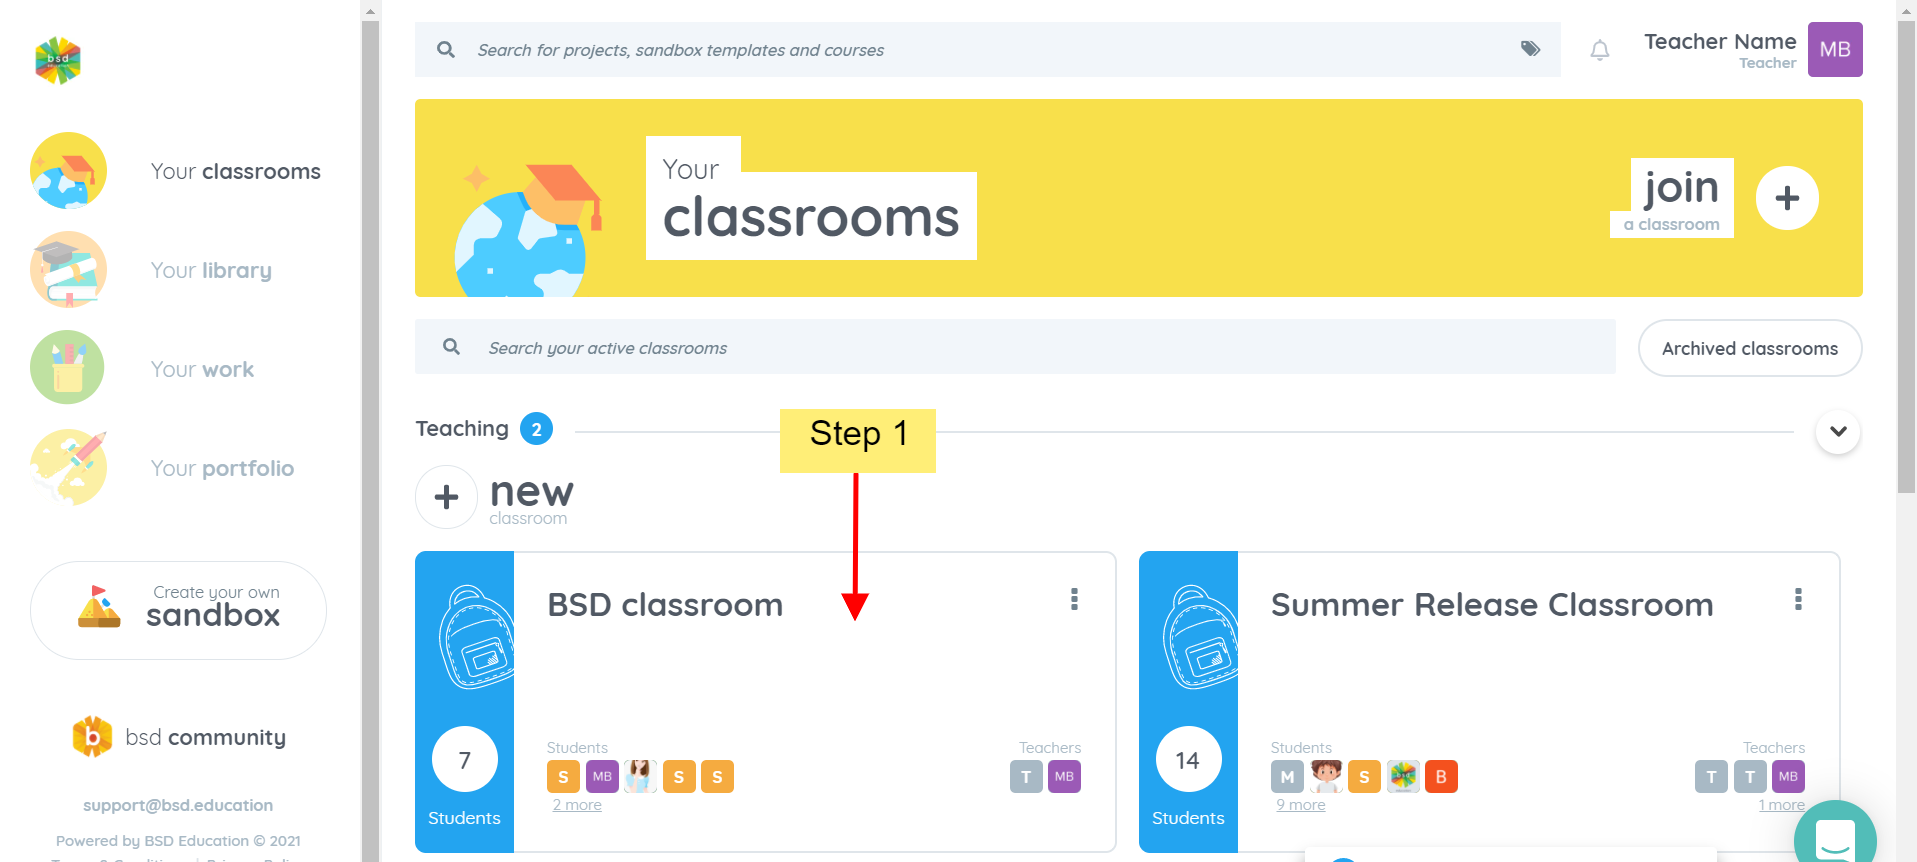
  1. On your home page, you will see the main menu section on the left side panel, click “Your library”. And after that, the courses and activities available in your organization will appear.
Lib1
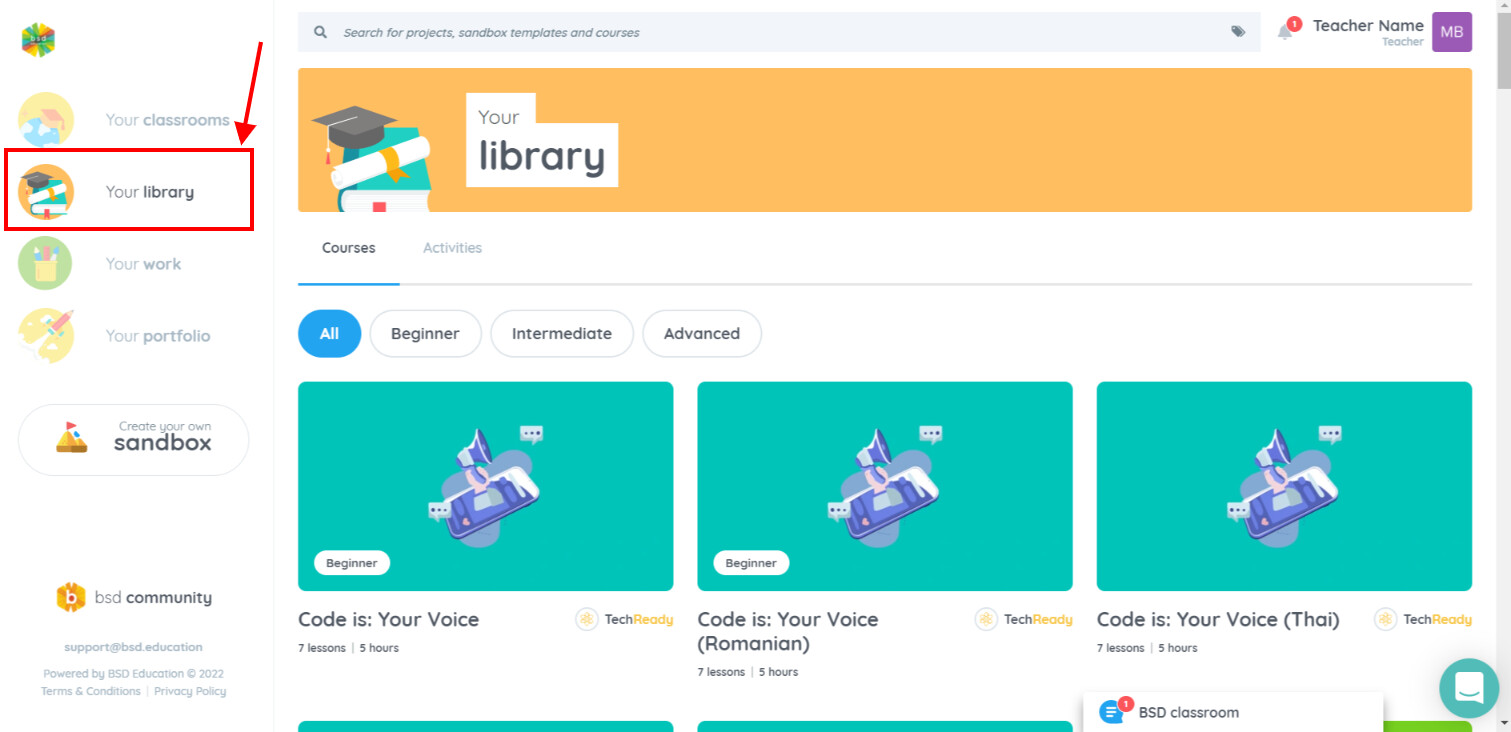
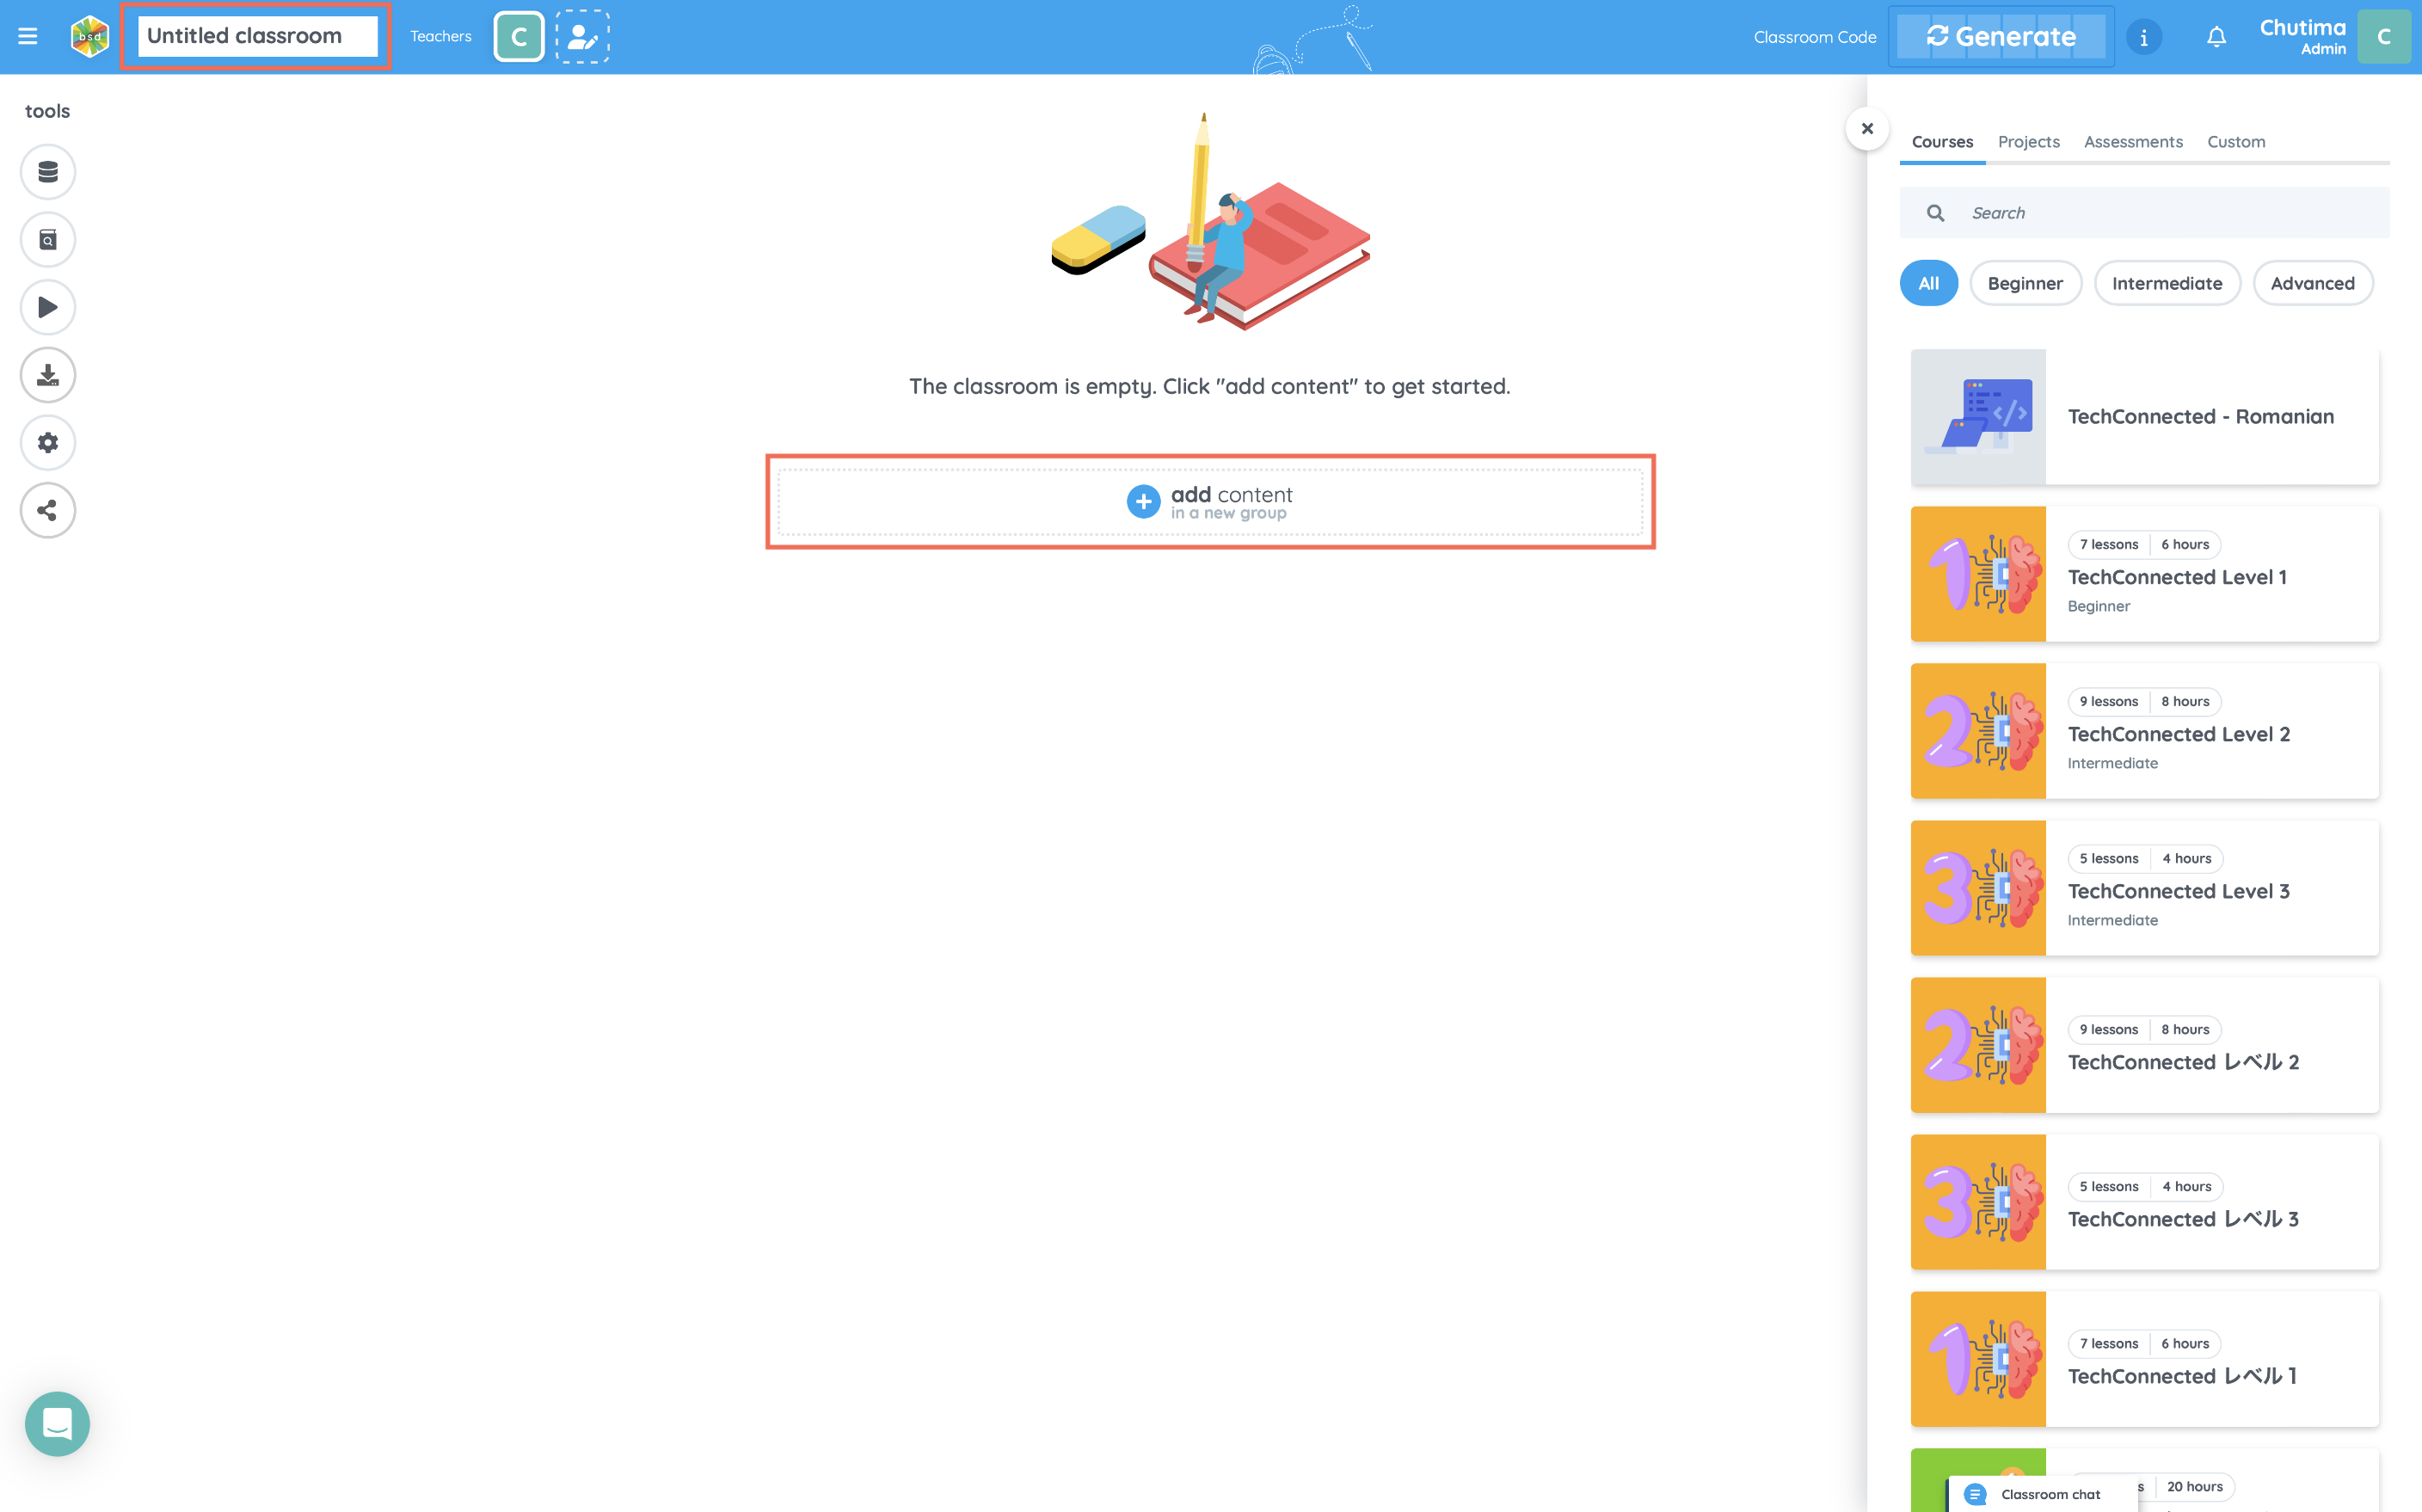
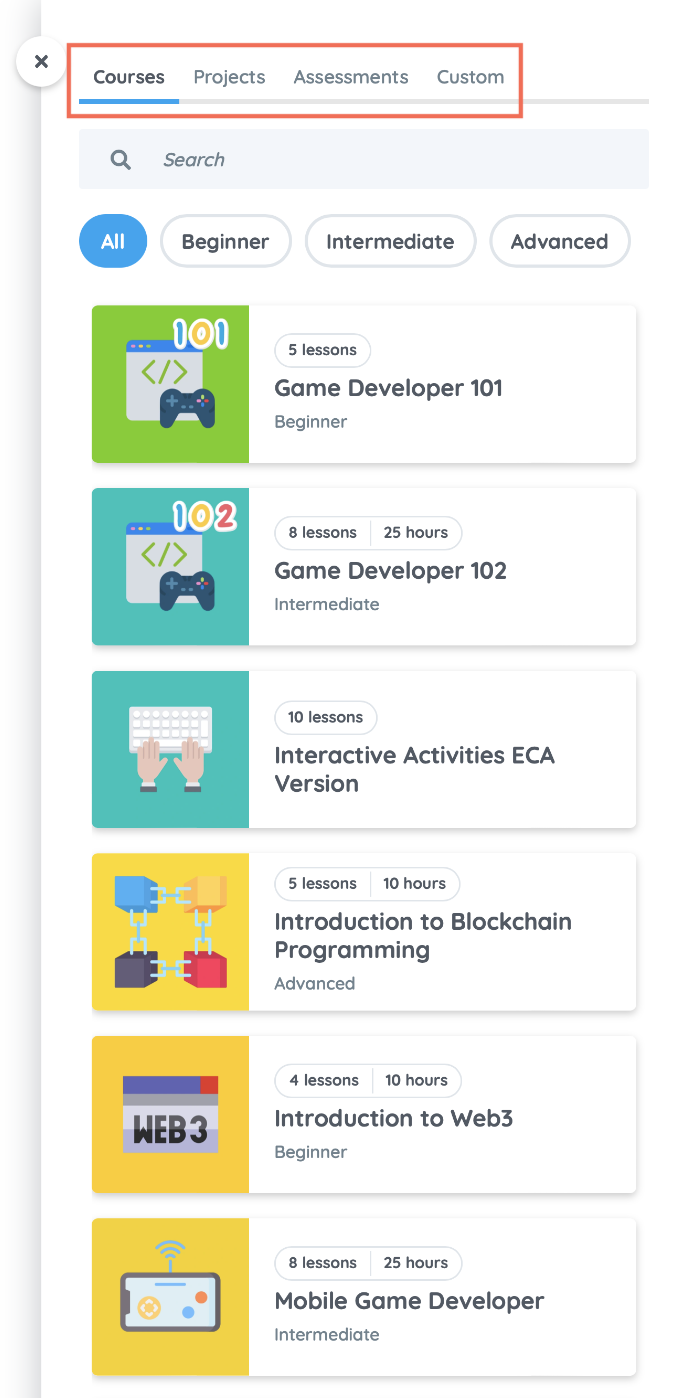
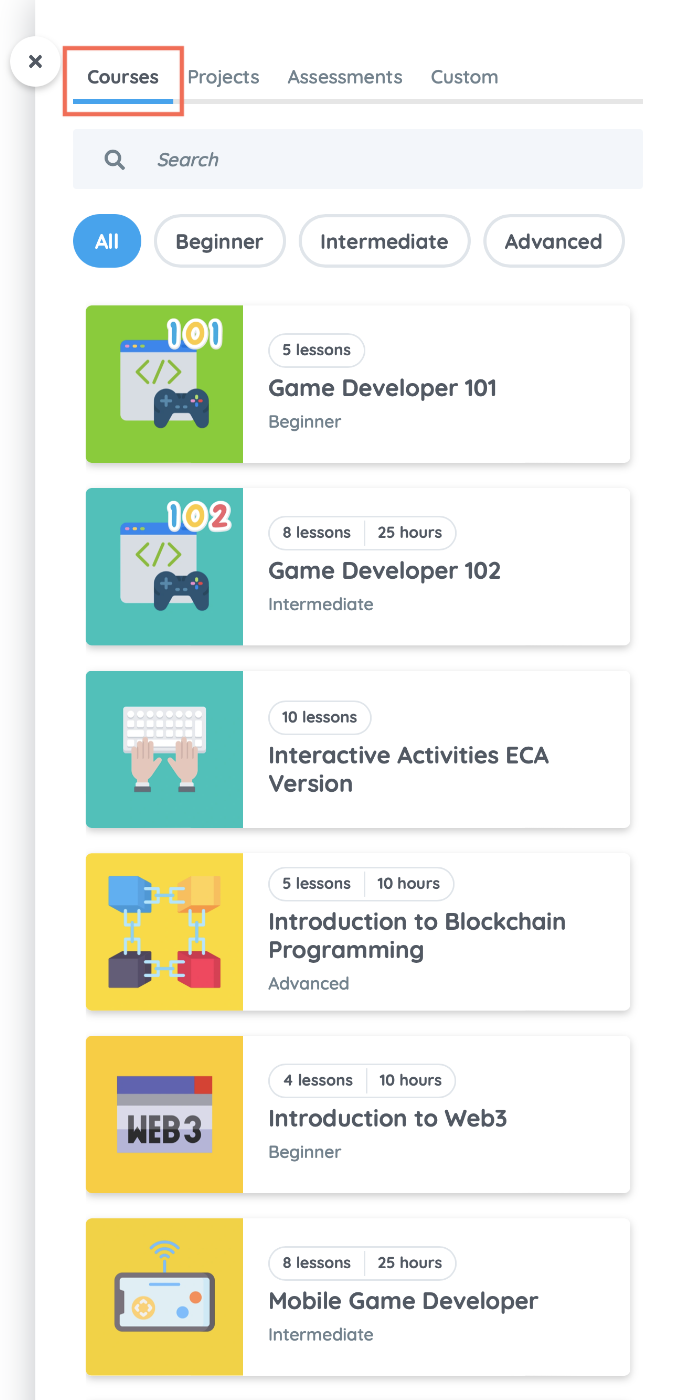
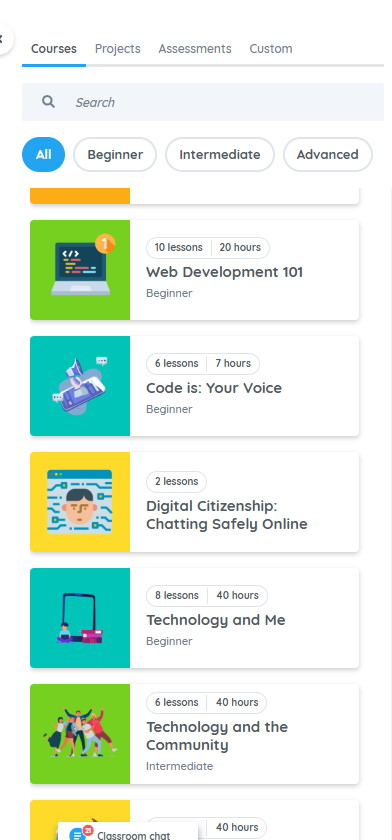
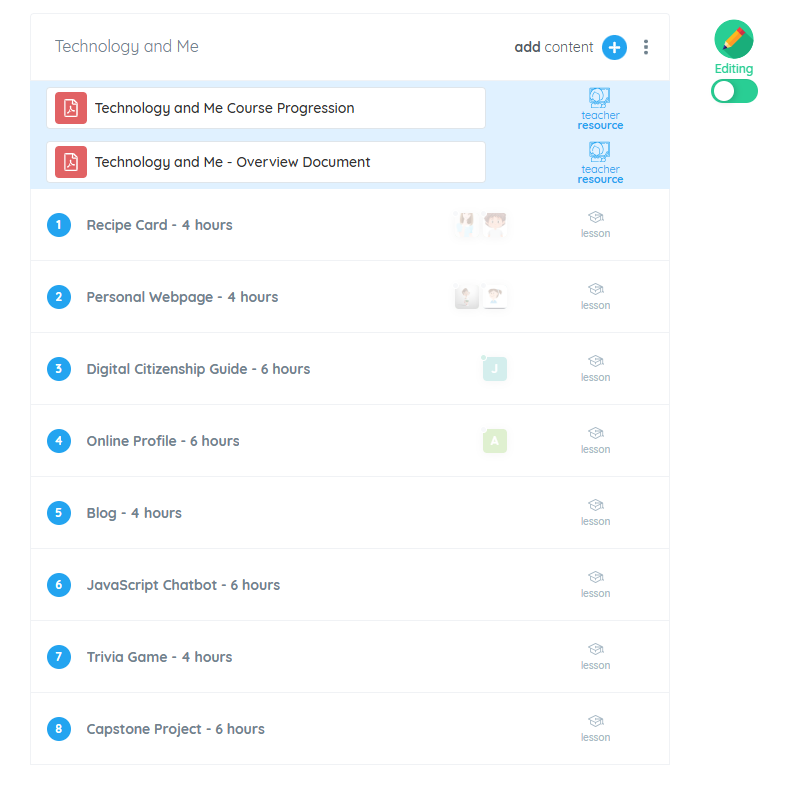
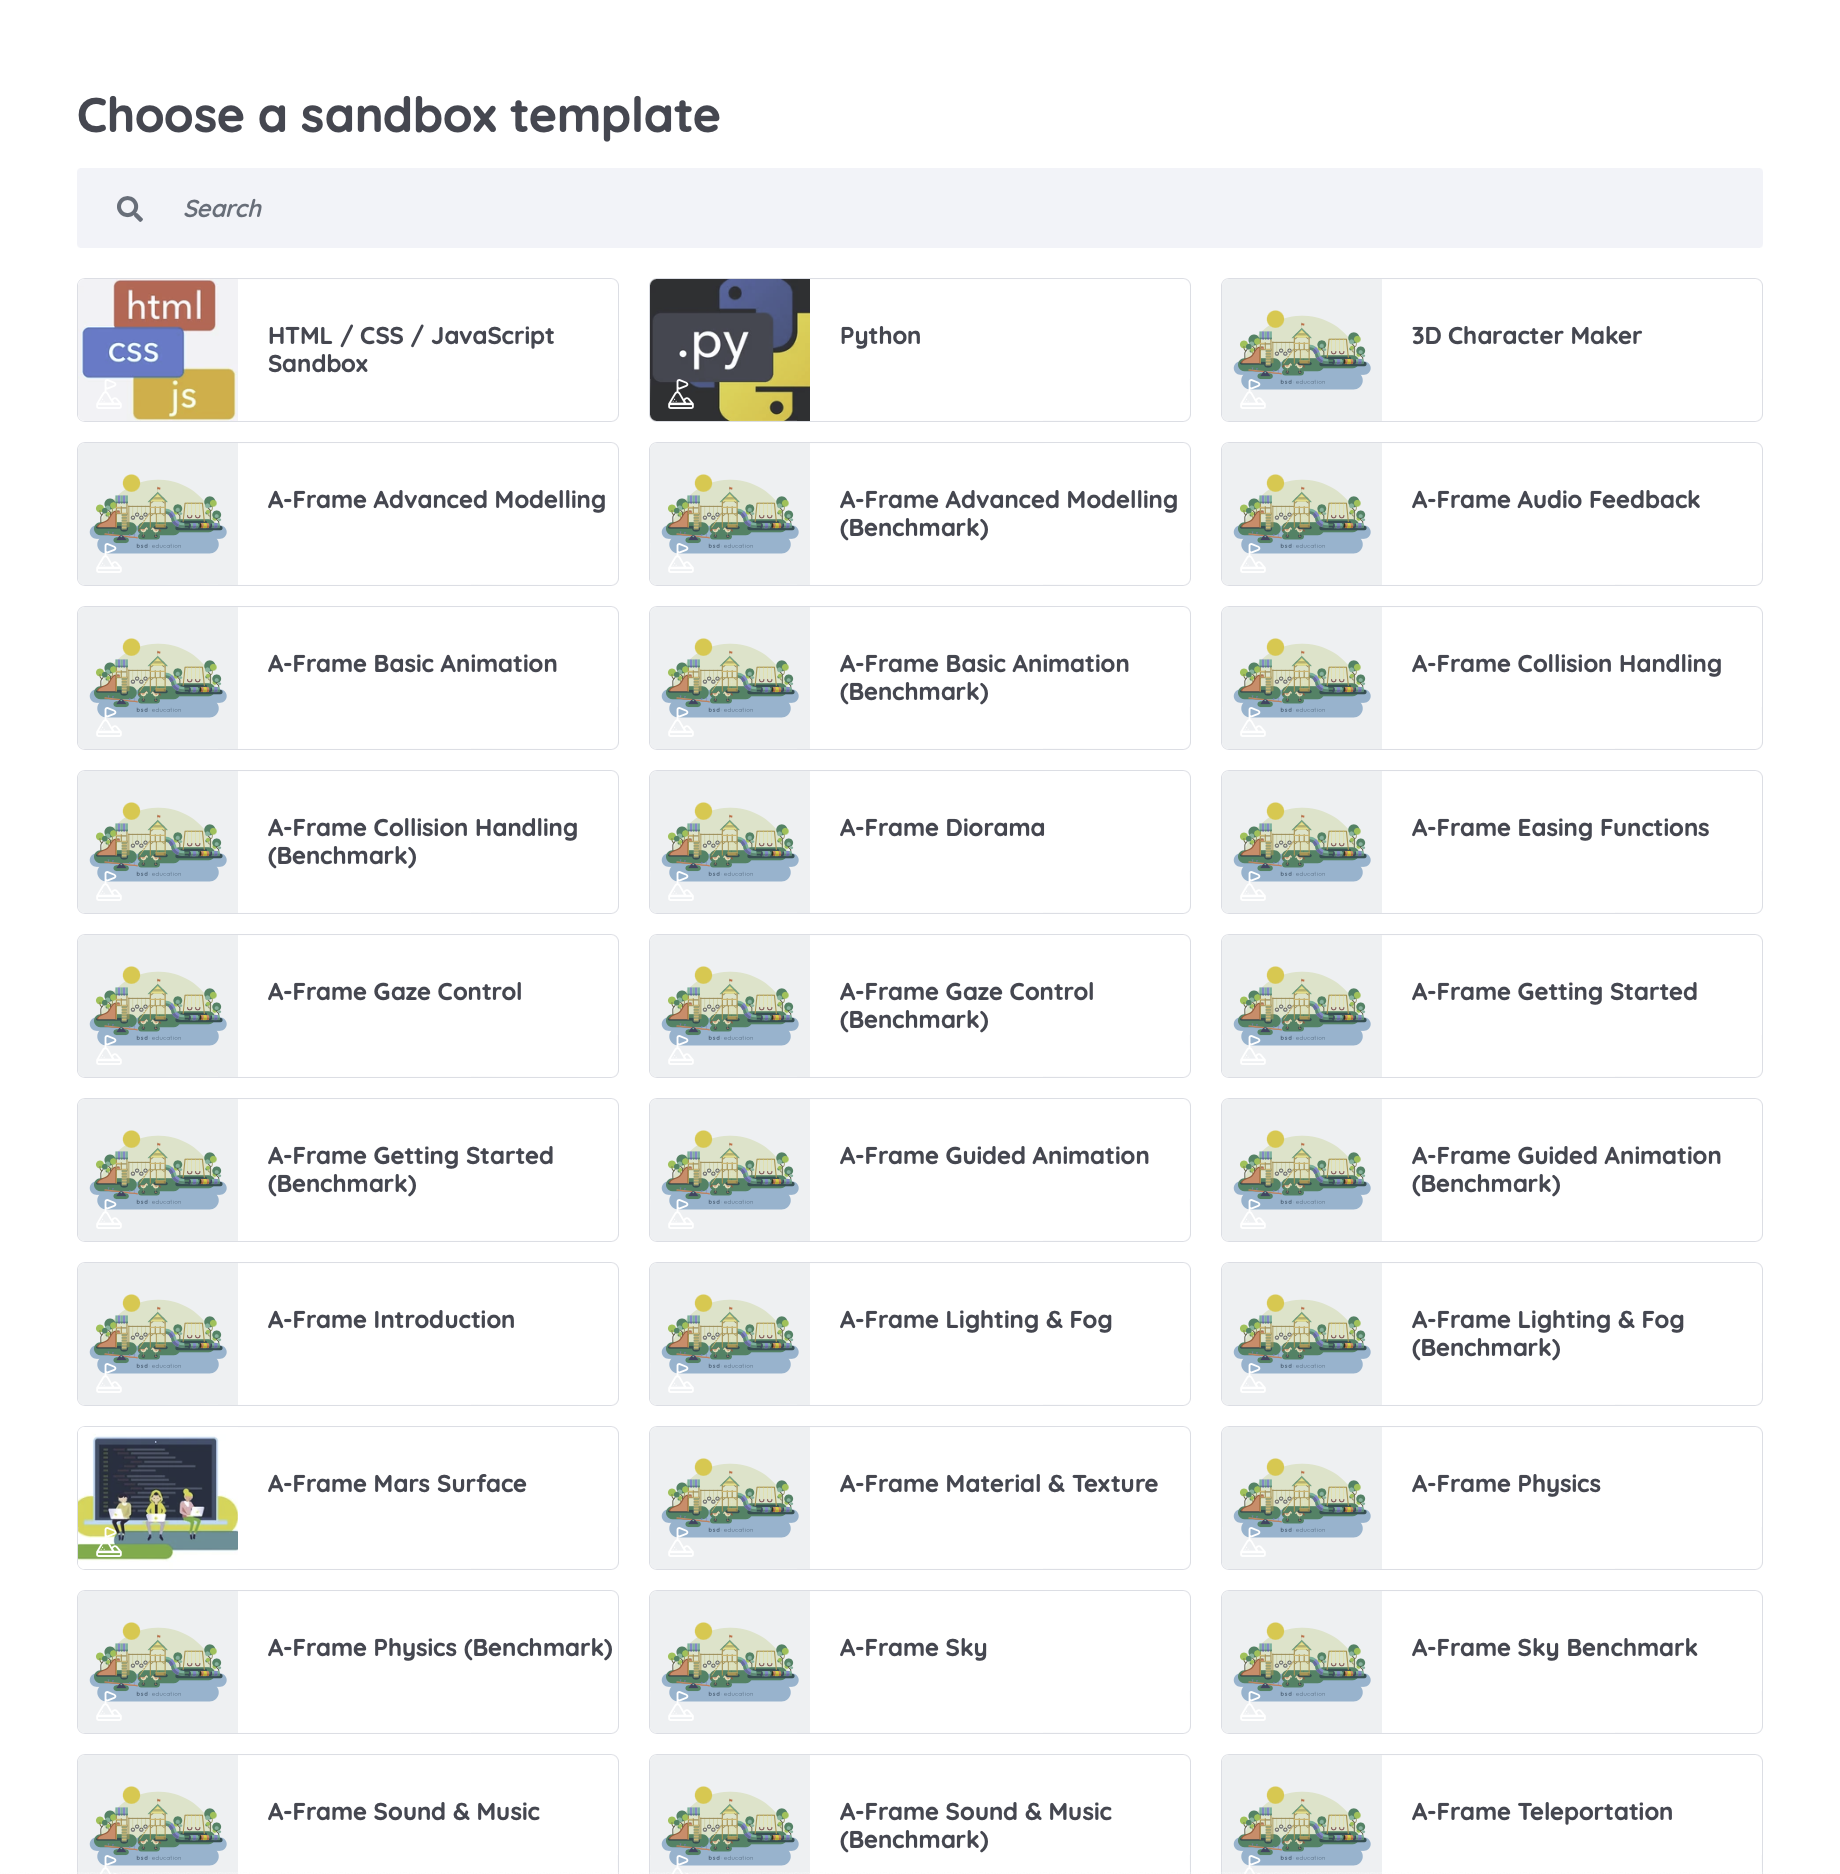
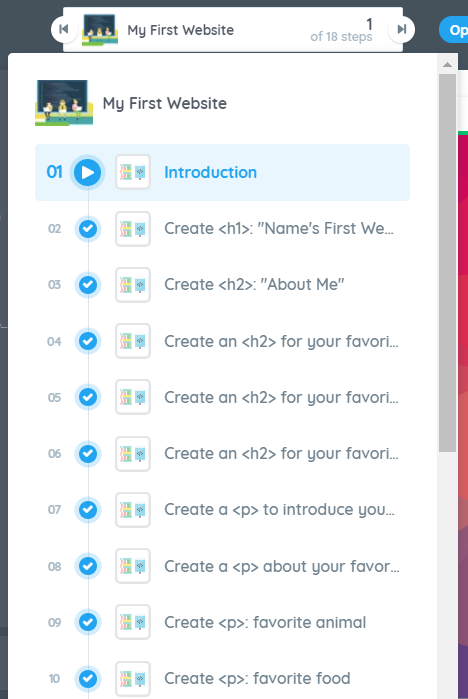
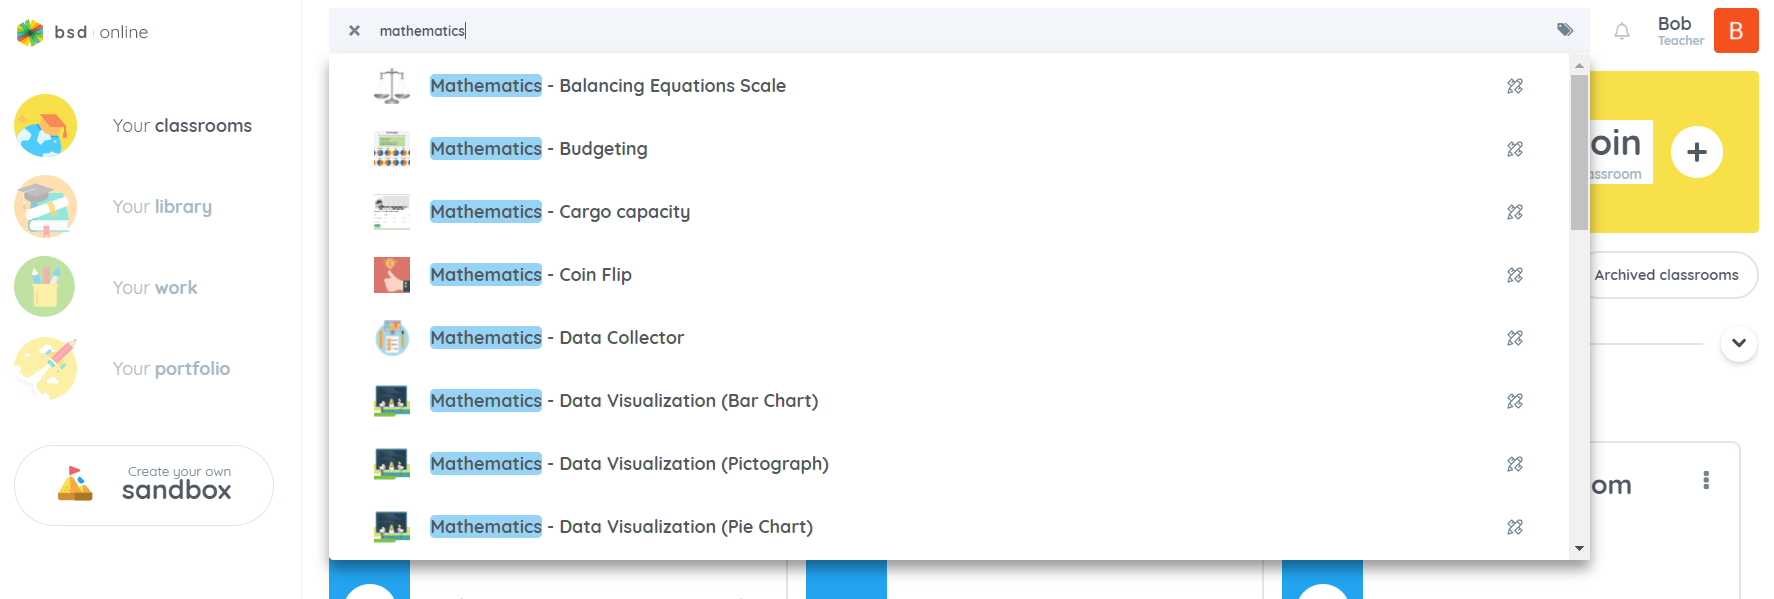
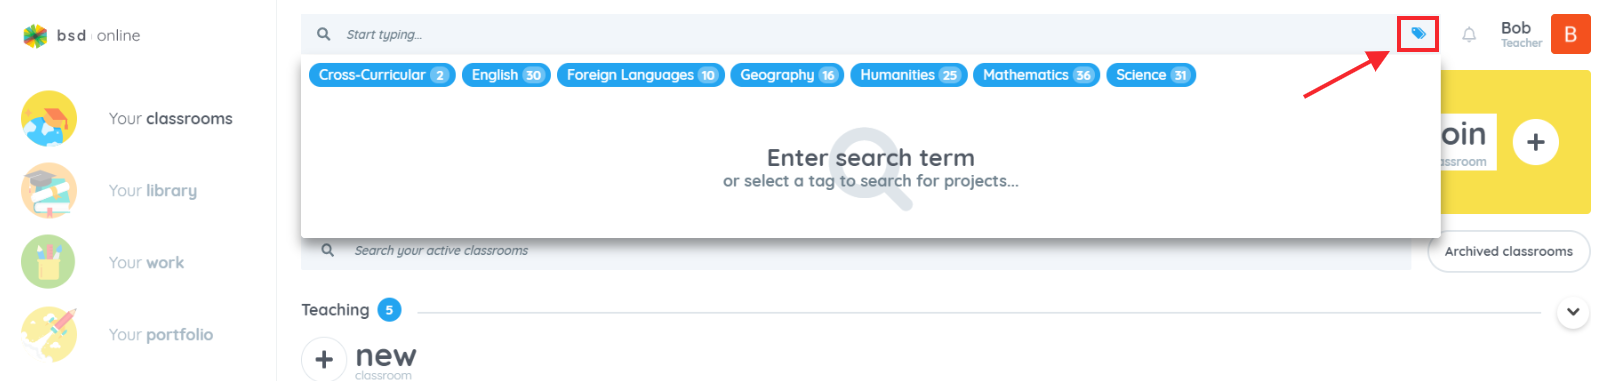
  1. The new design shows courses laid out in a grid view. Course images are now front and center and new information such as the course level and course duration are also displayed. This feature also introduces the concept of activity courses which are an unordered collection of projects. TechConnected courses have been assigned as activity courses. At this point, you can choose the course you want to add to your classroom.
Lib2
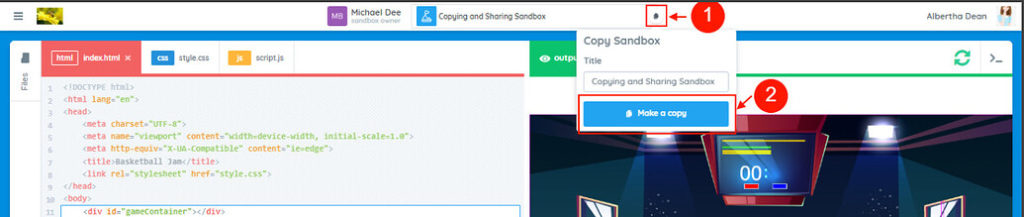
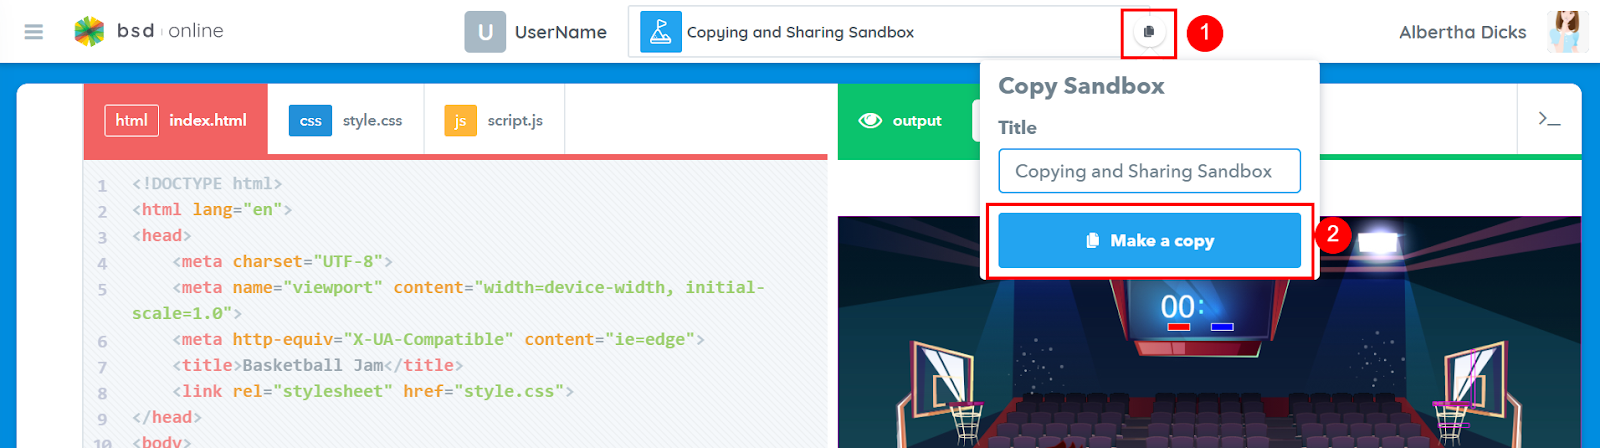
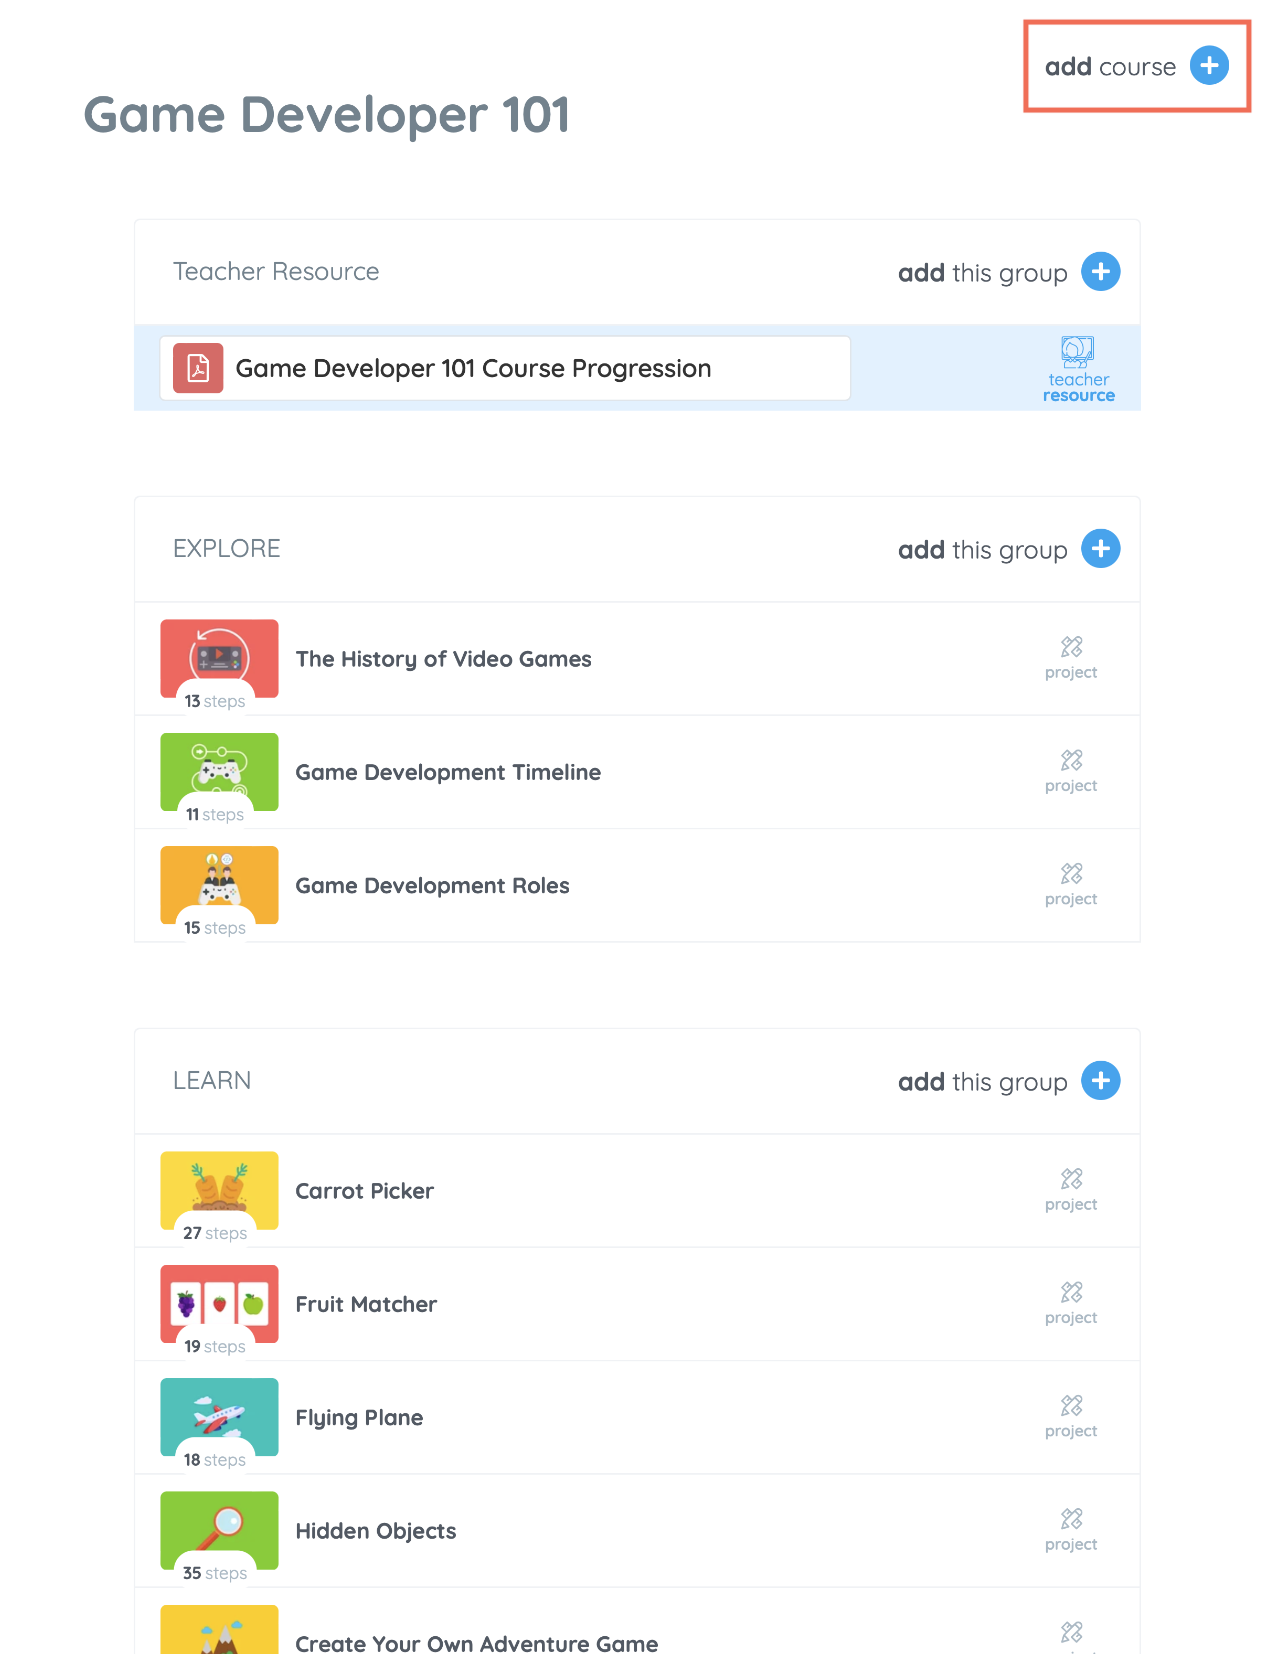
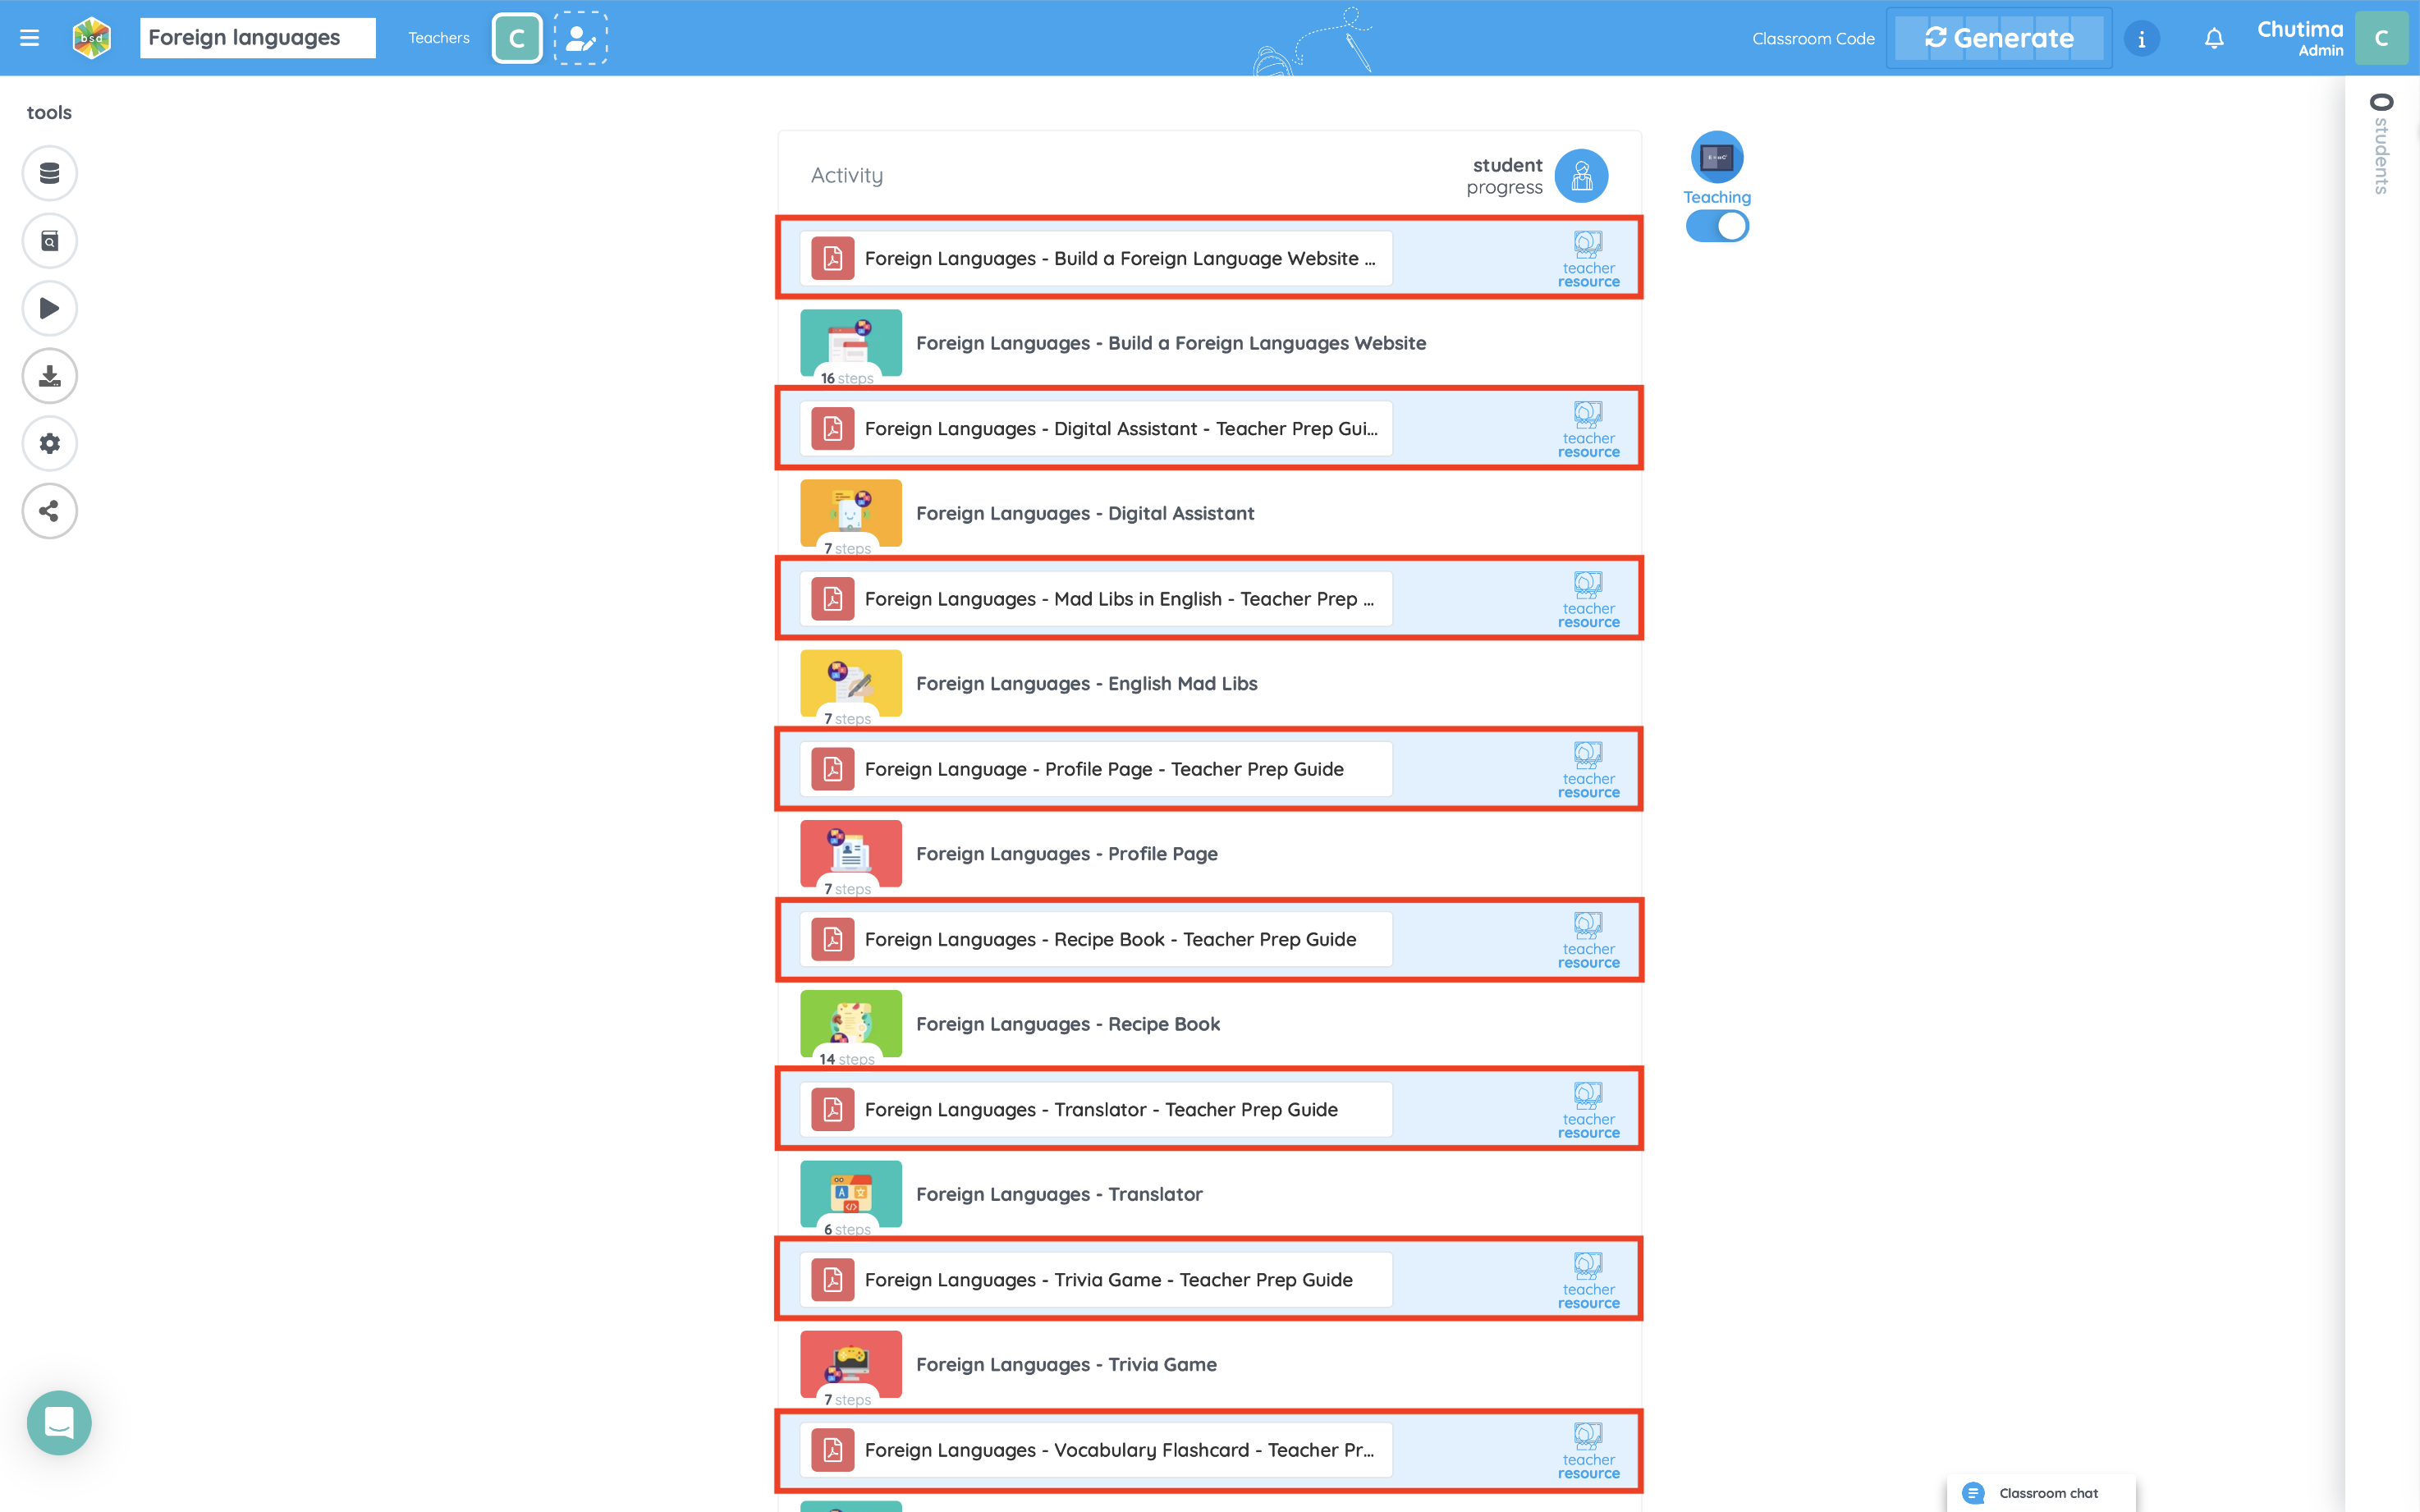
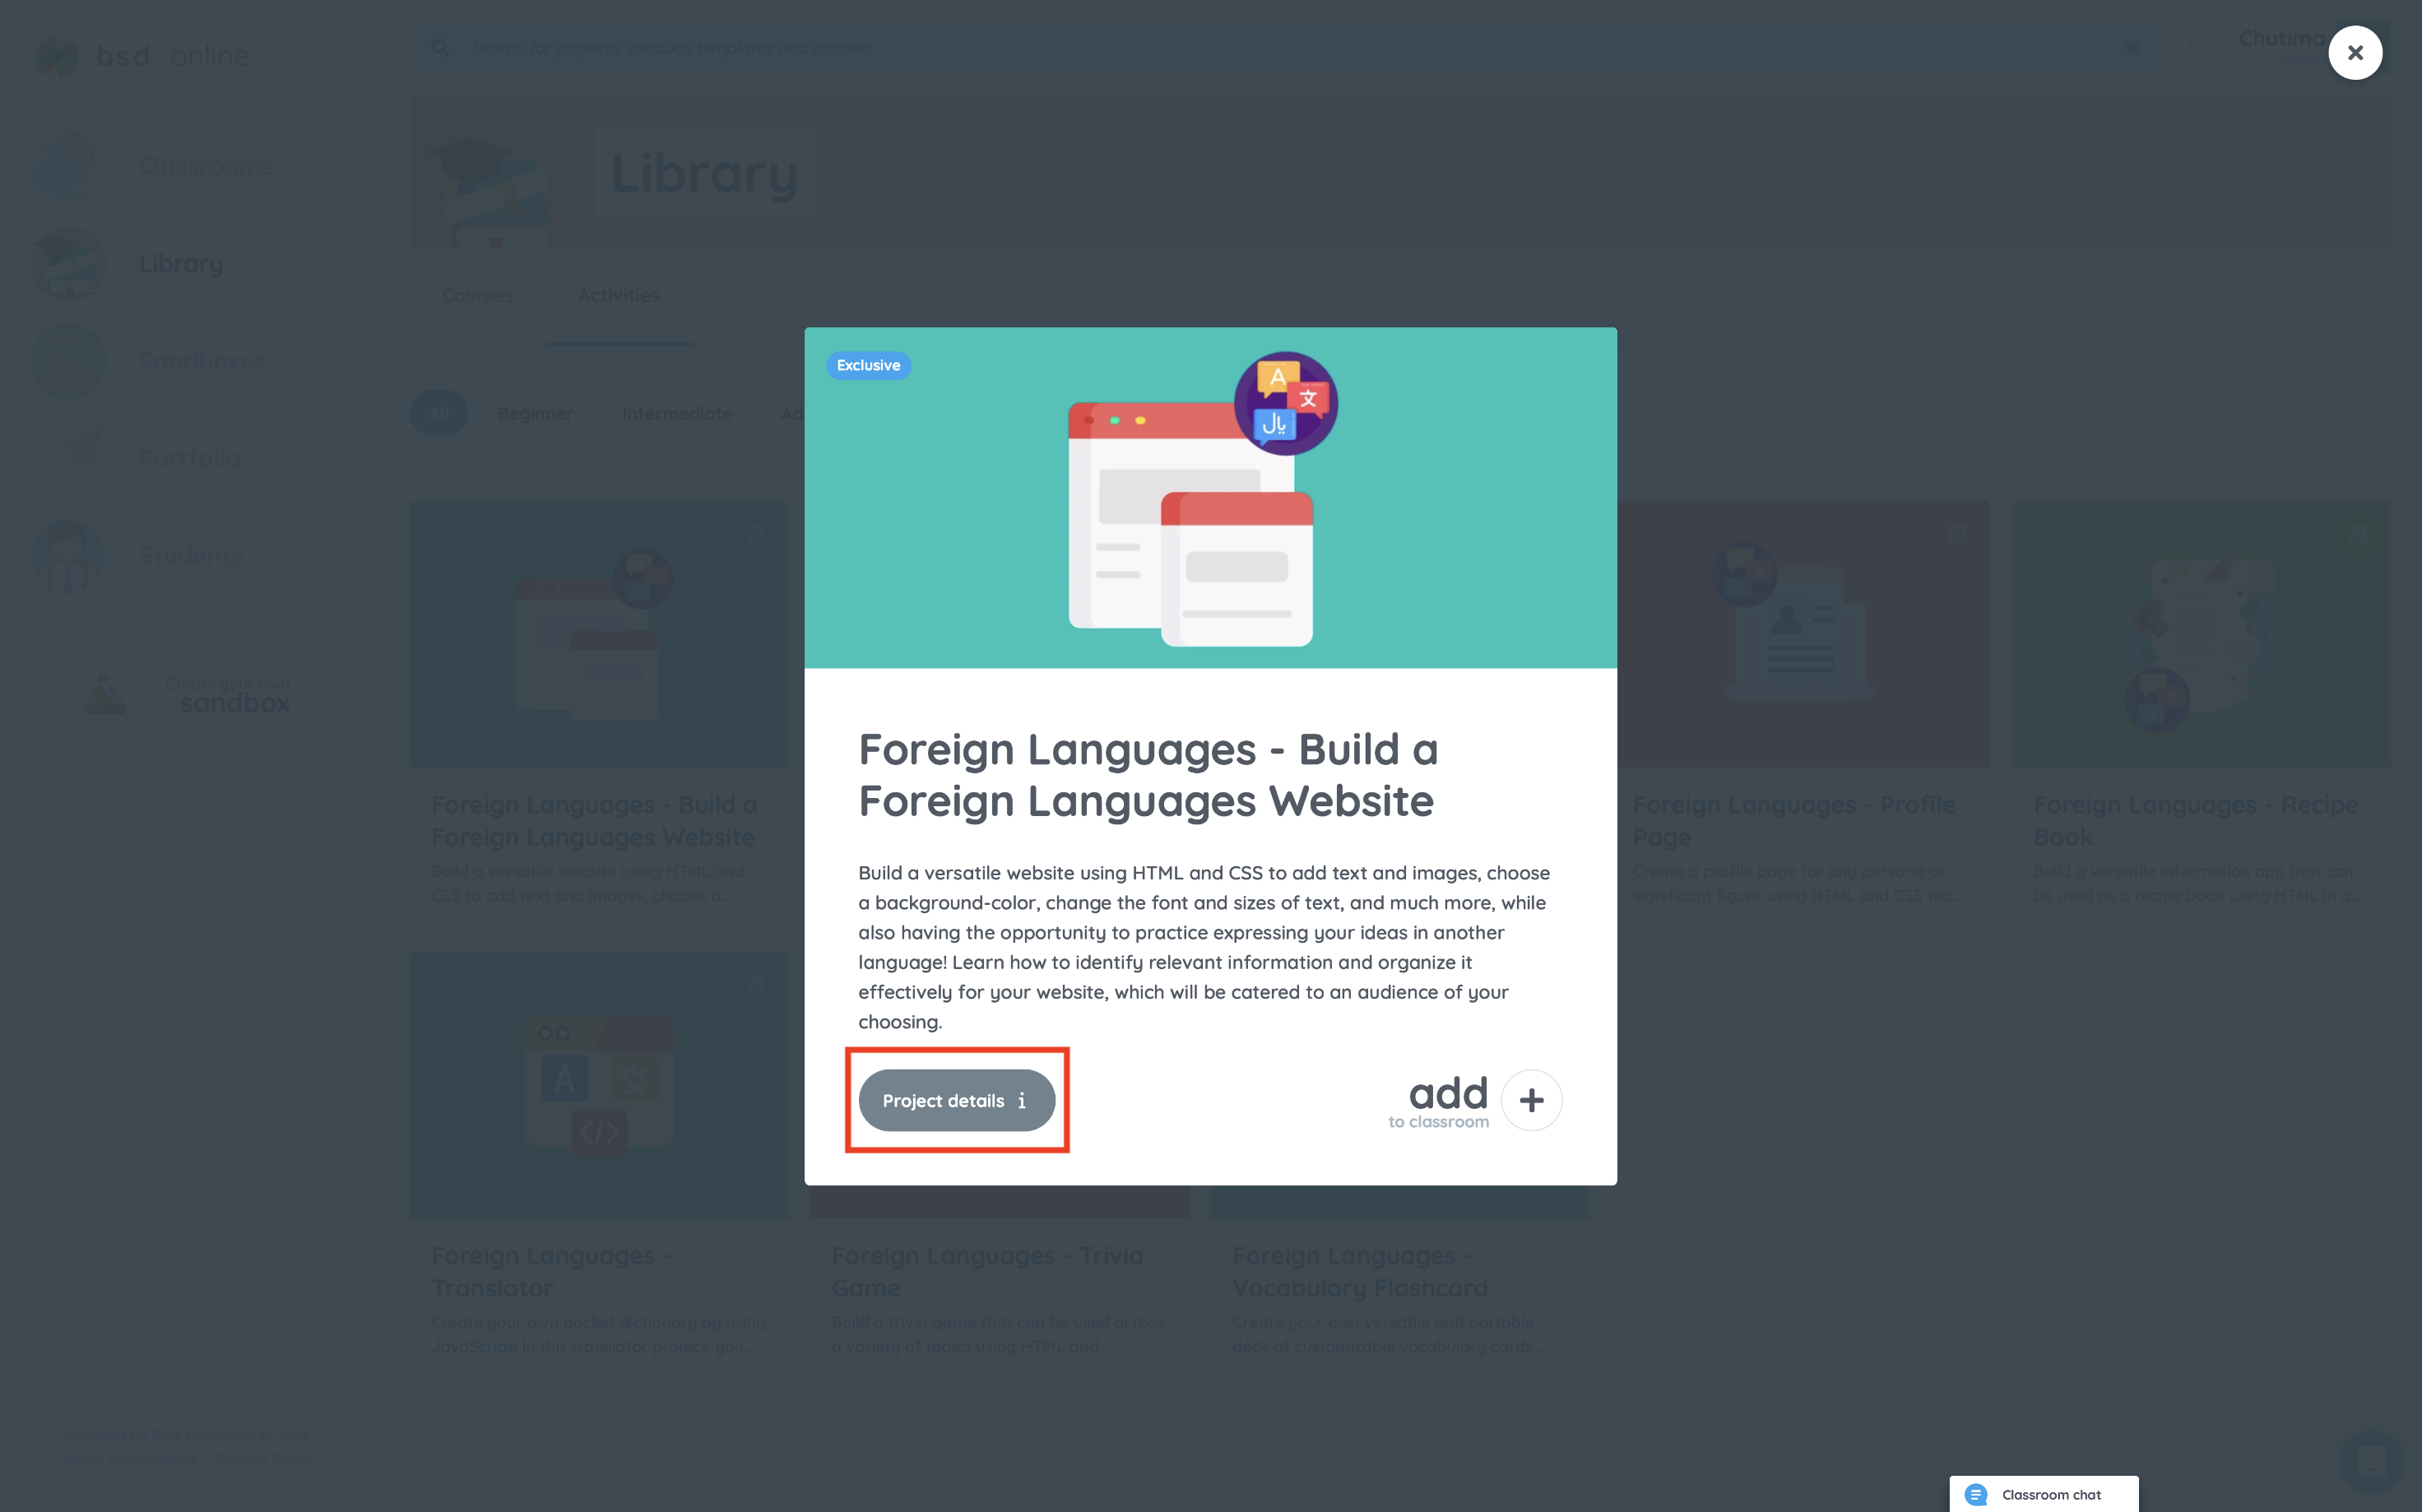
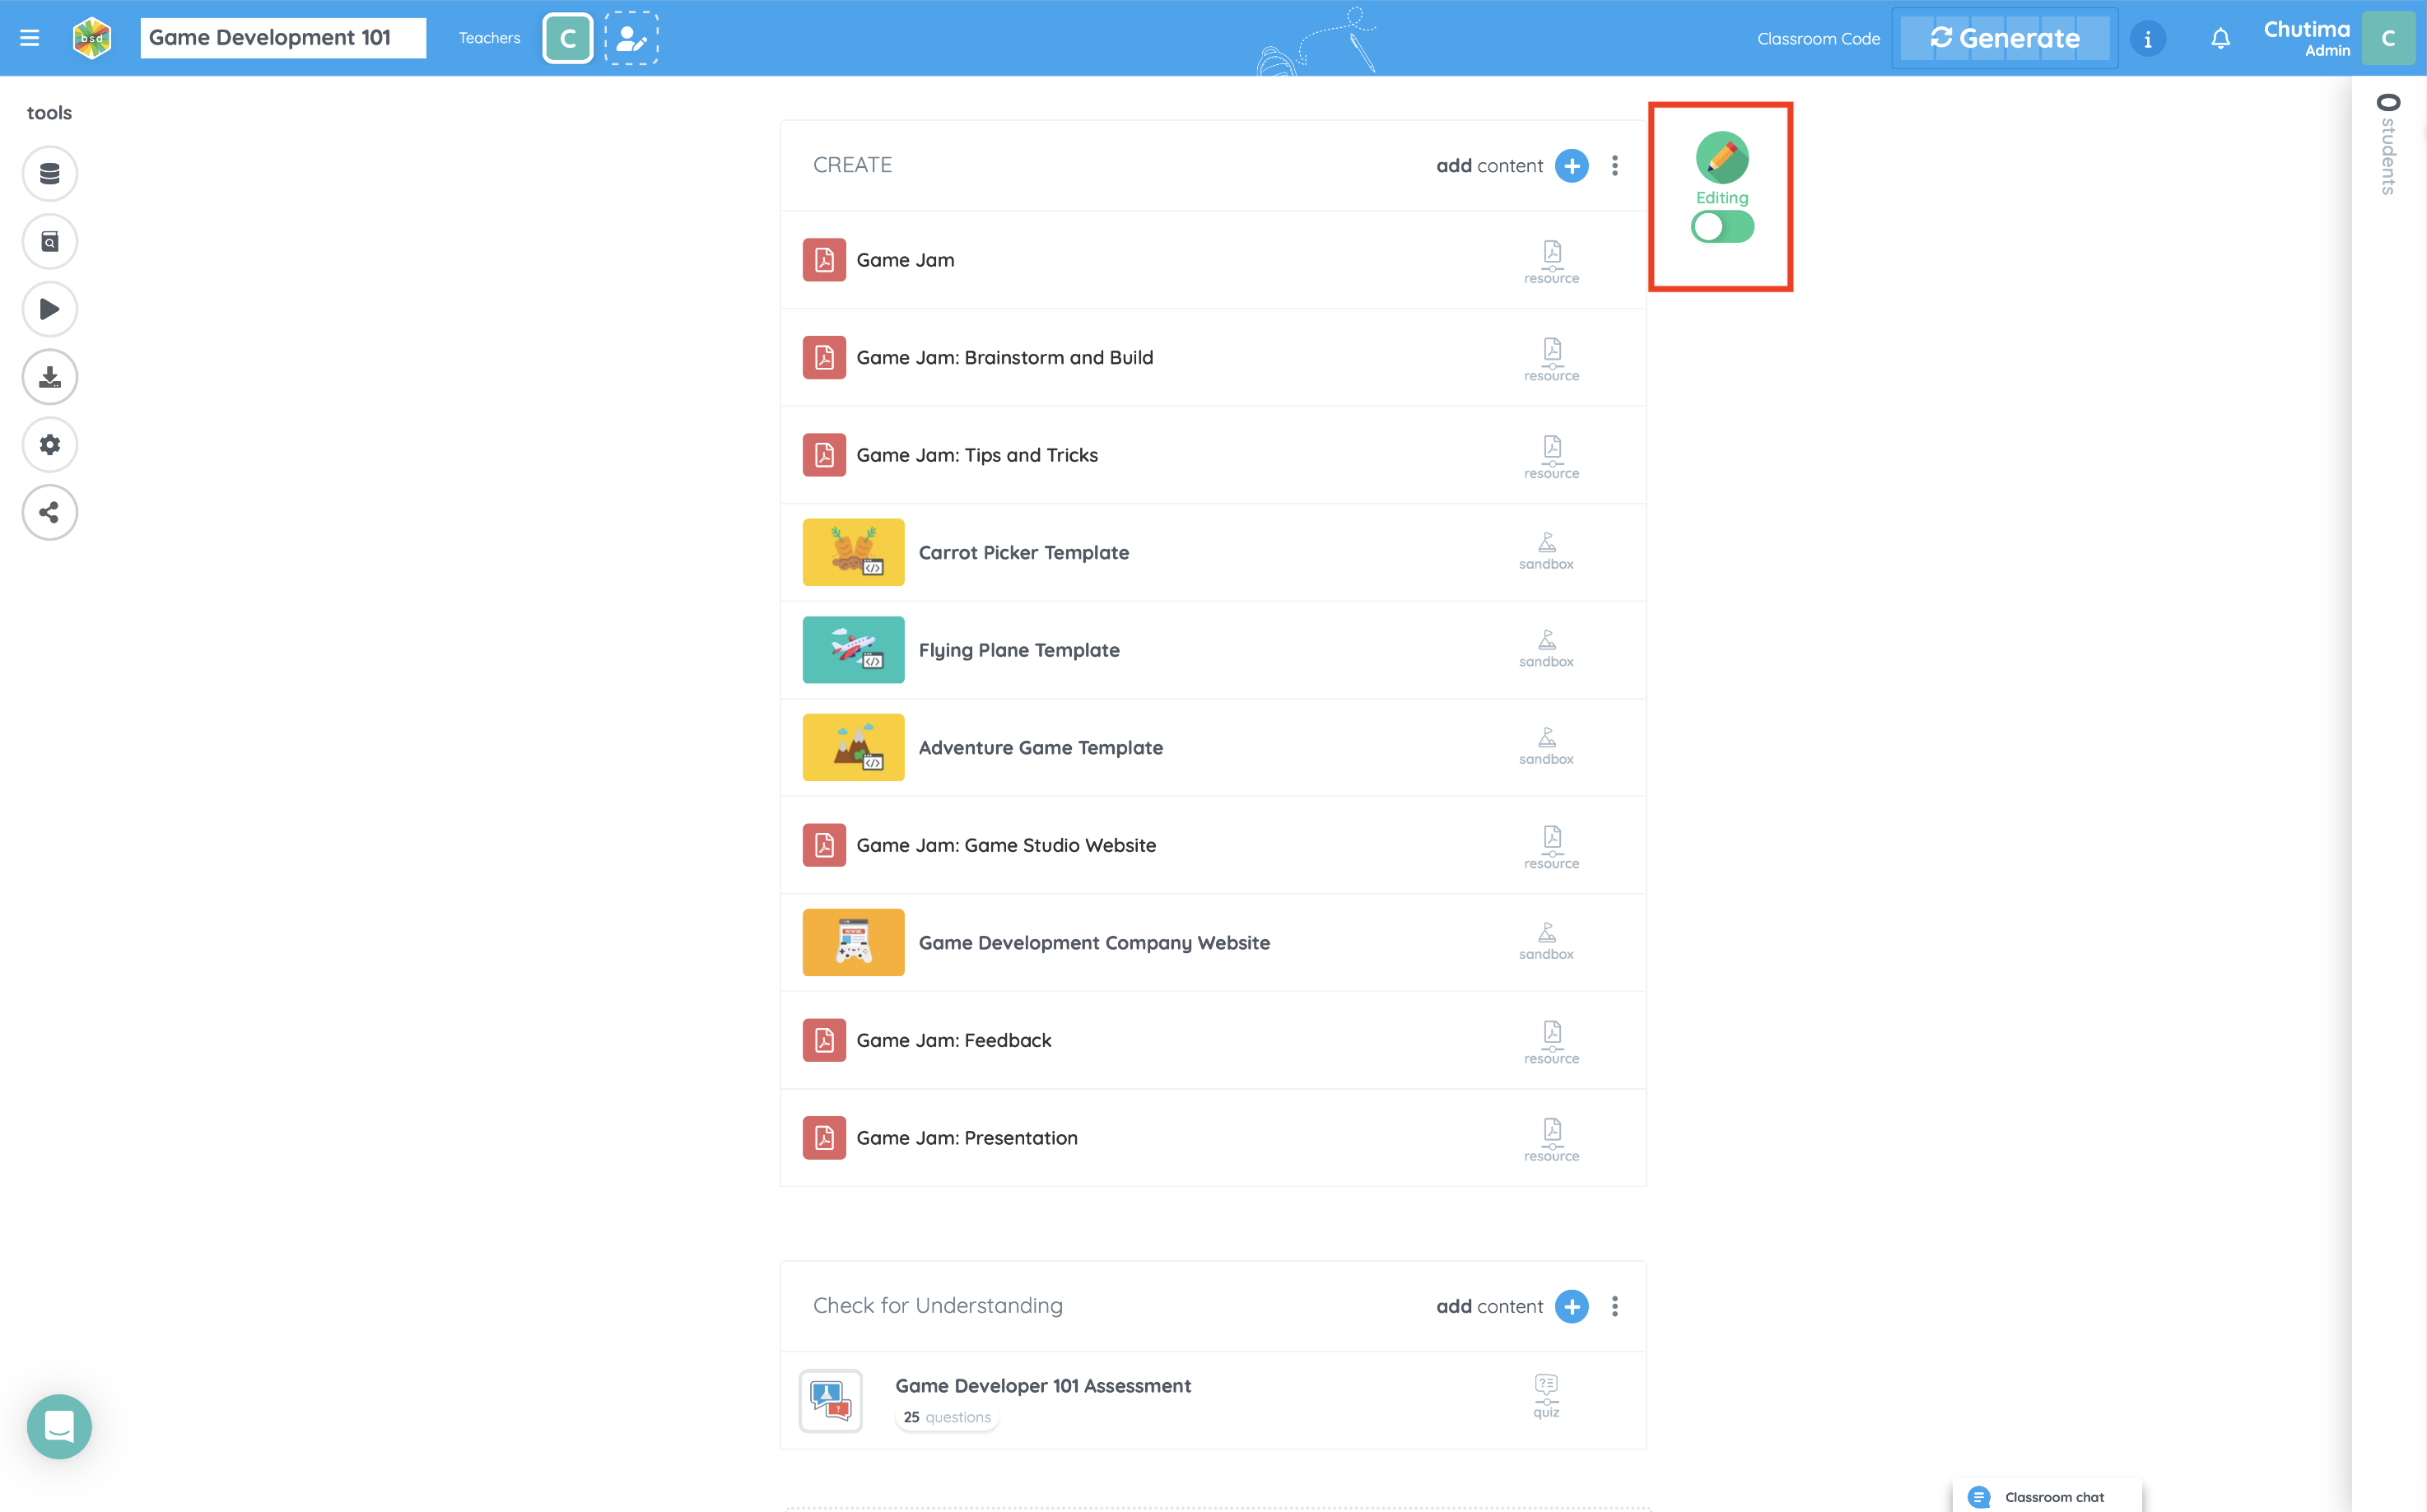
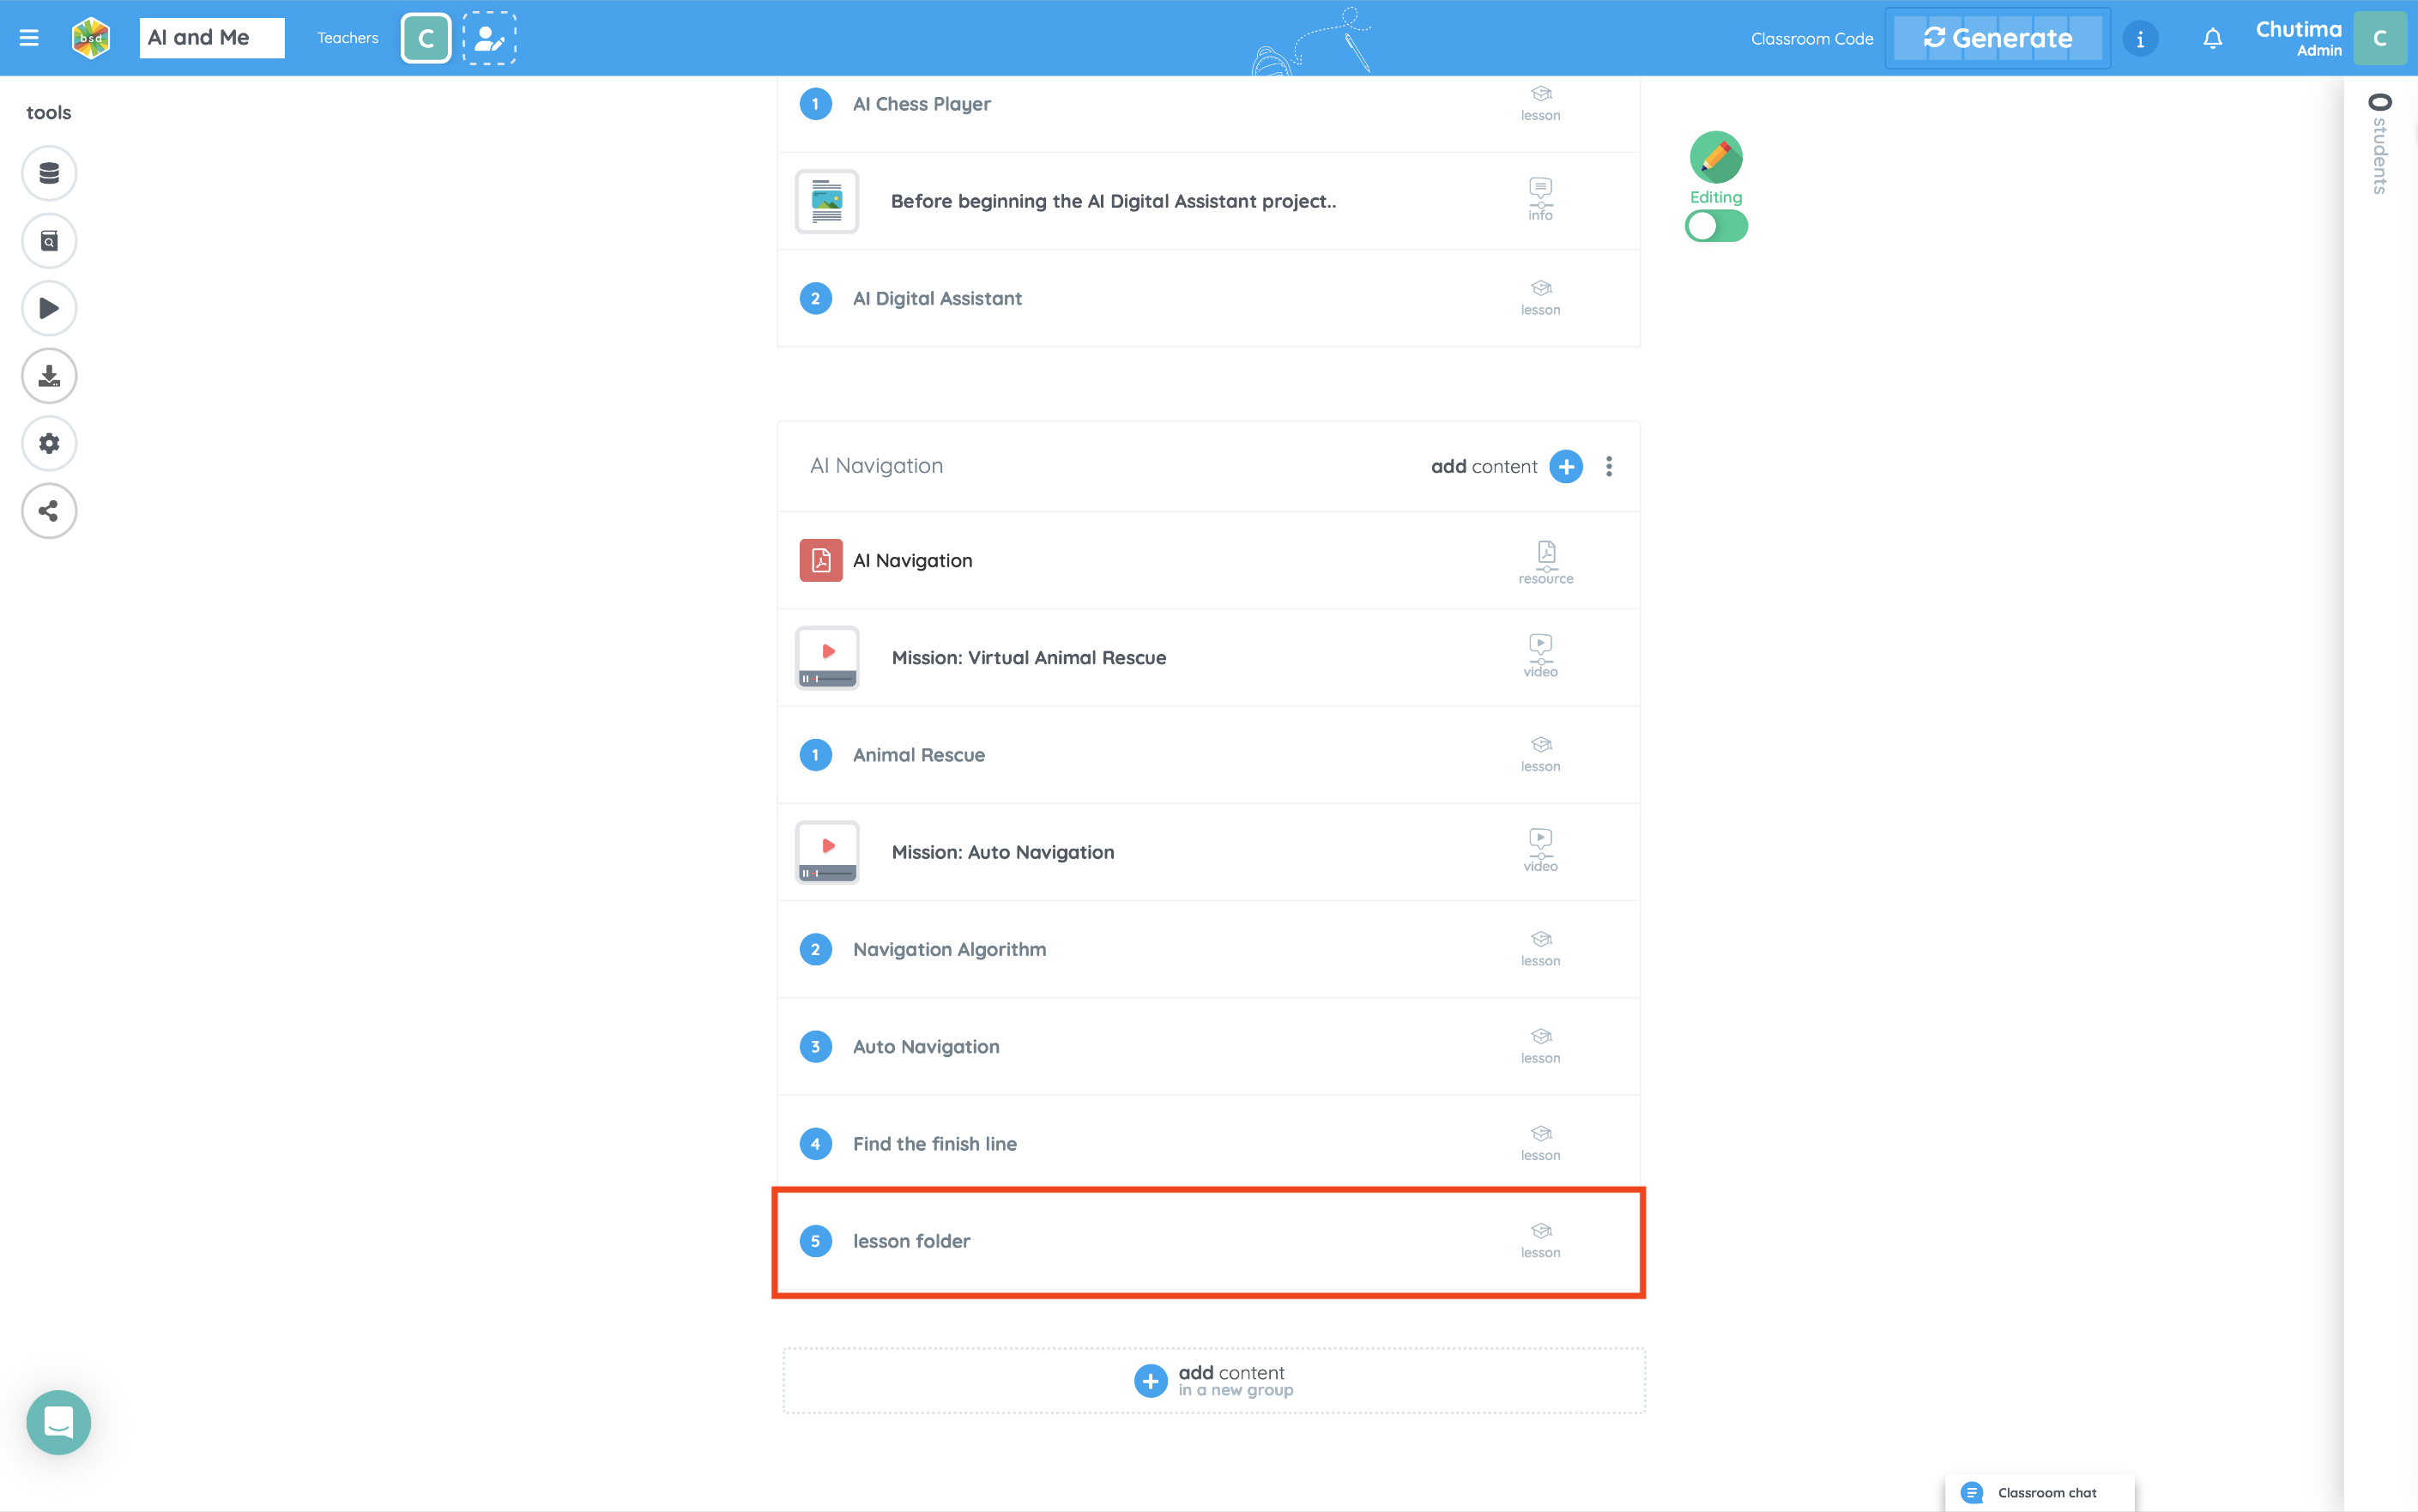
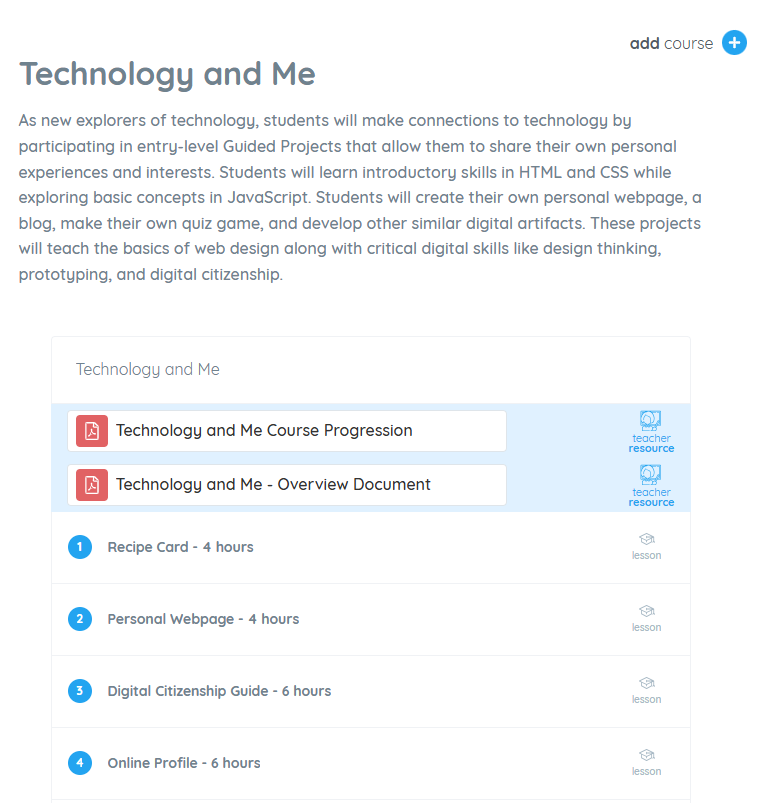
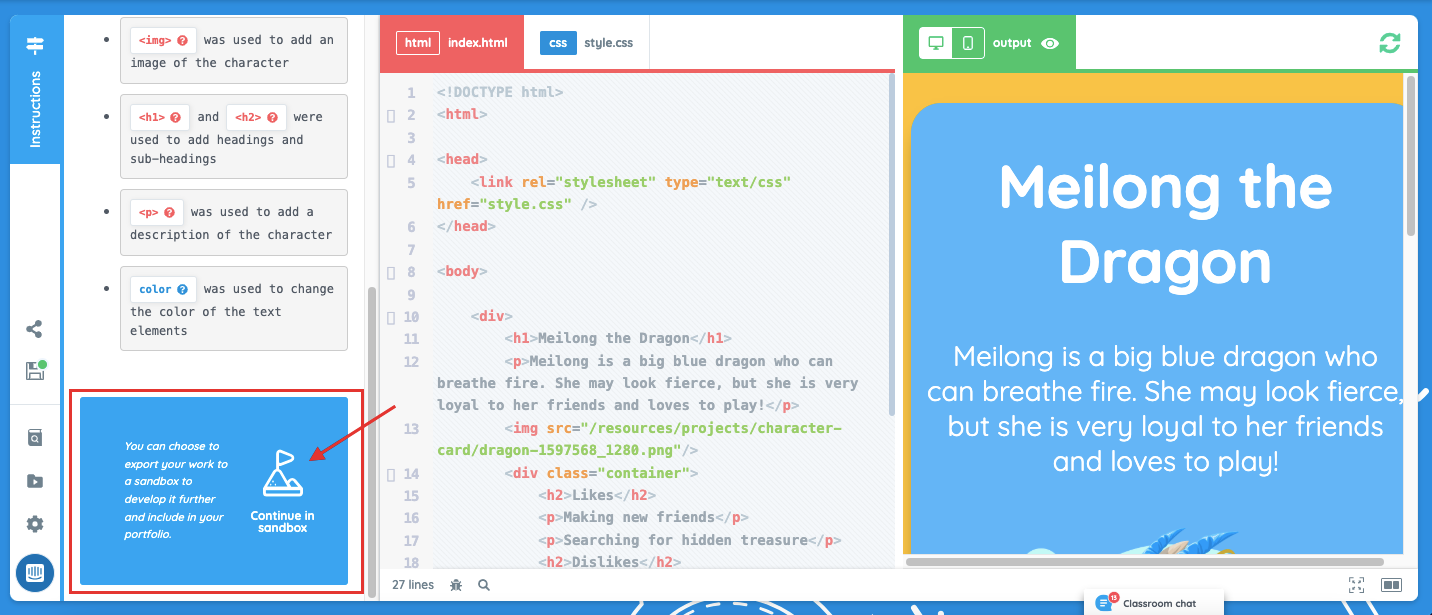
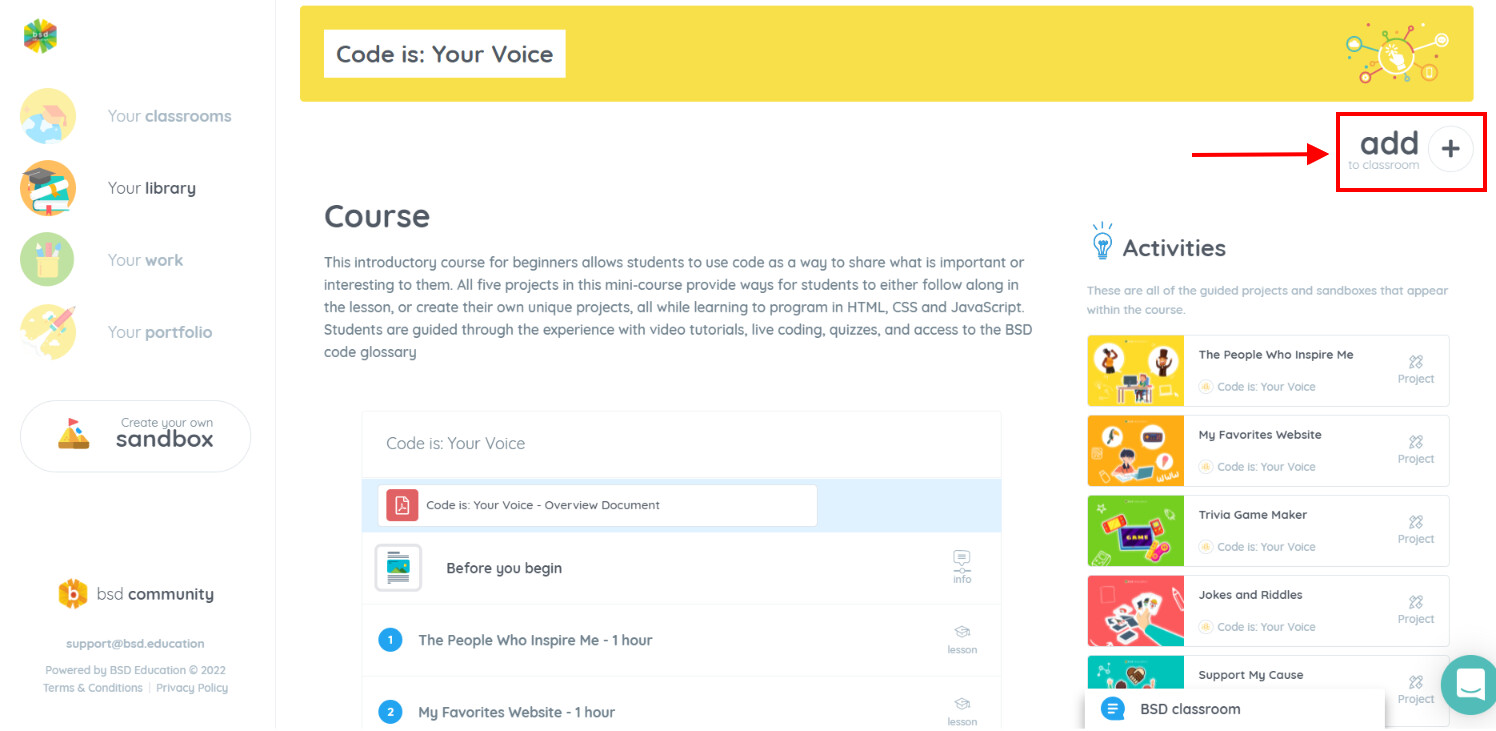
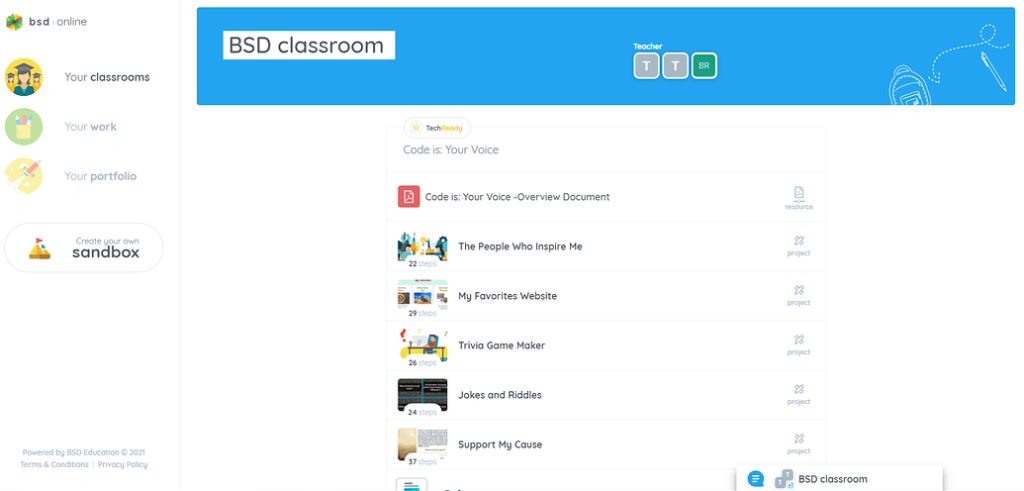
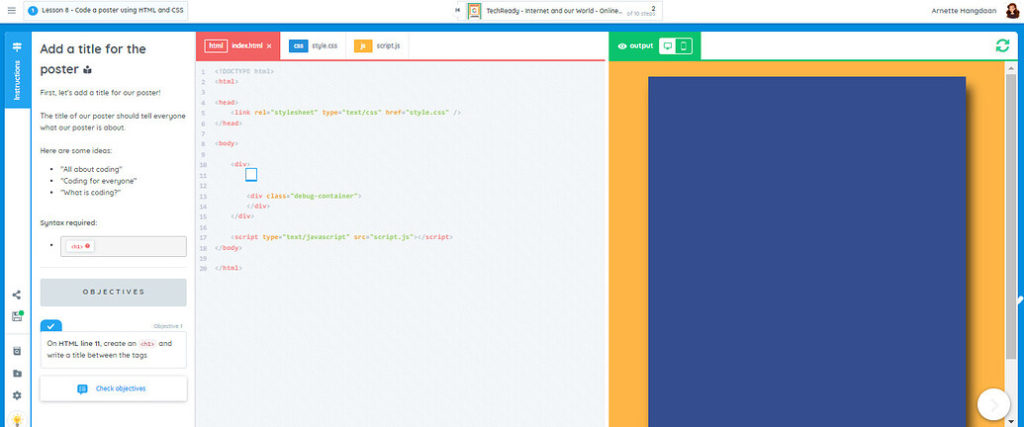
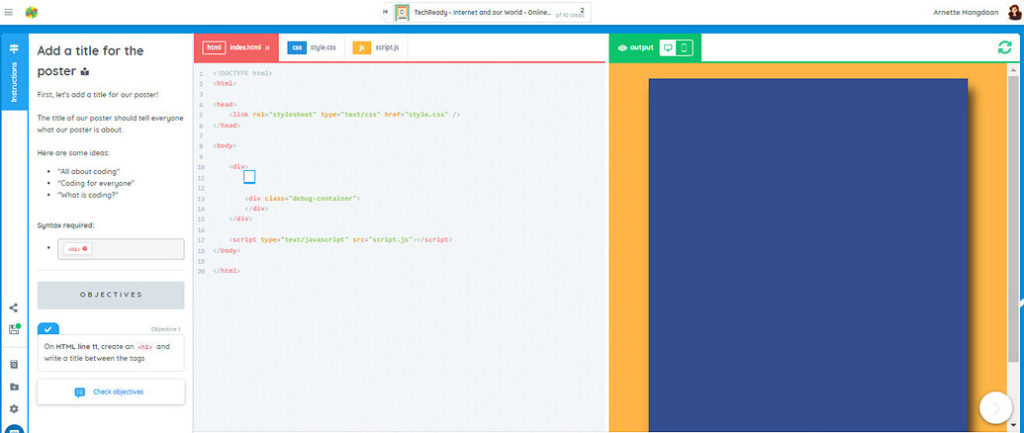
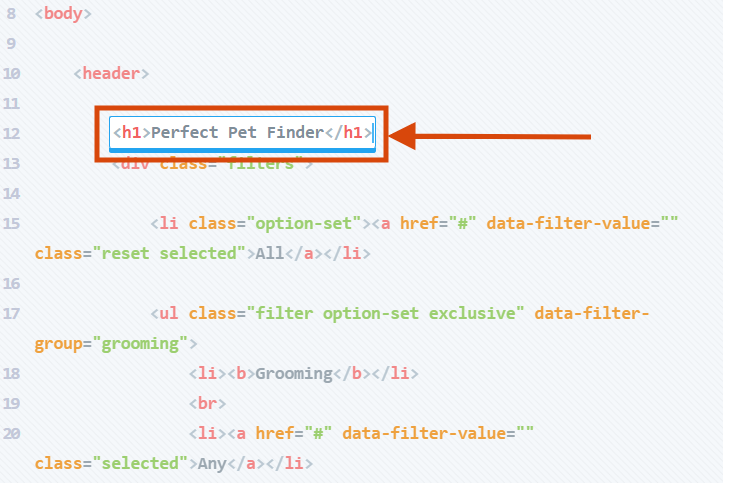
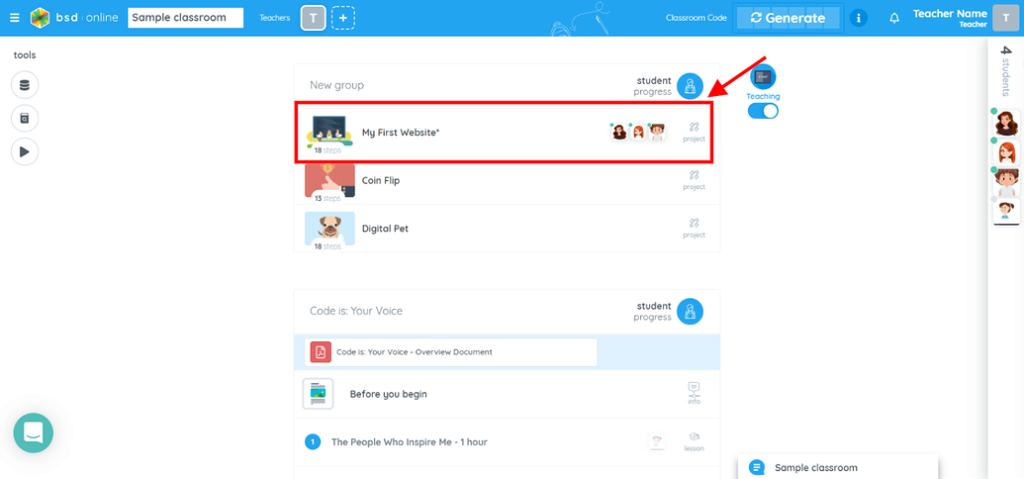
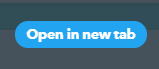
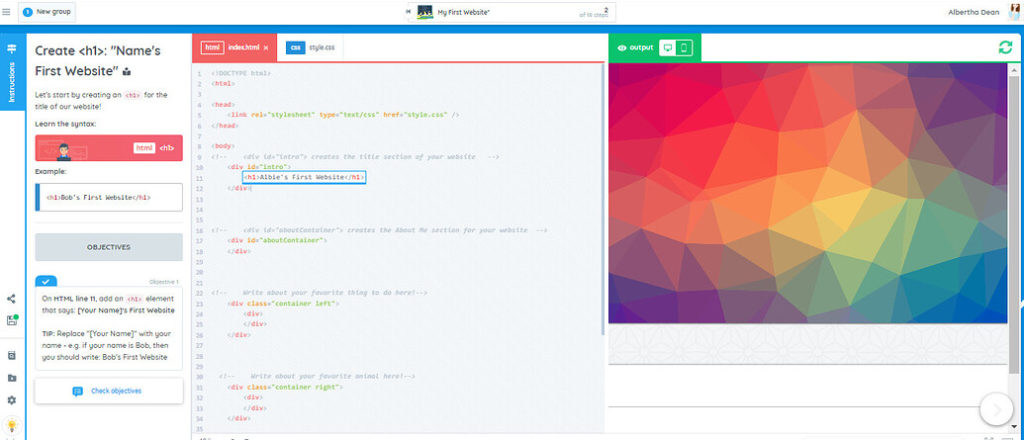
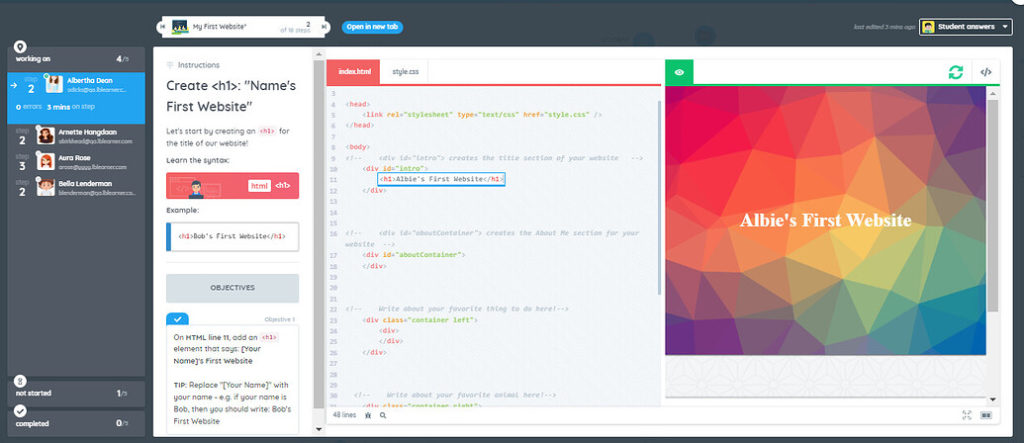
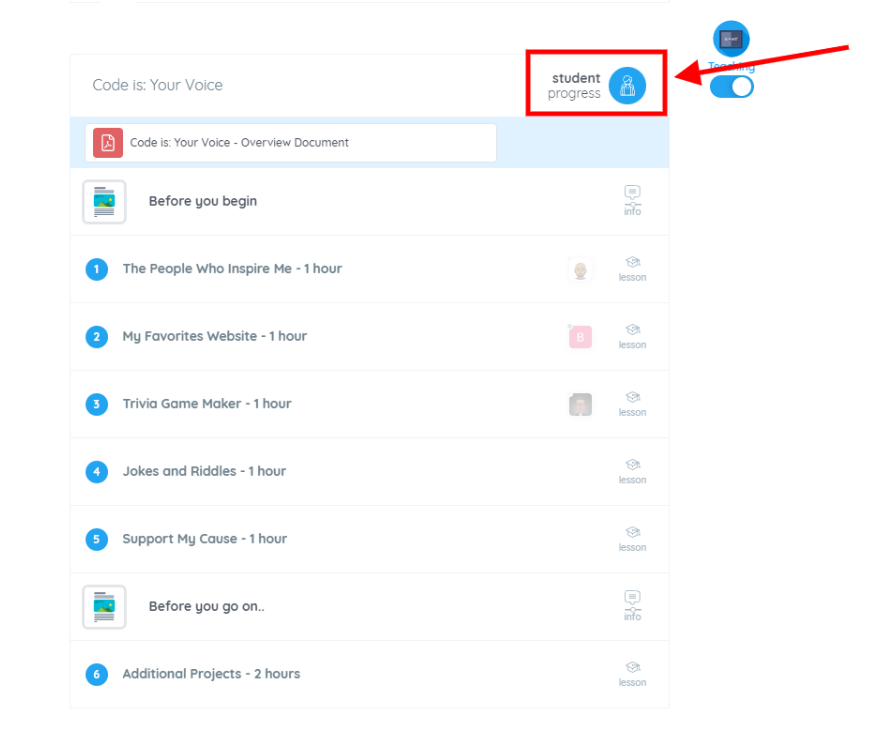
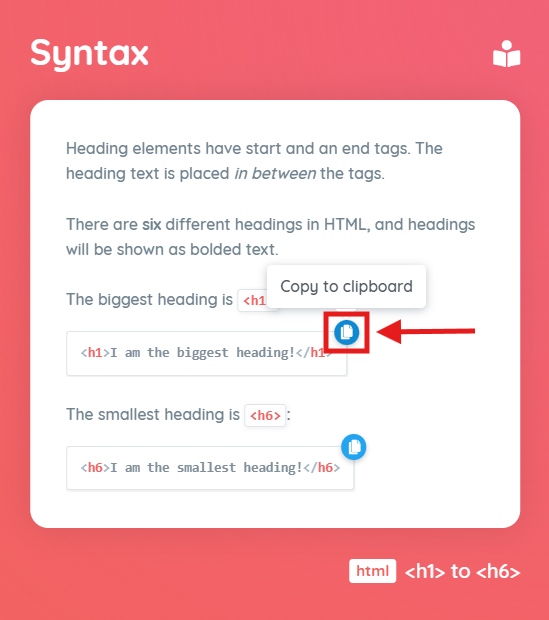
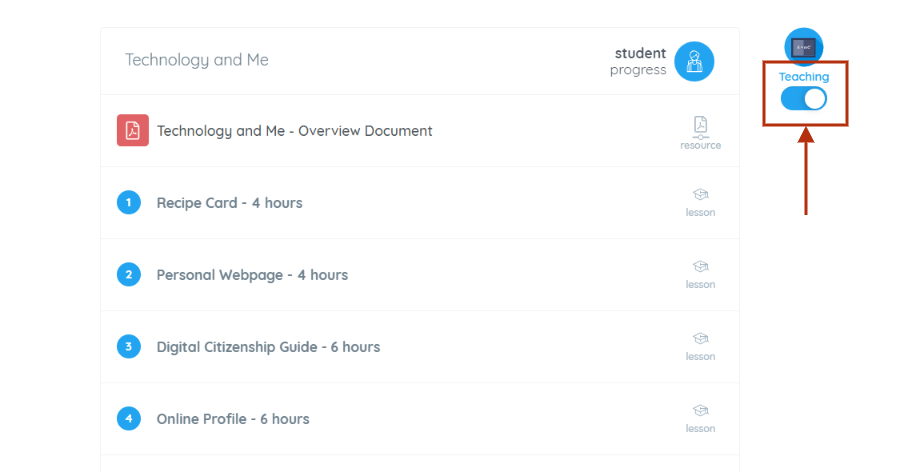
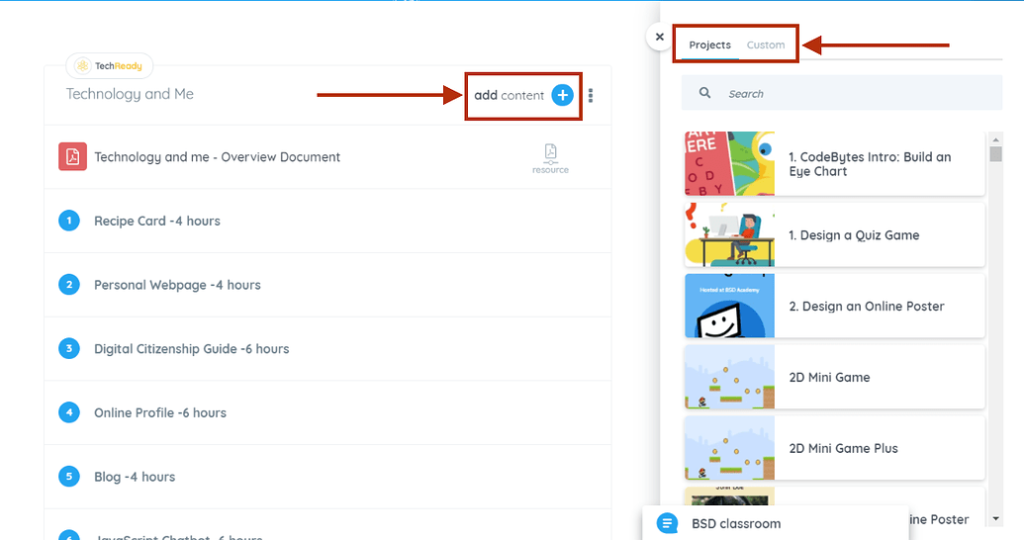
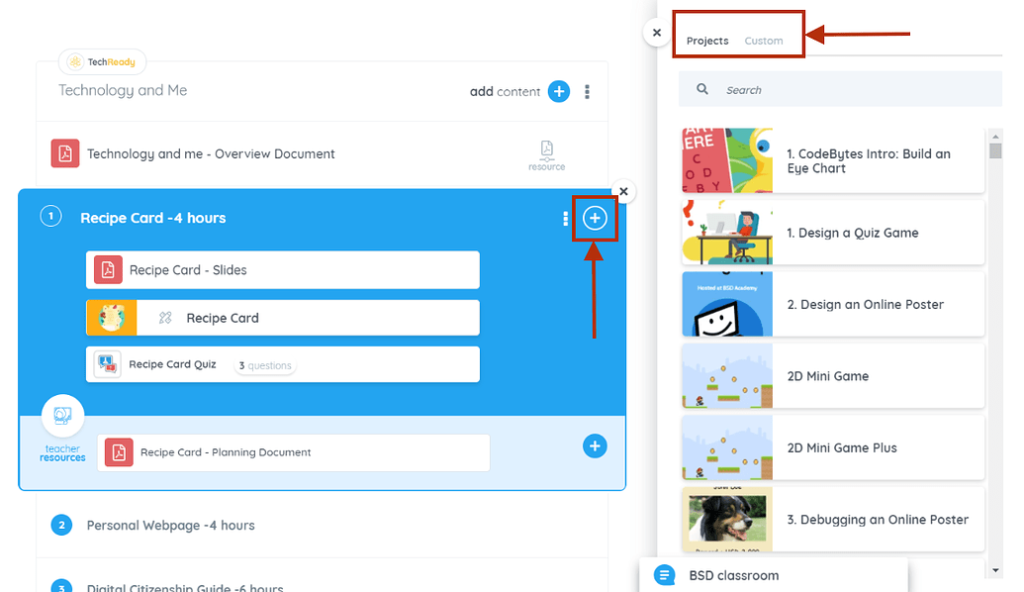
  1. This is what a course within “Your library” looks like. In the upper right, you will see the “add to classroom” icon, click it.
screenshot-app.bsd.education-2022.02.01-05_39_07
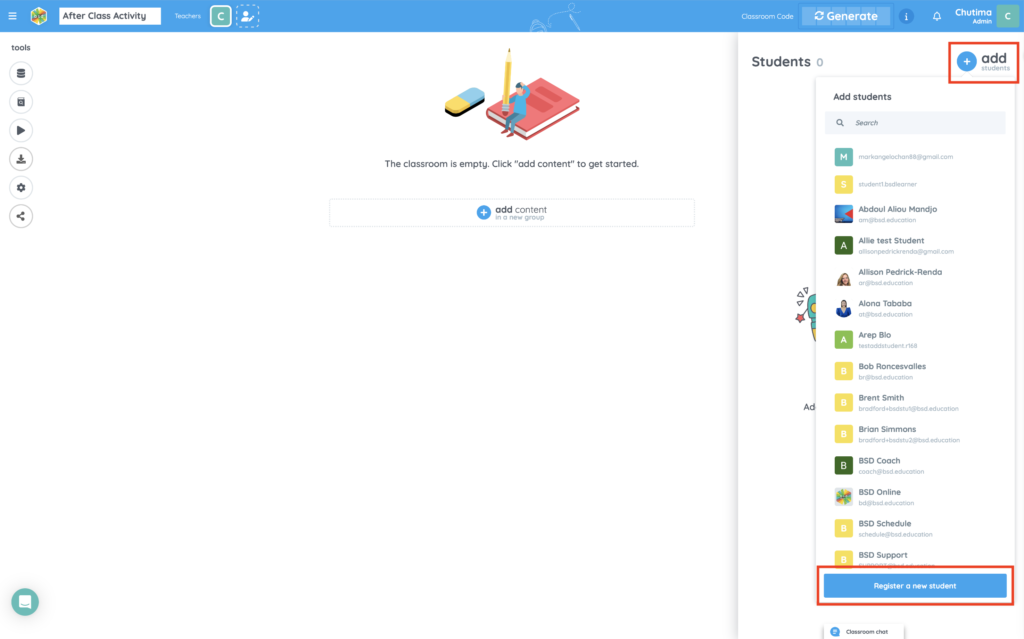
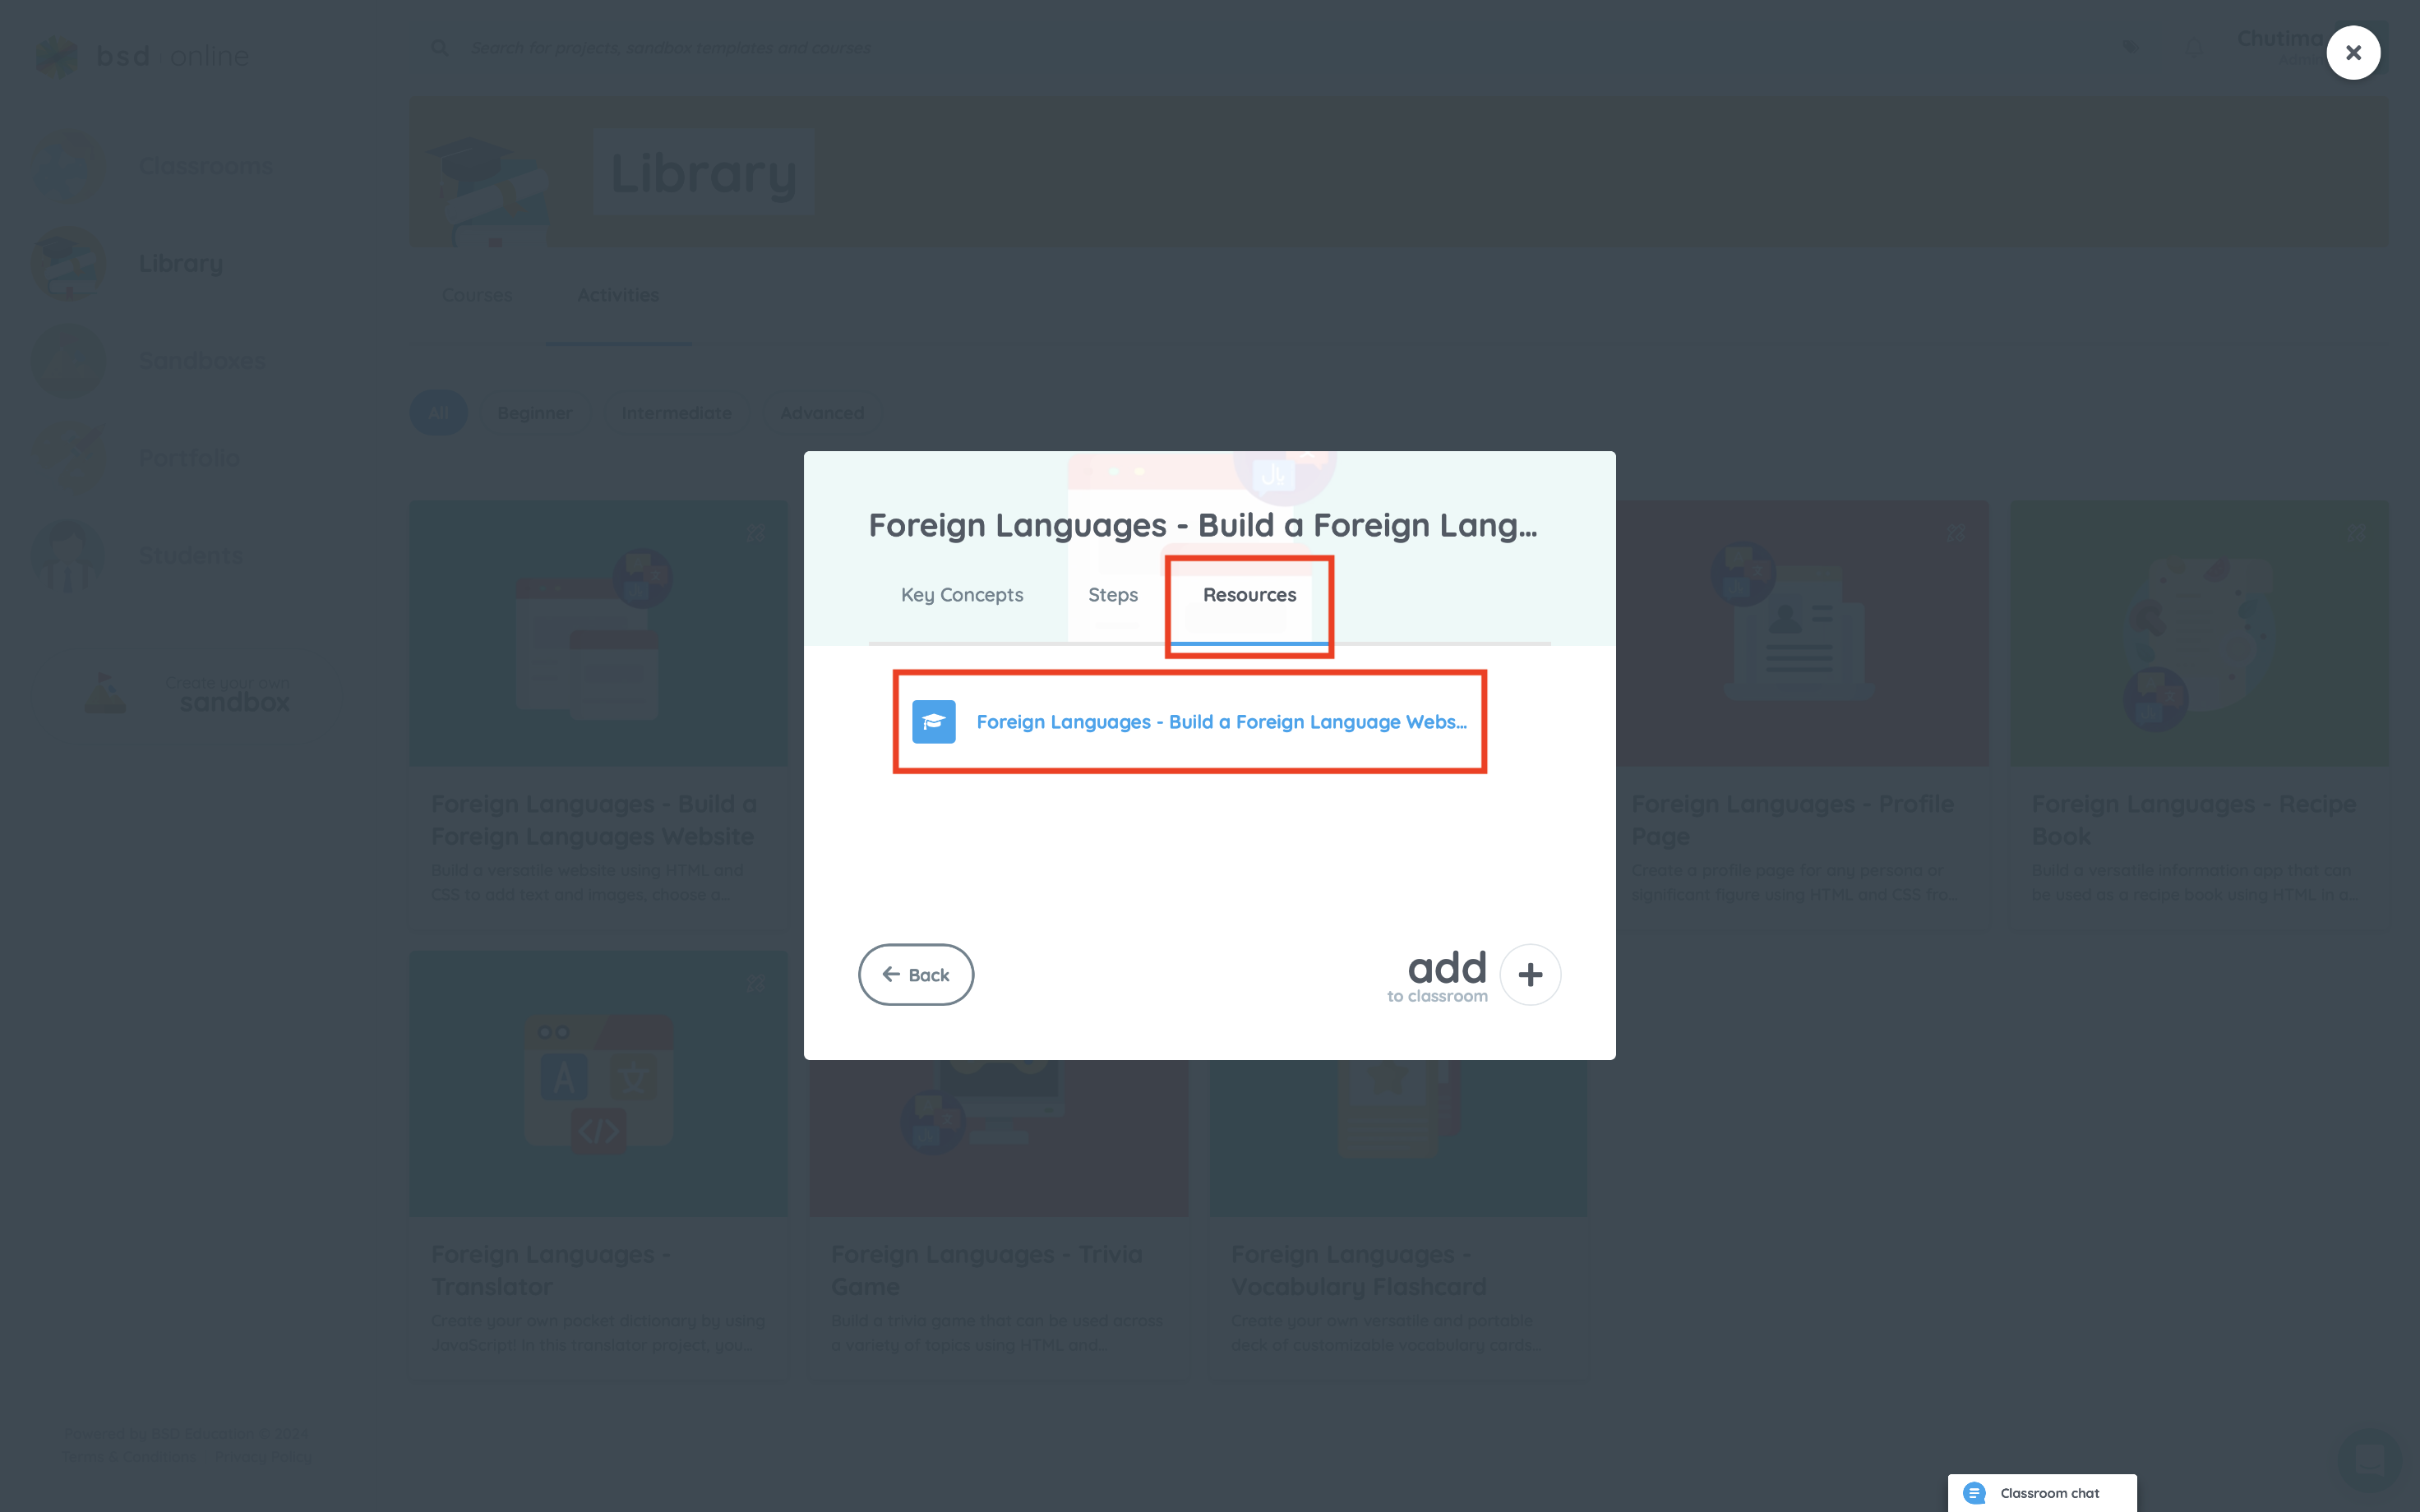
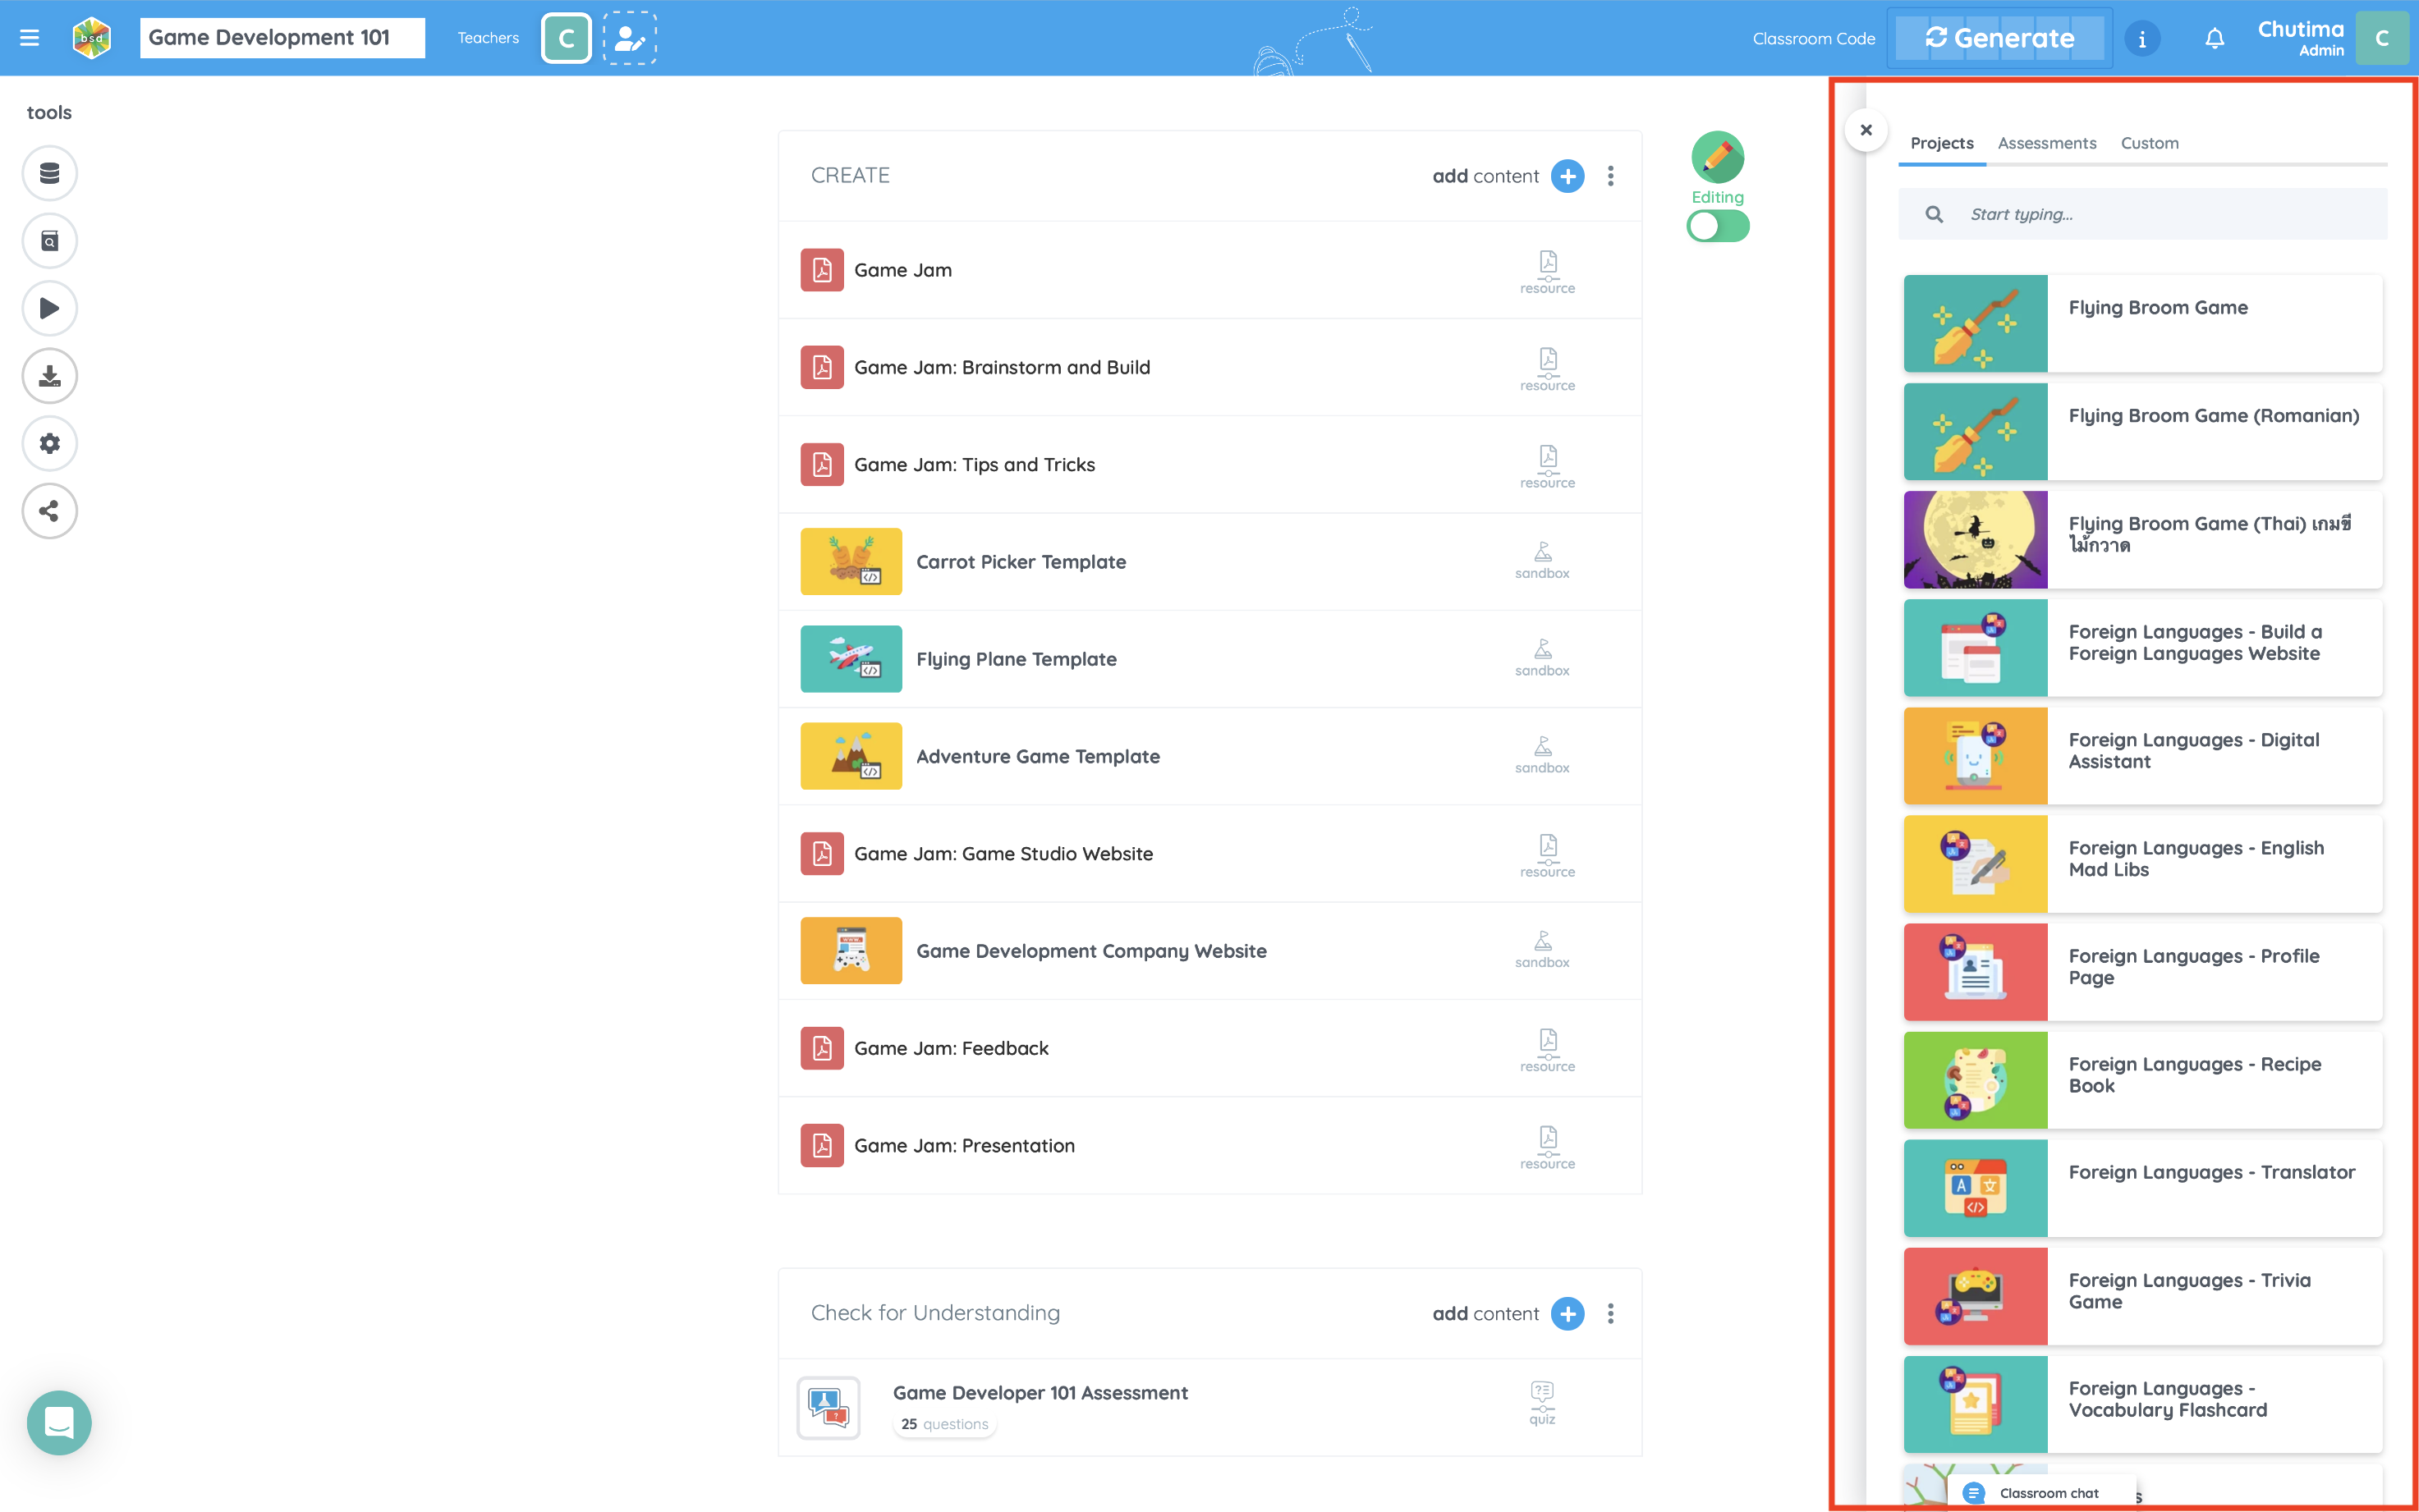
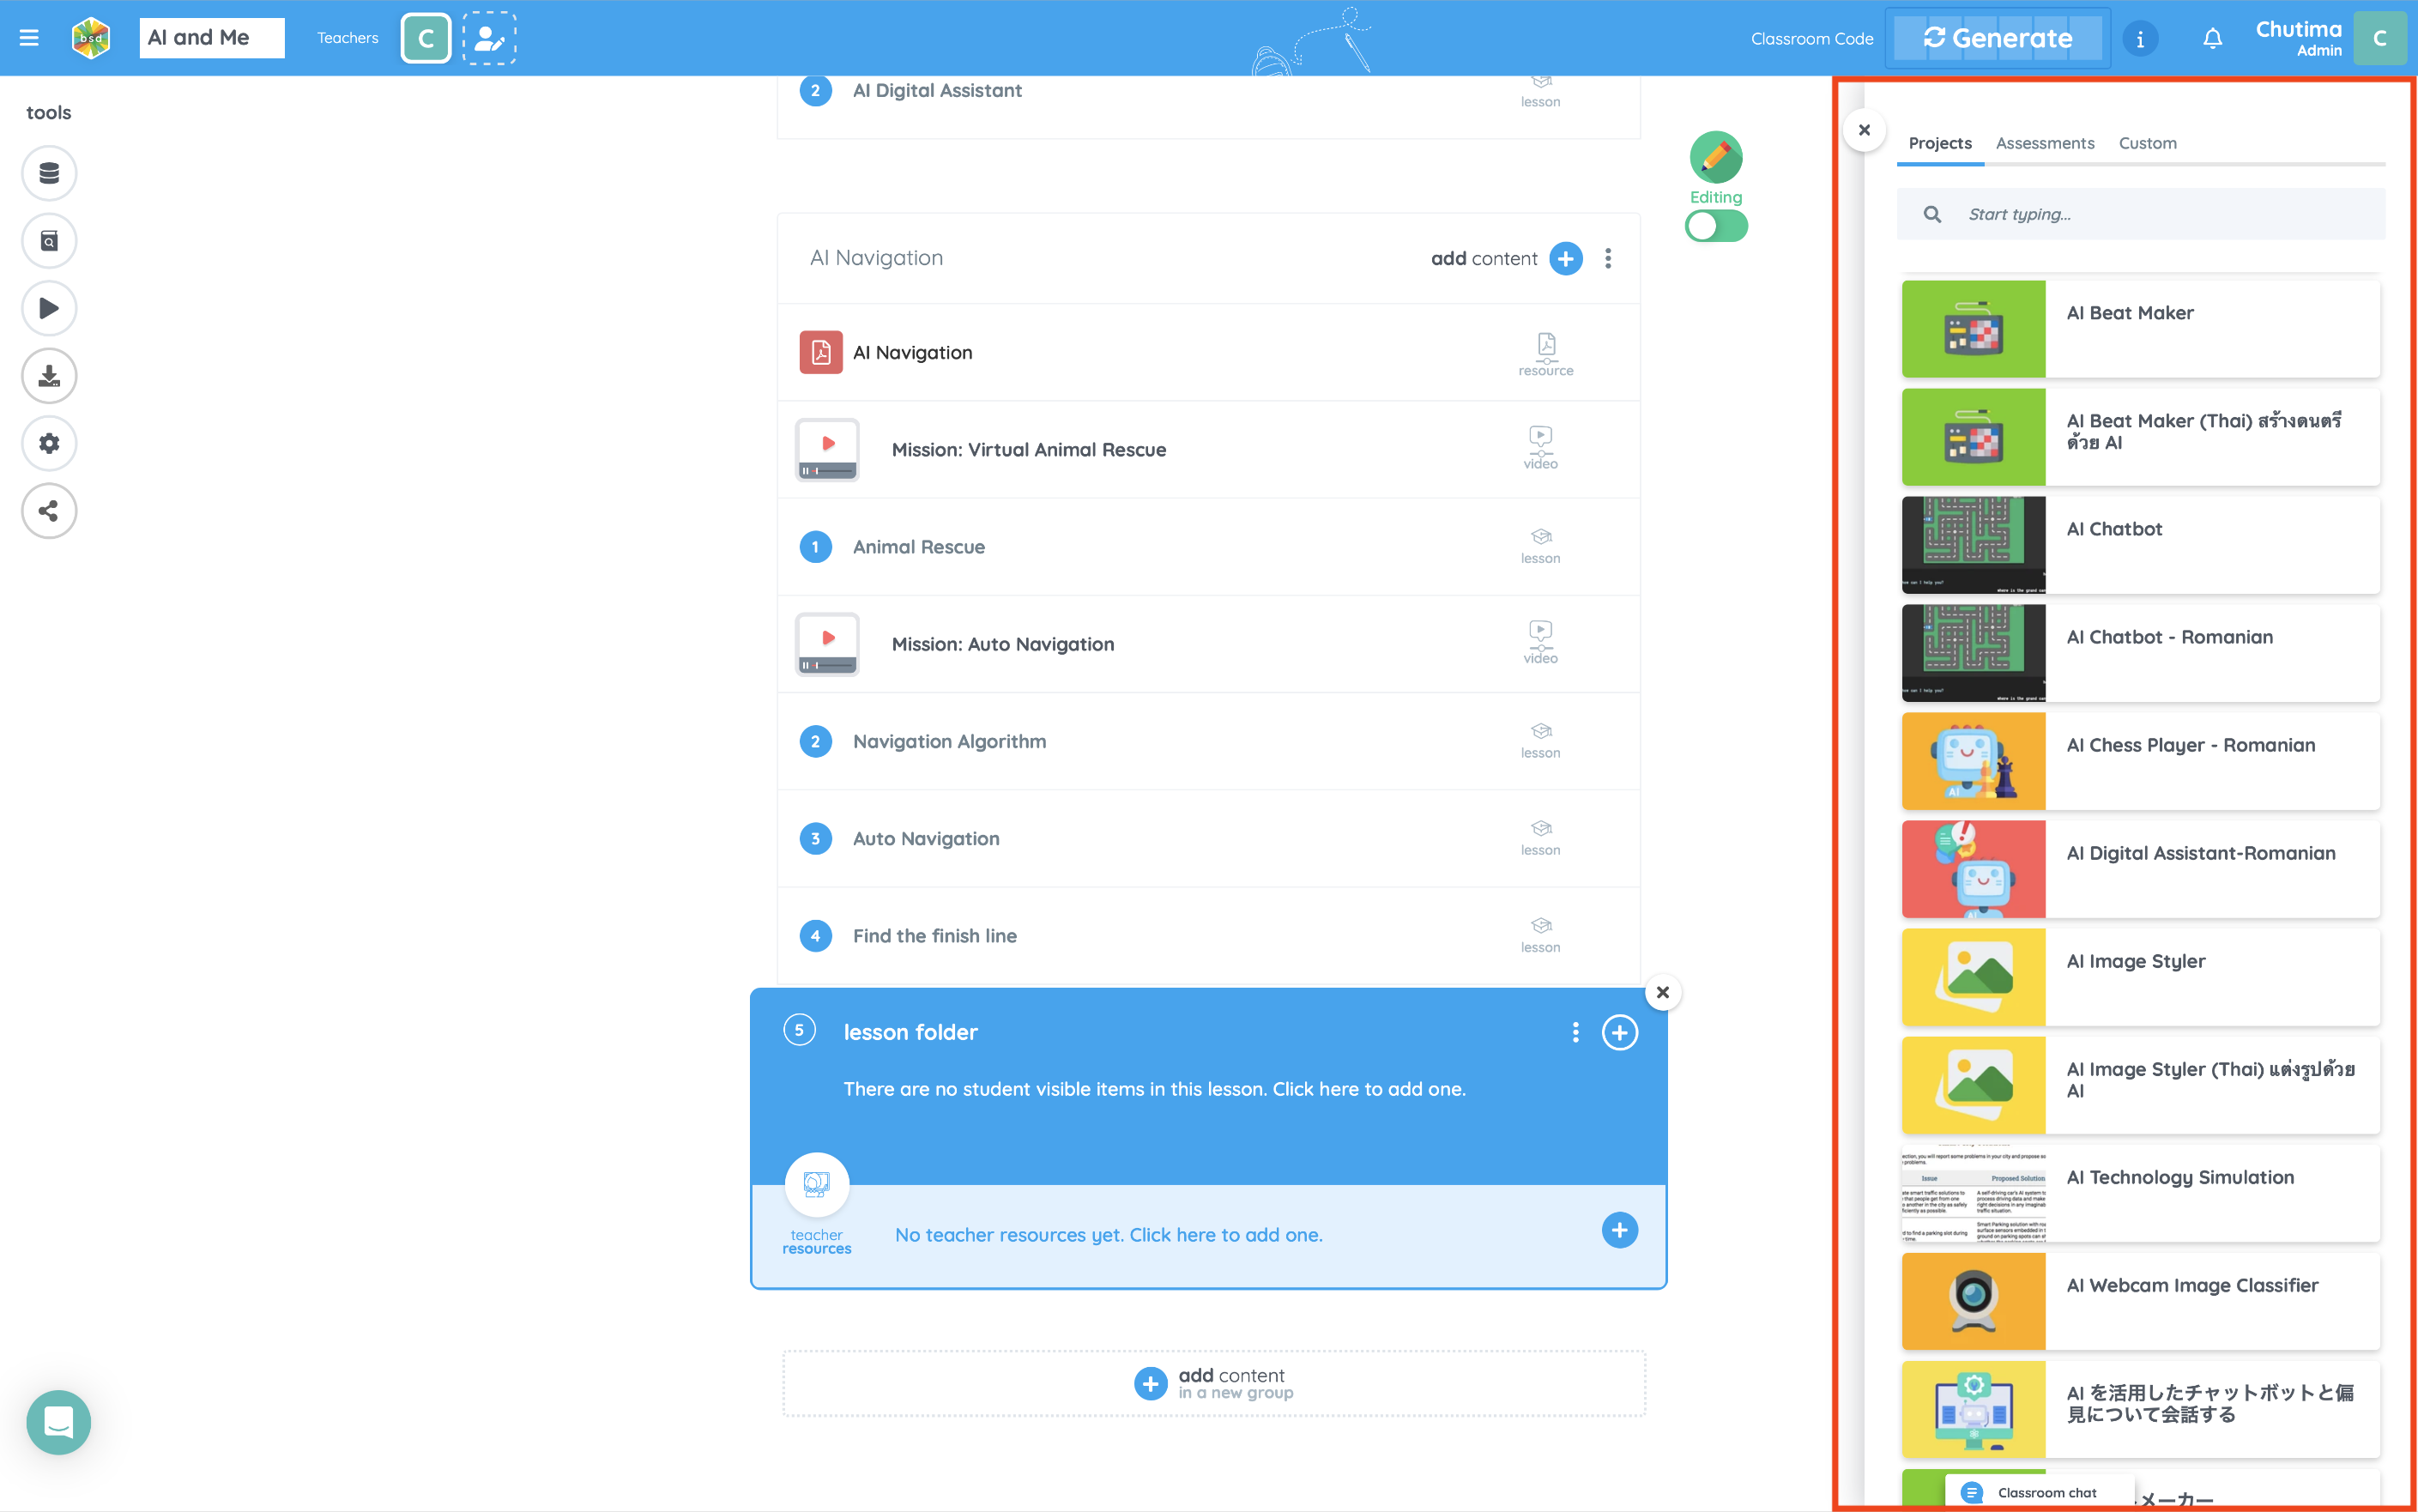
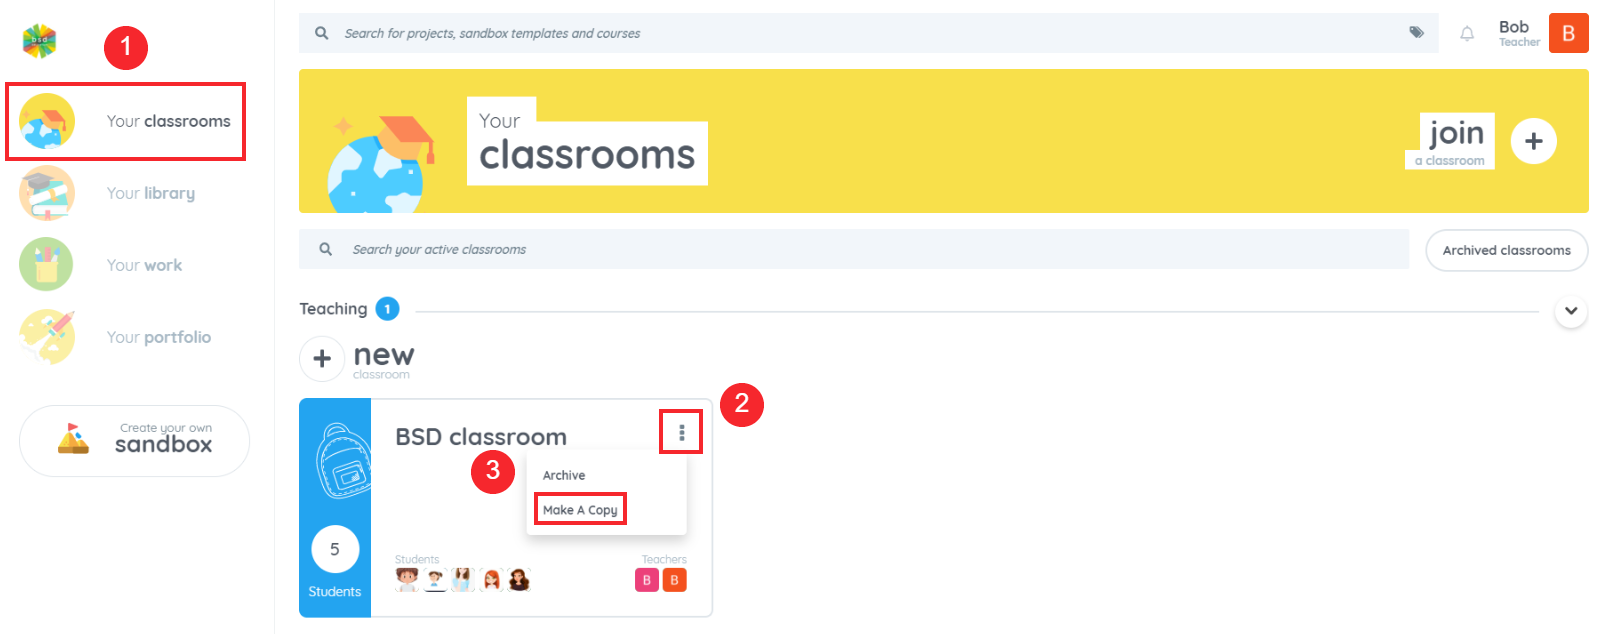
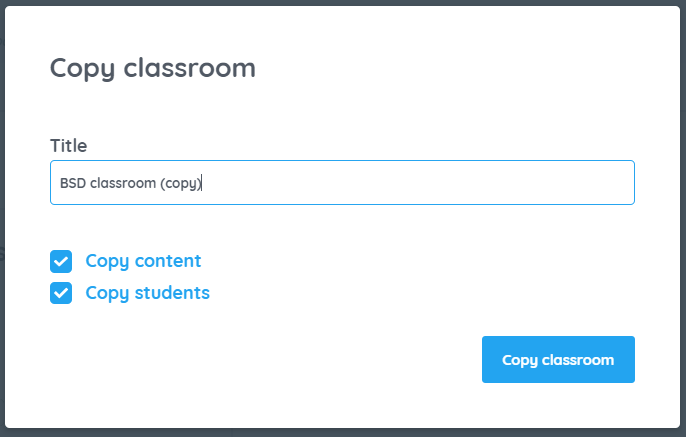
  1. After that, a popup box will appear giving you the choice of which classroom you want to add this course to. Or you can create a new classroom to place the course of your choice by clicking on the “new classroom” button.
screenshot-app.bsd.education-2021.01.08-15_01_15
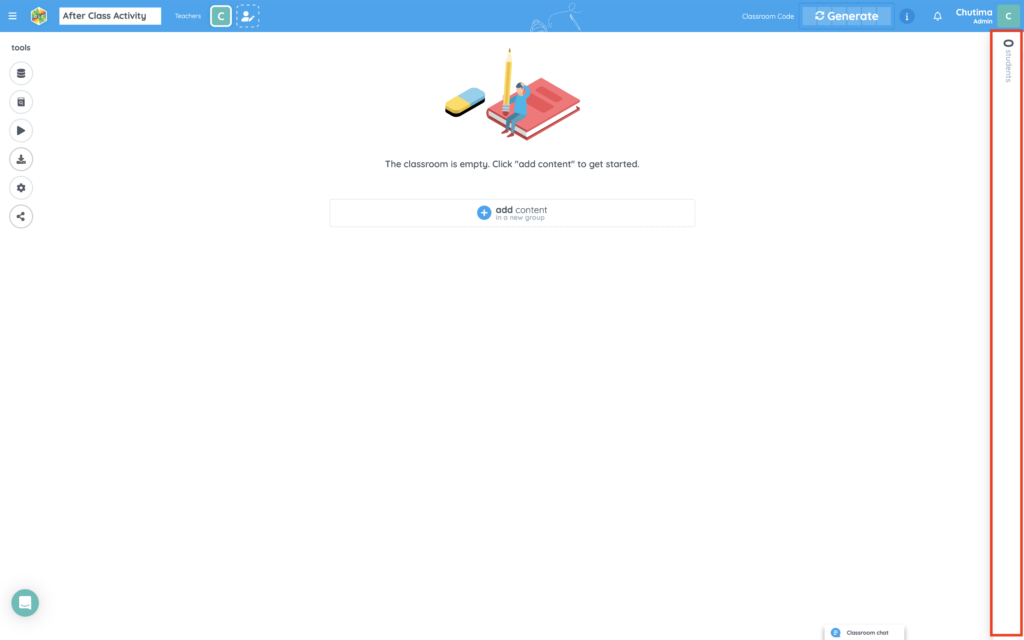
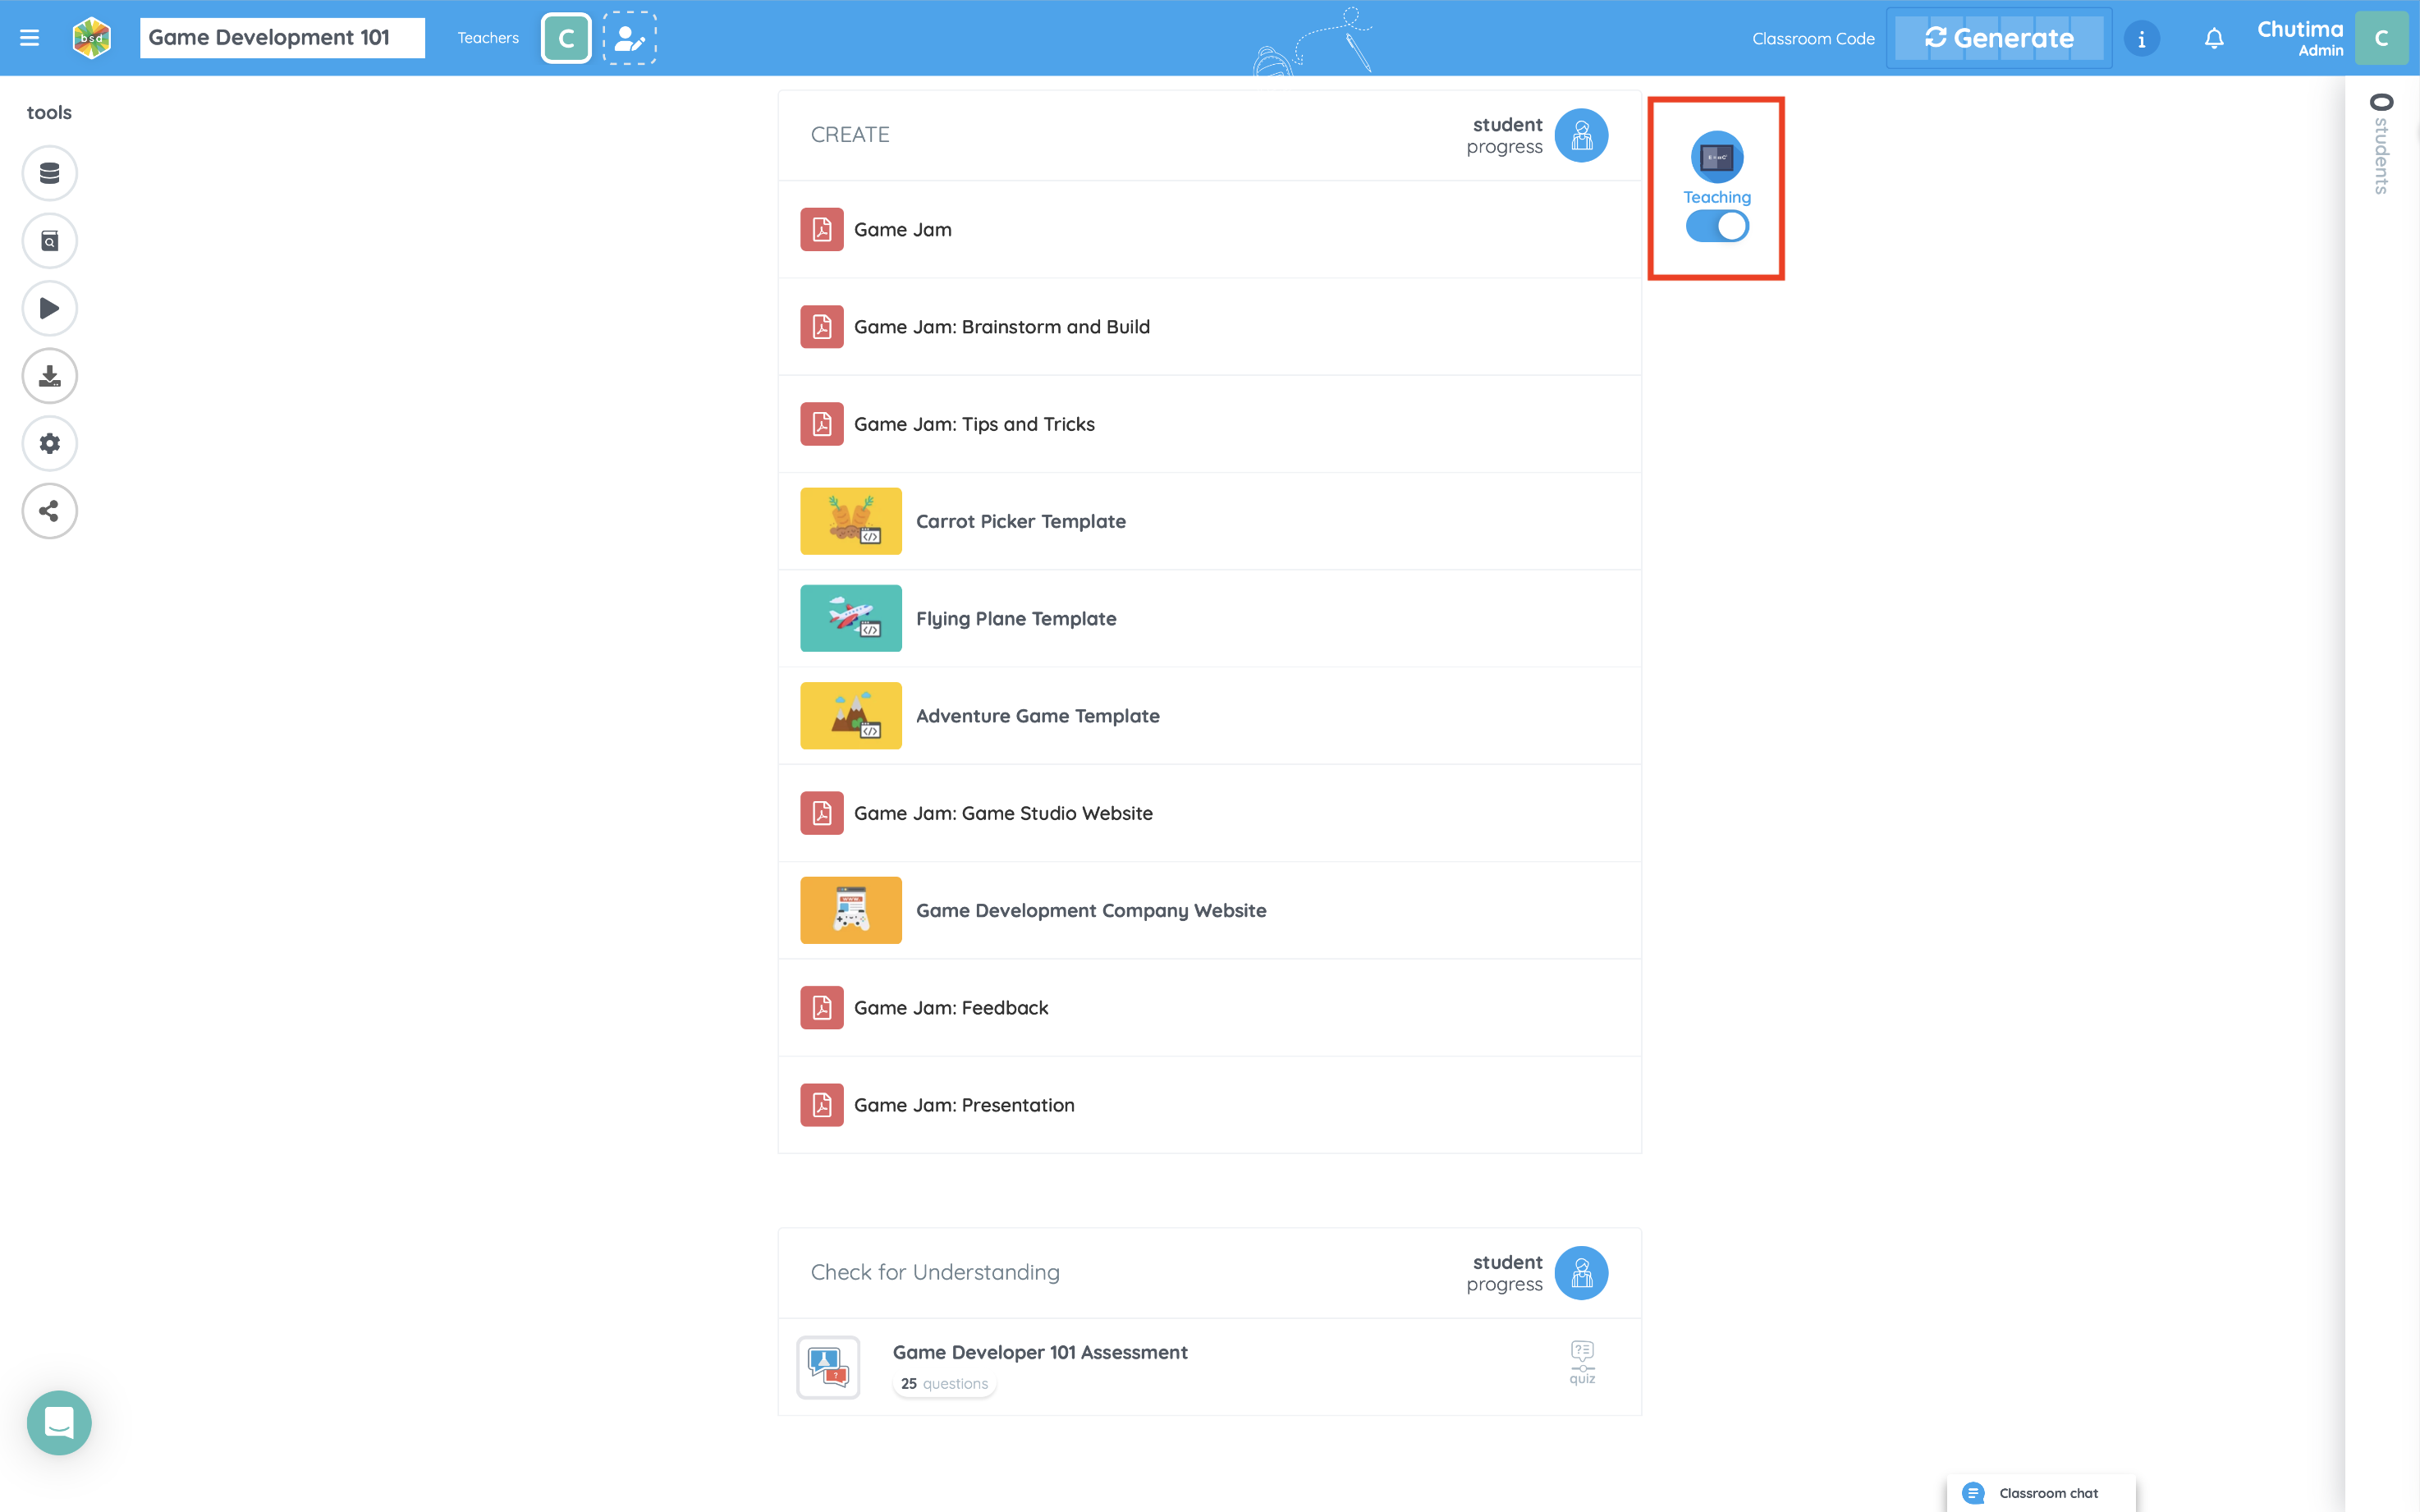
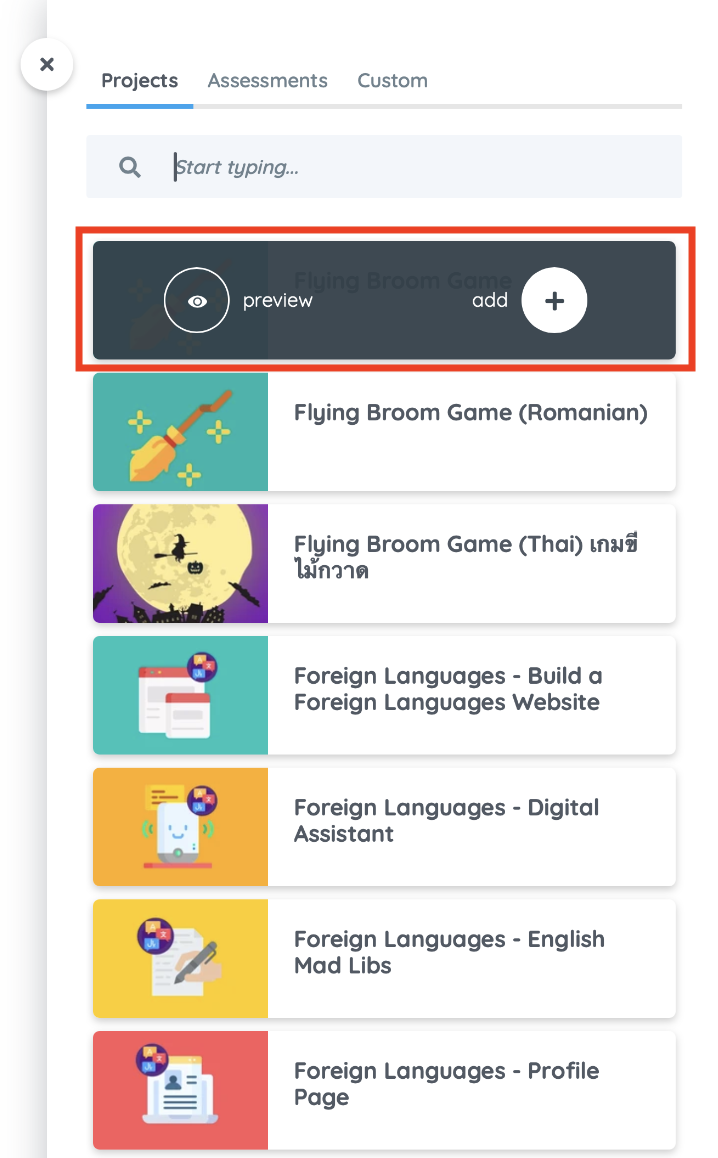
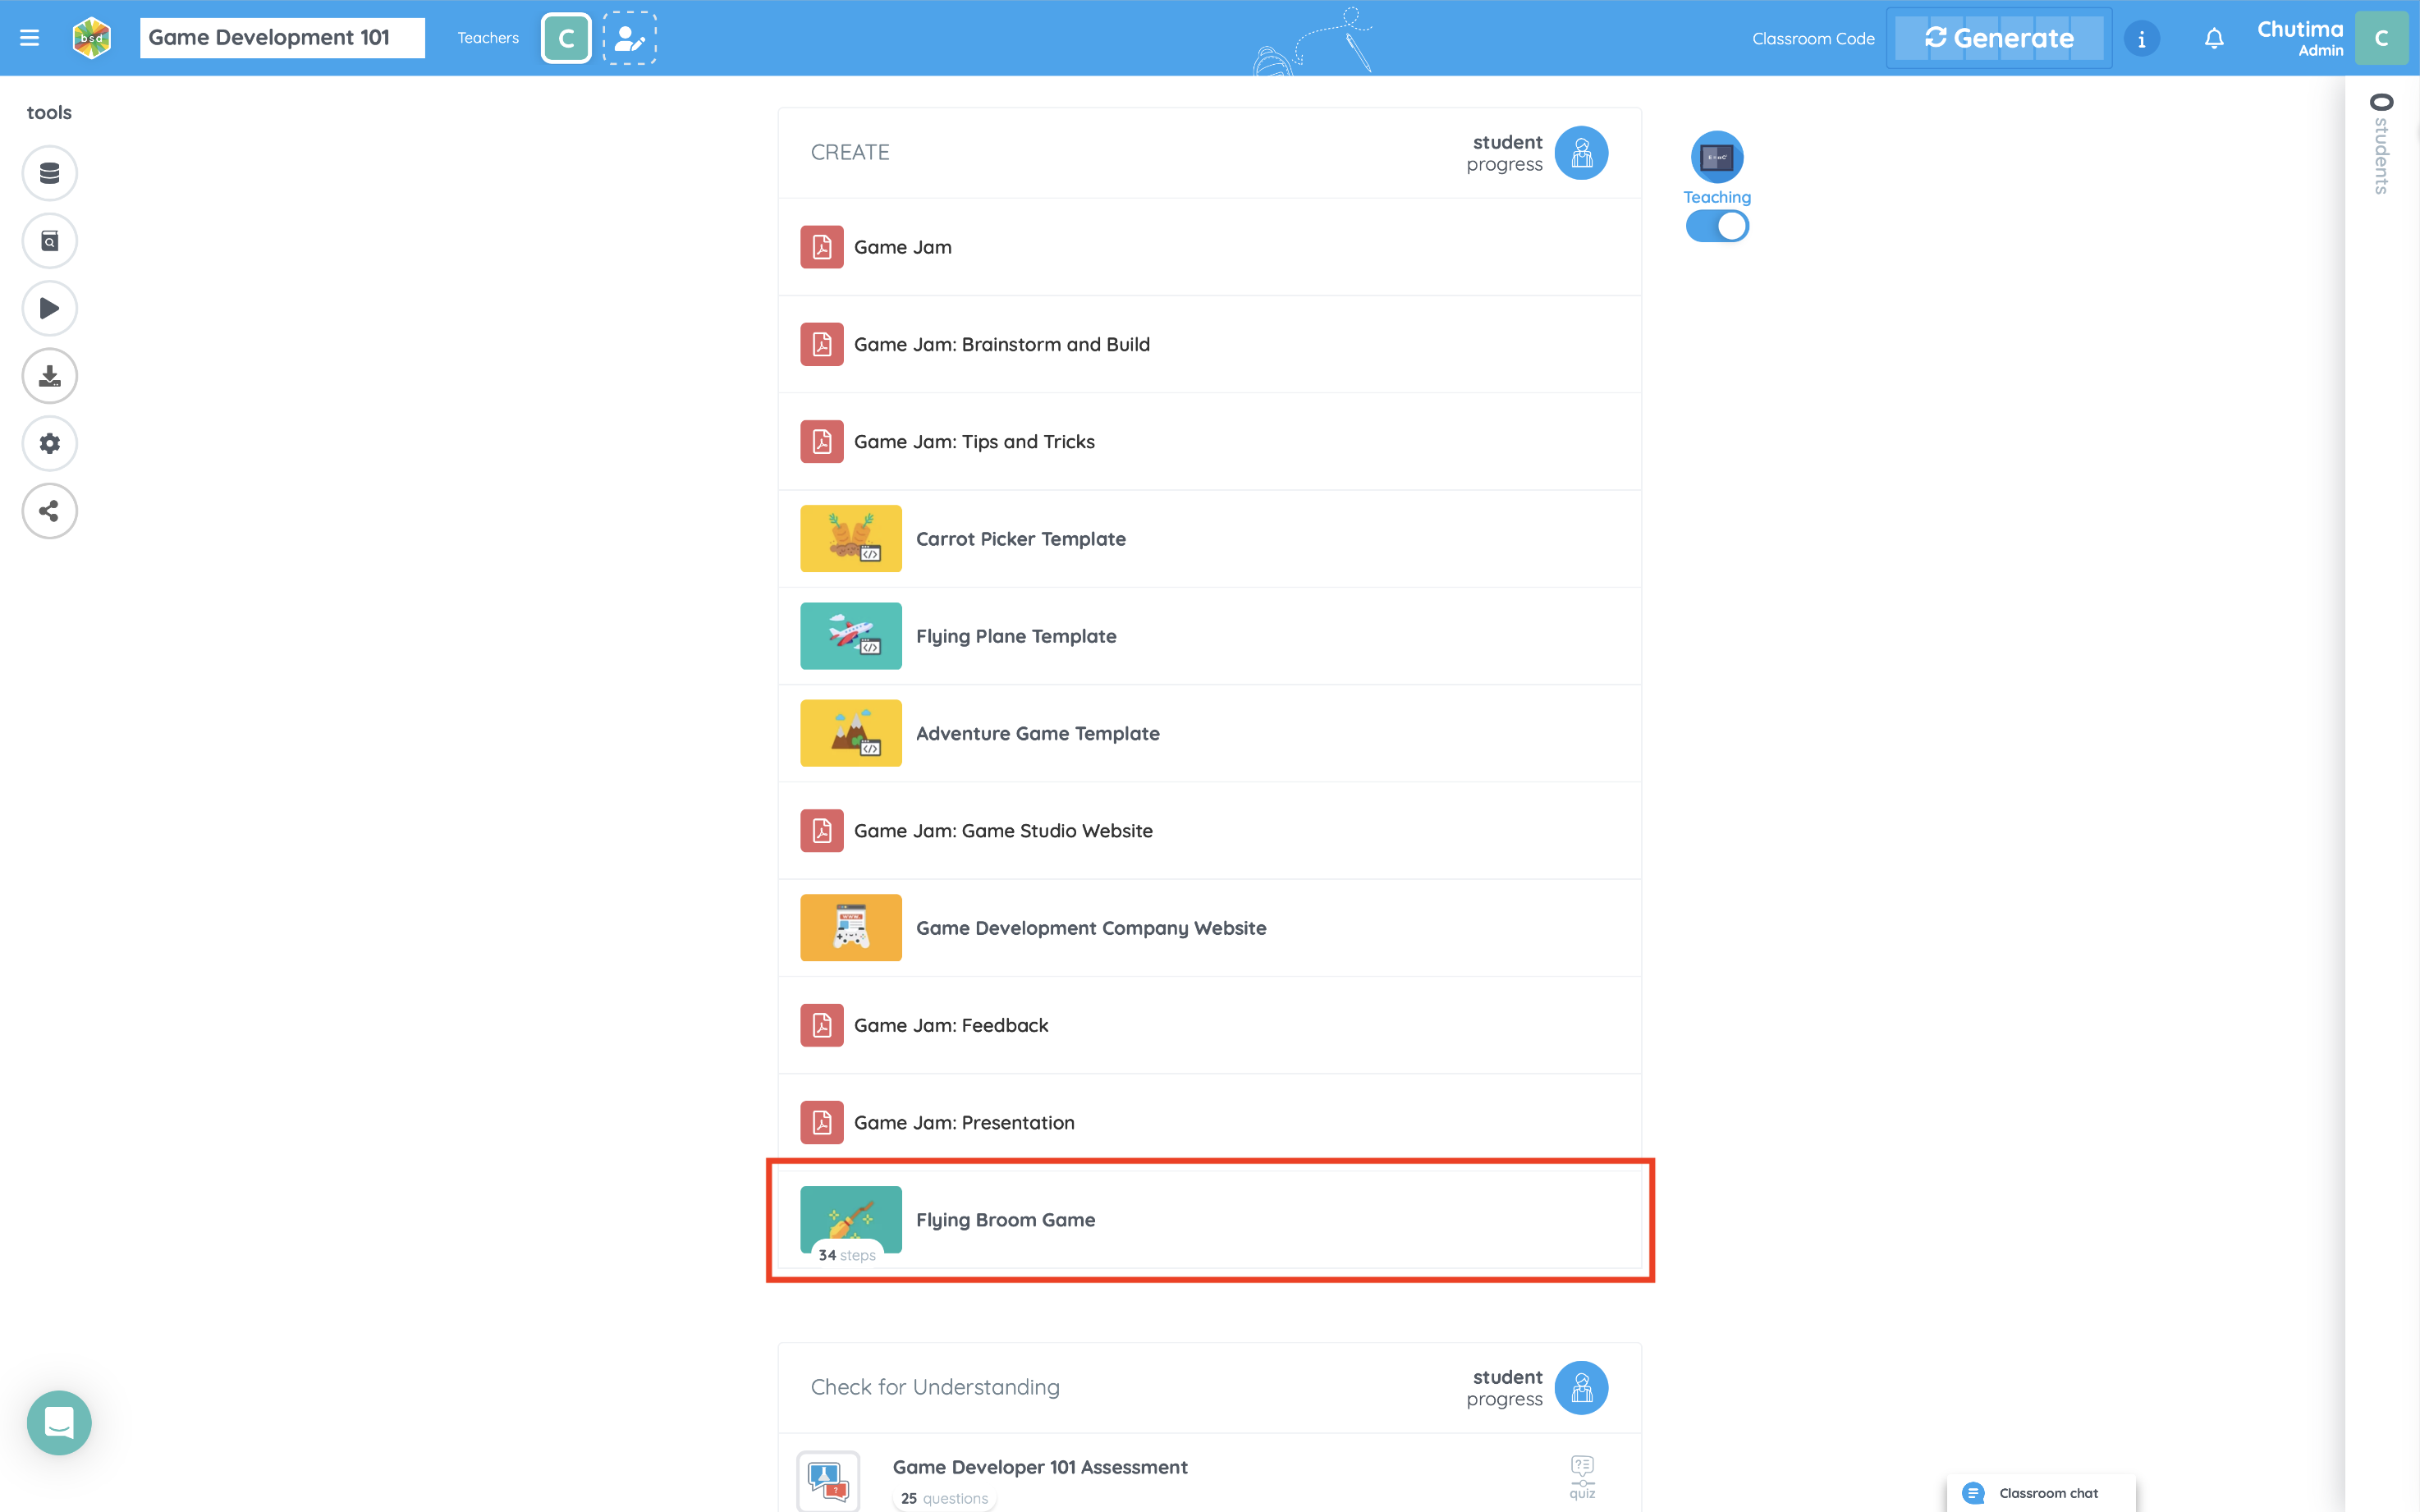
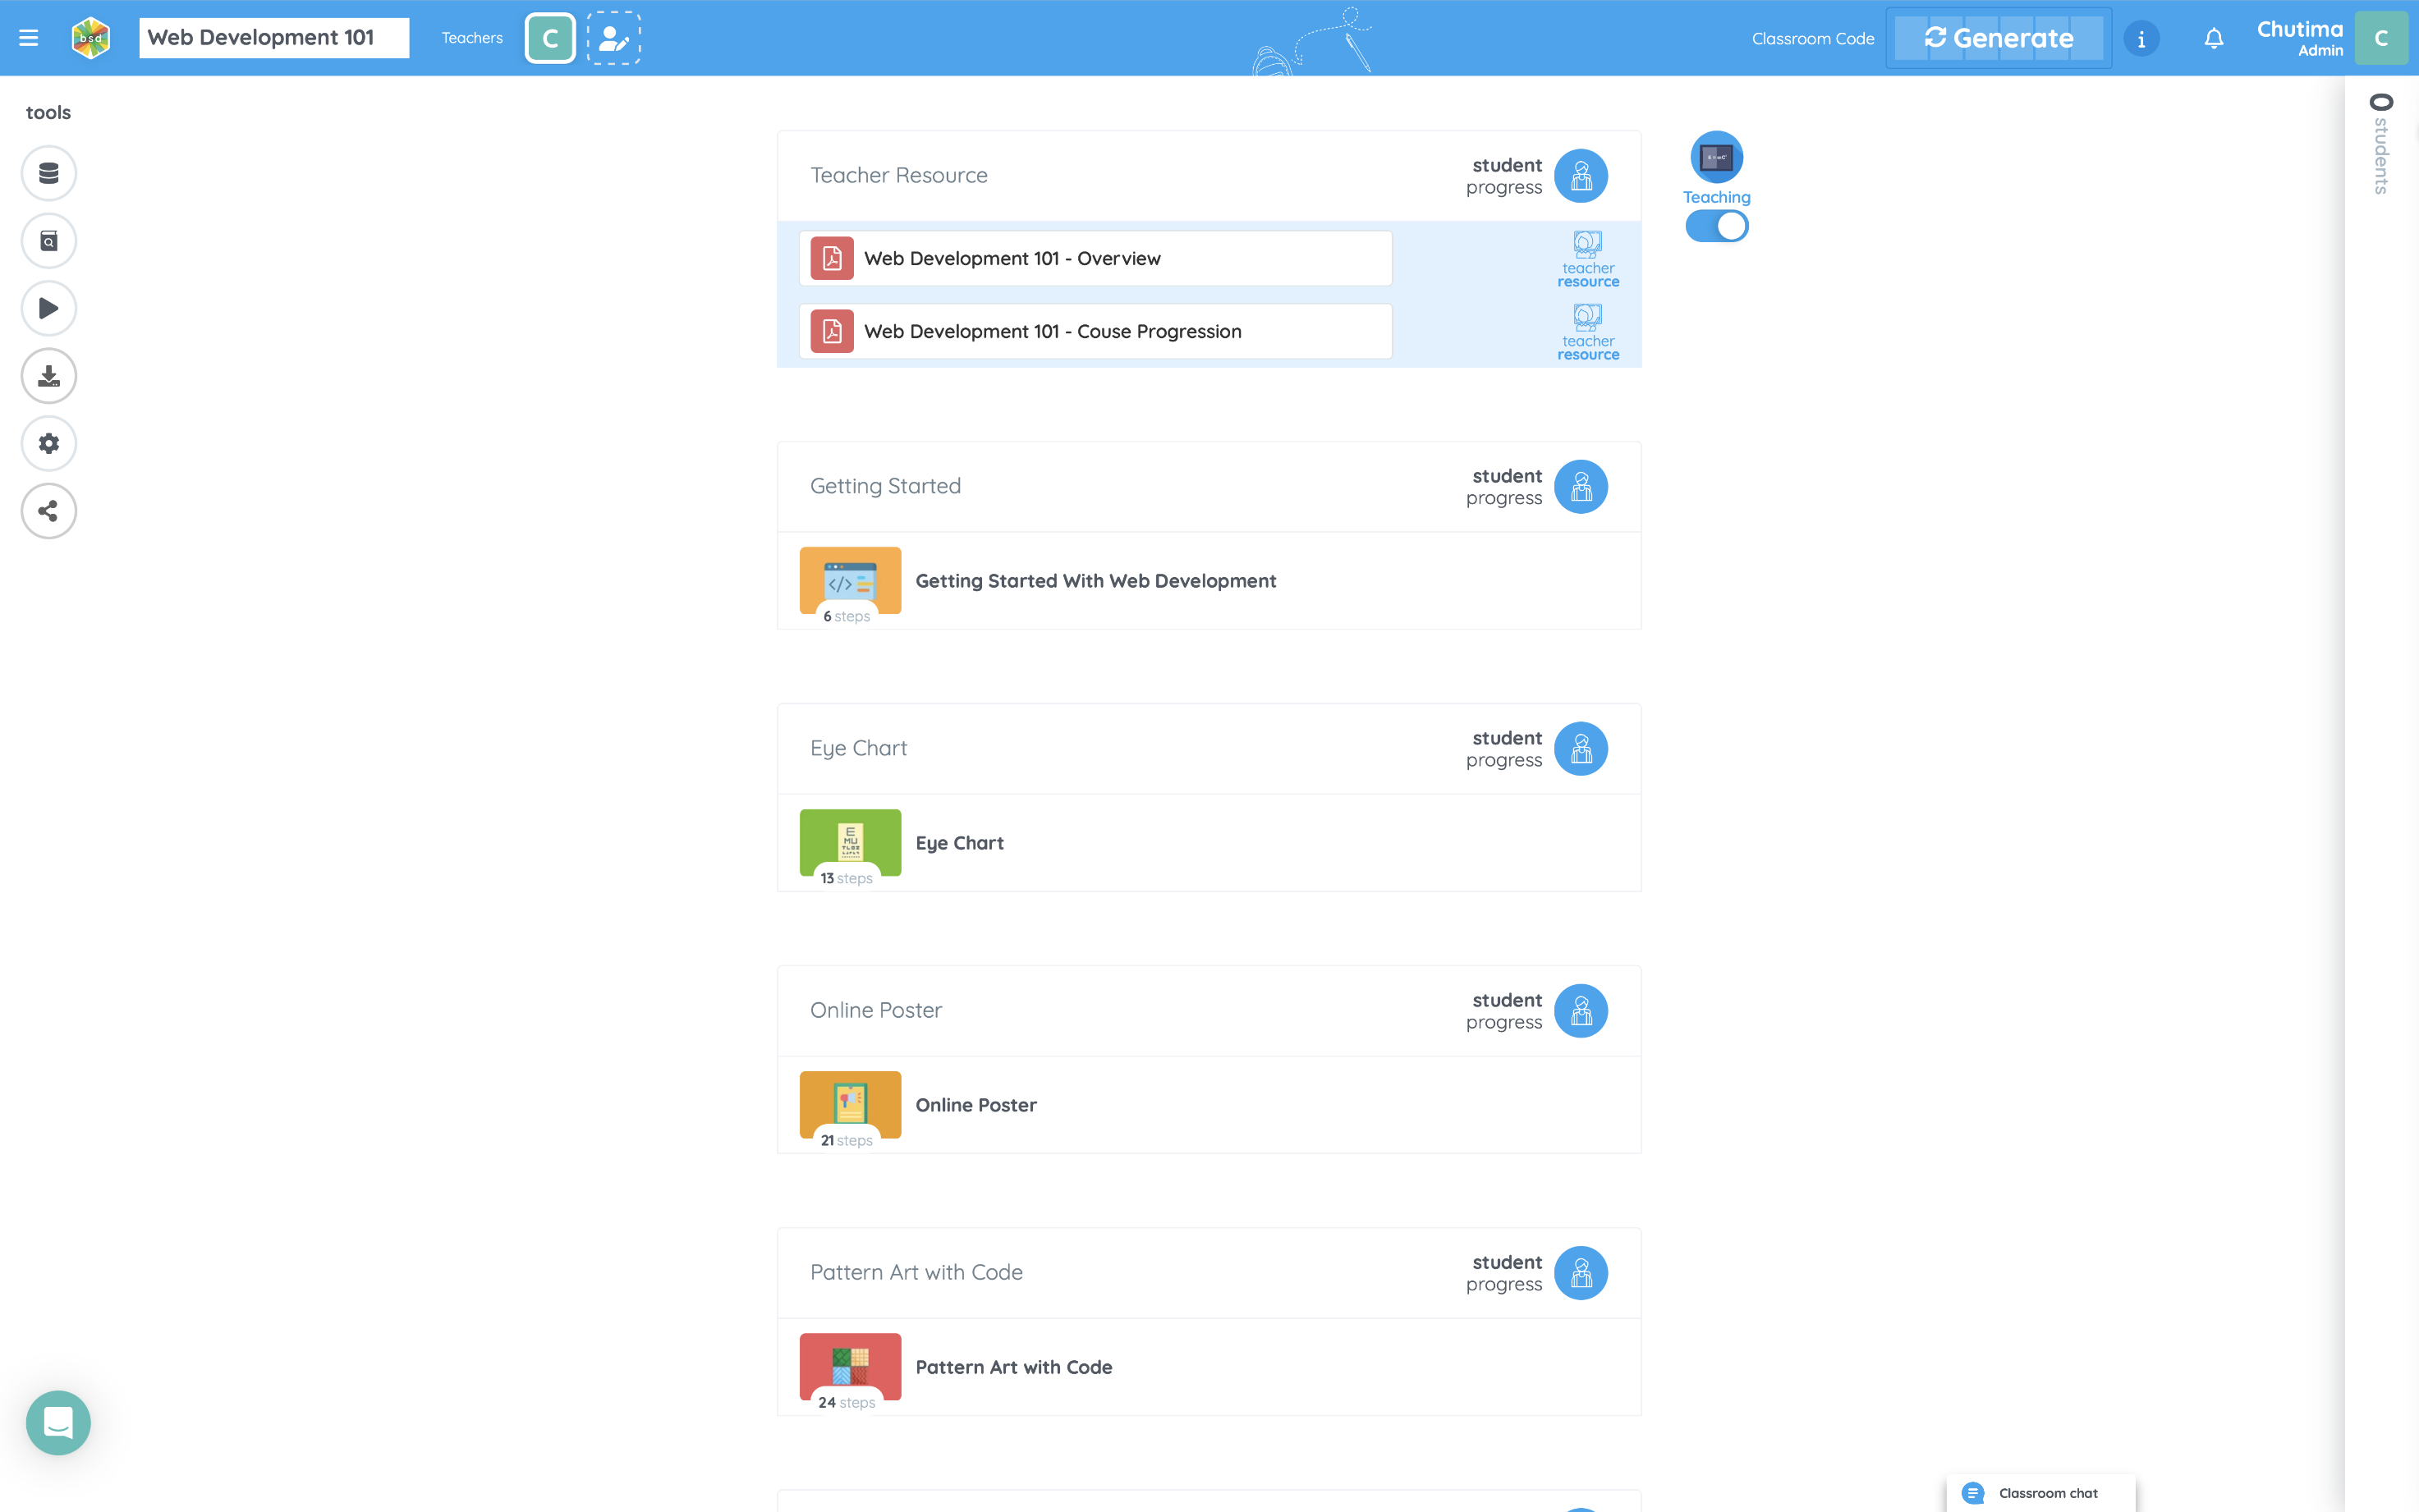
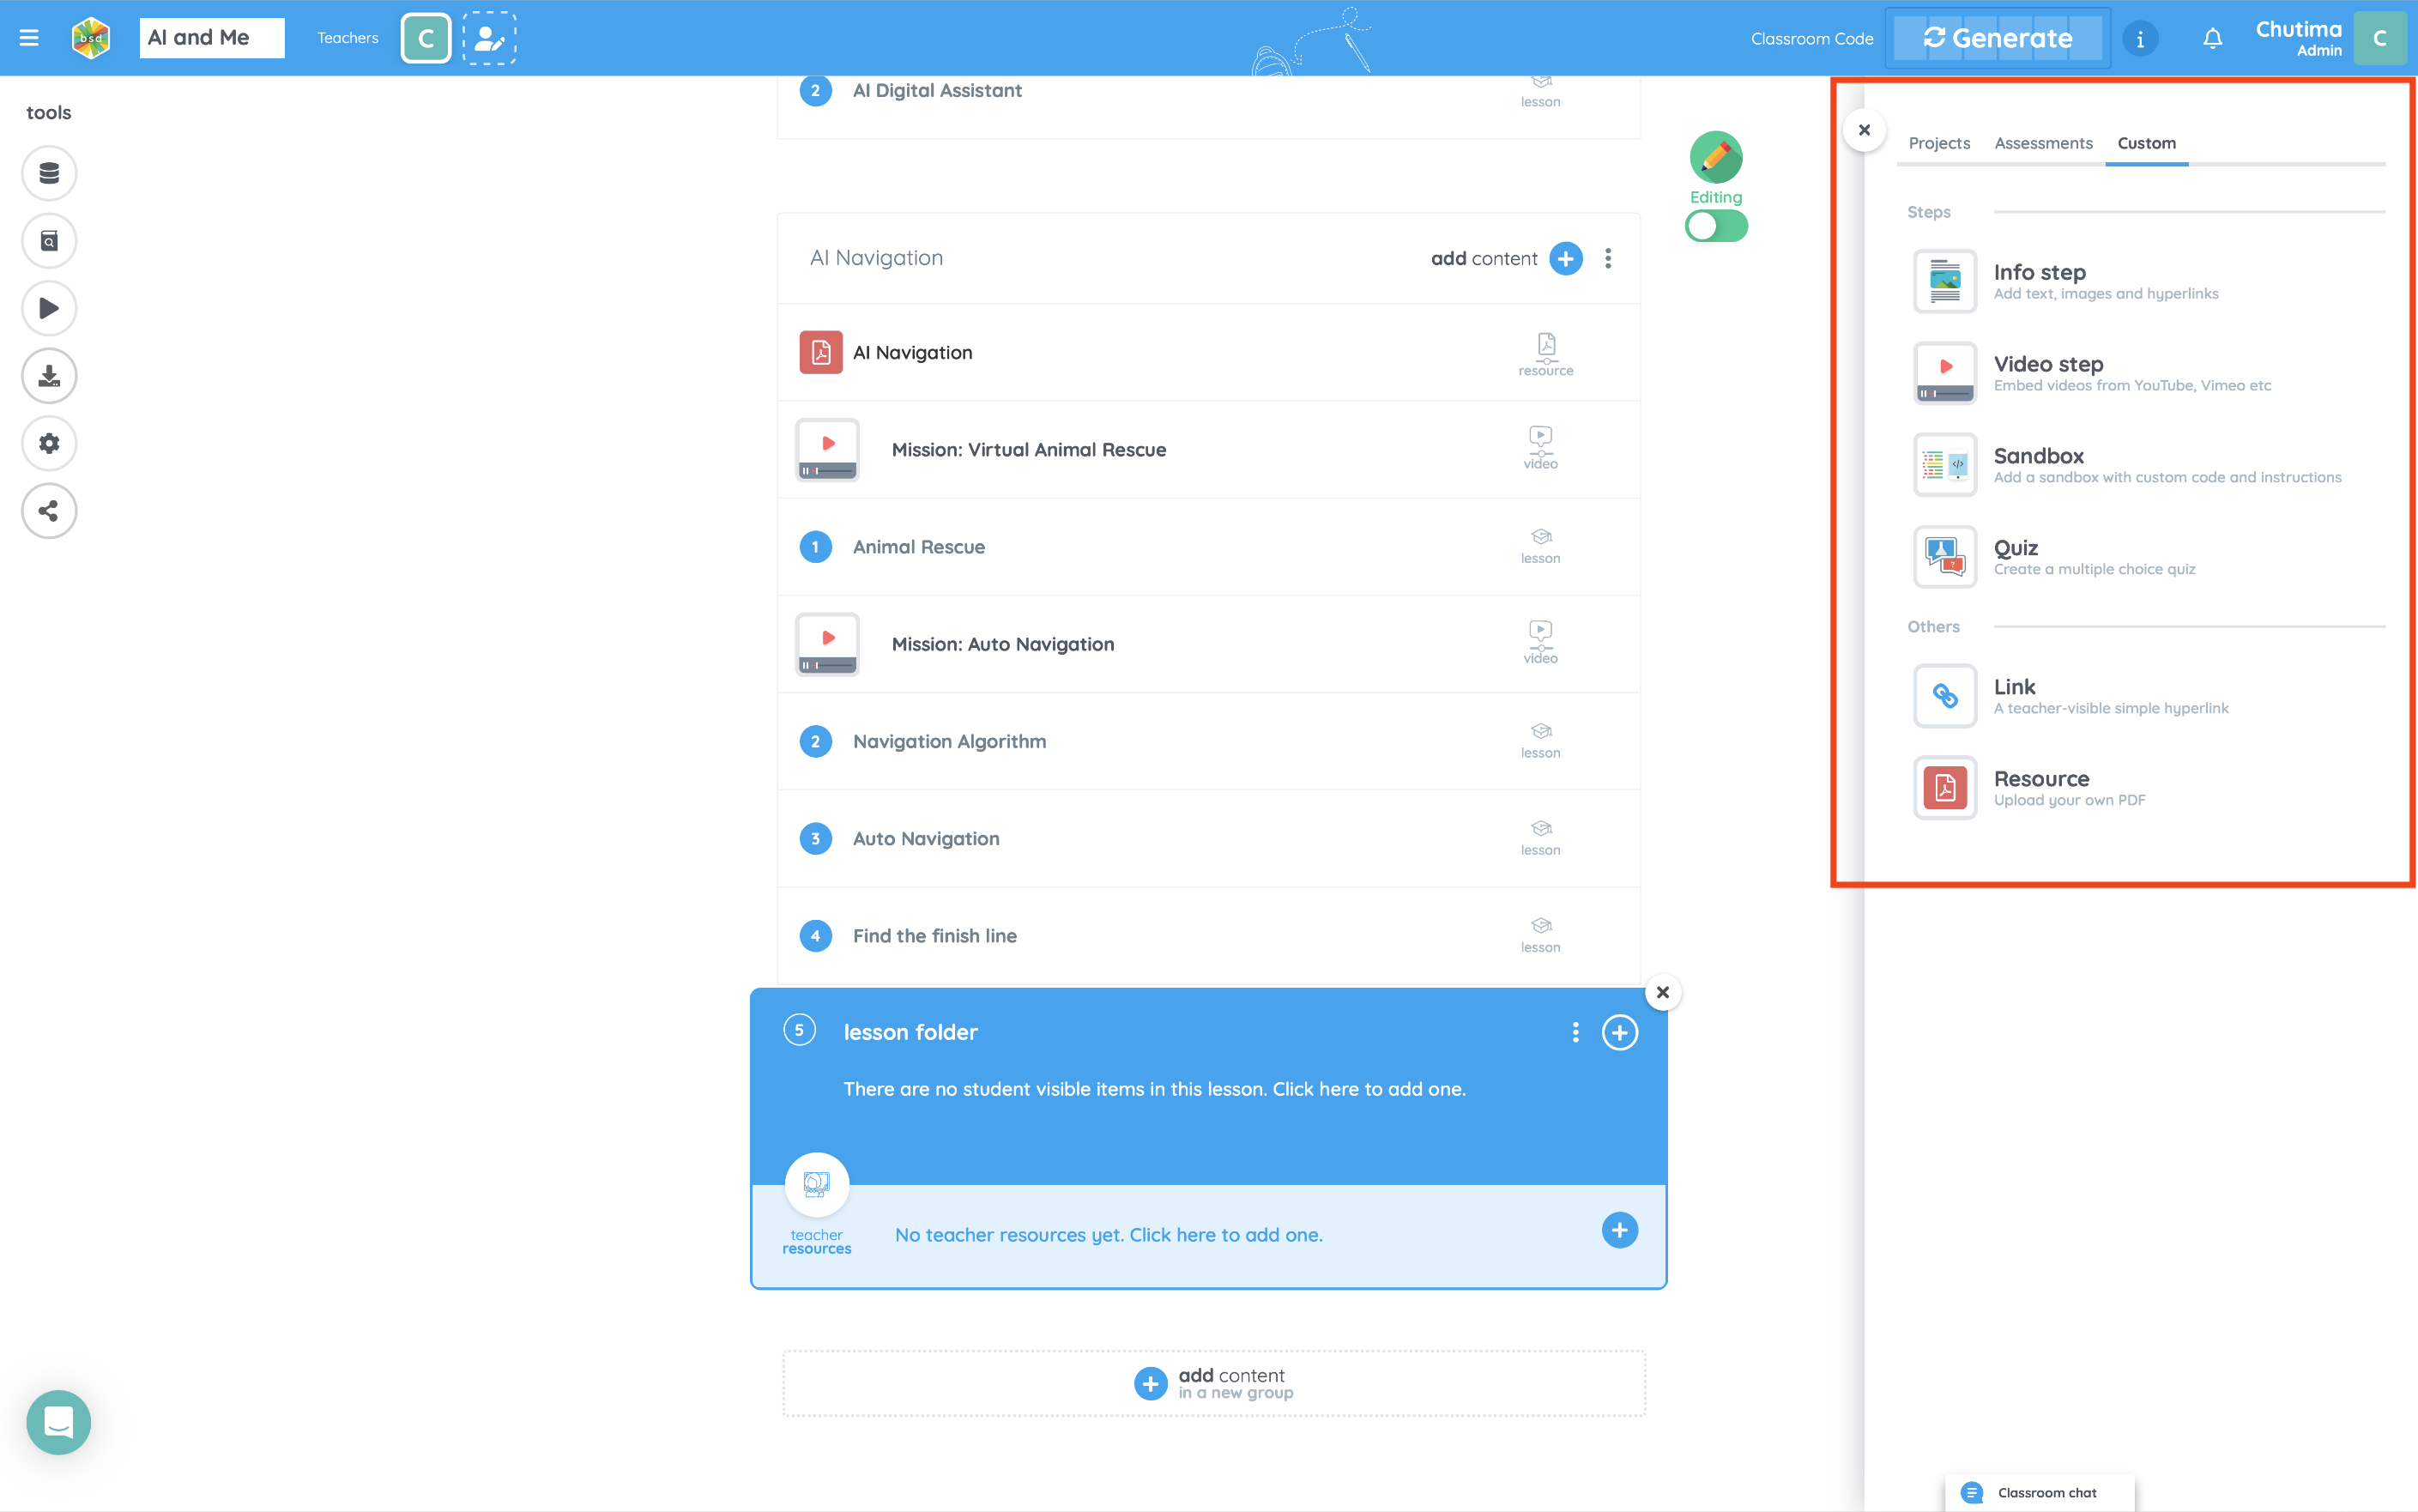
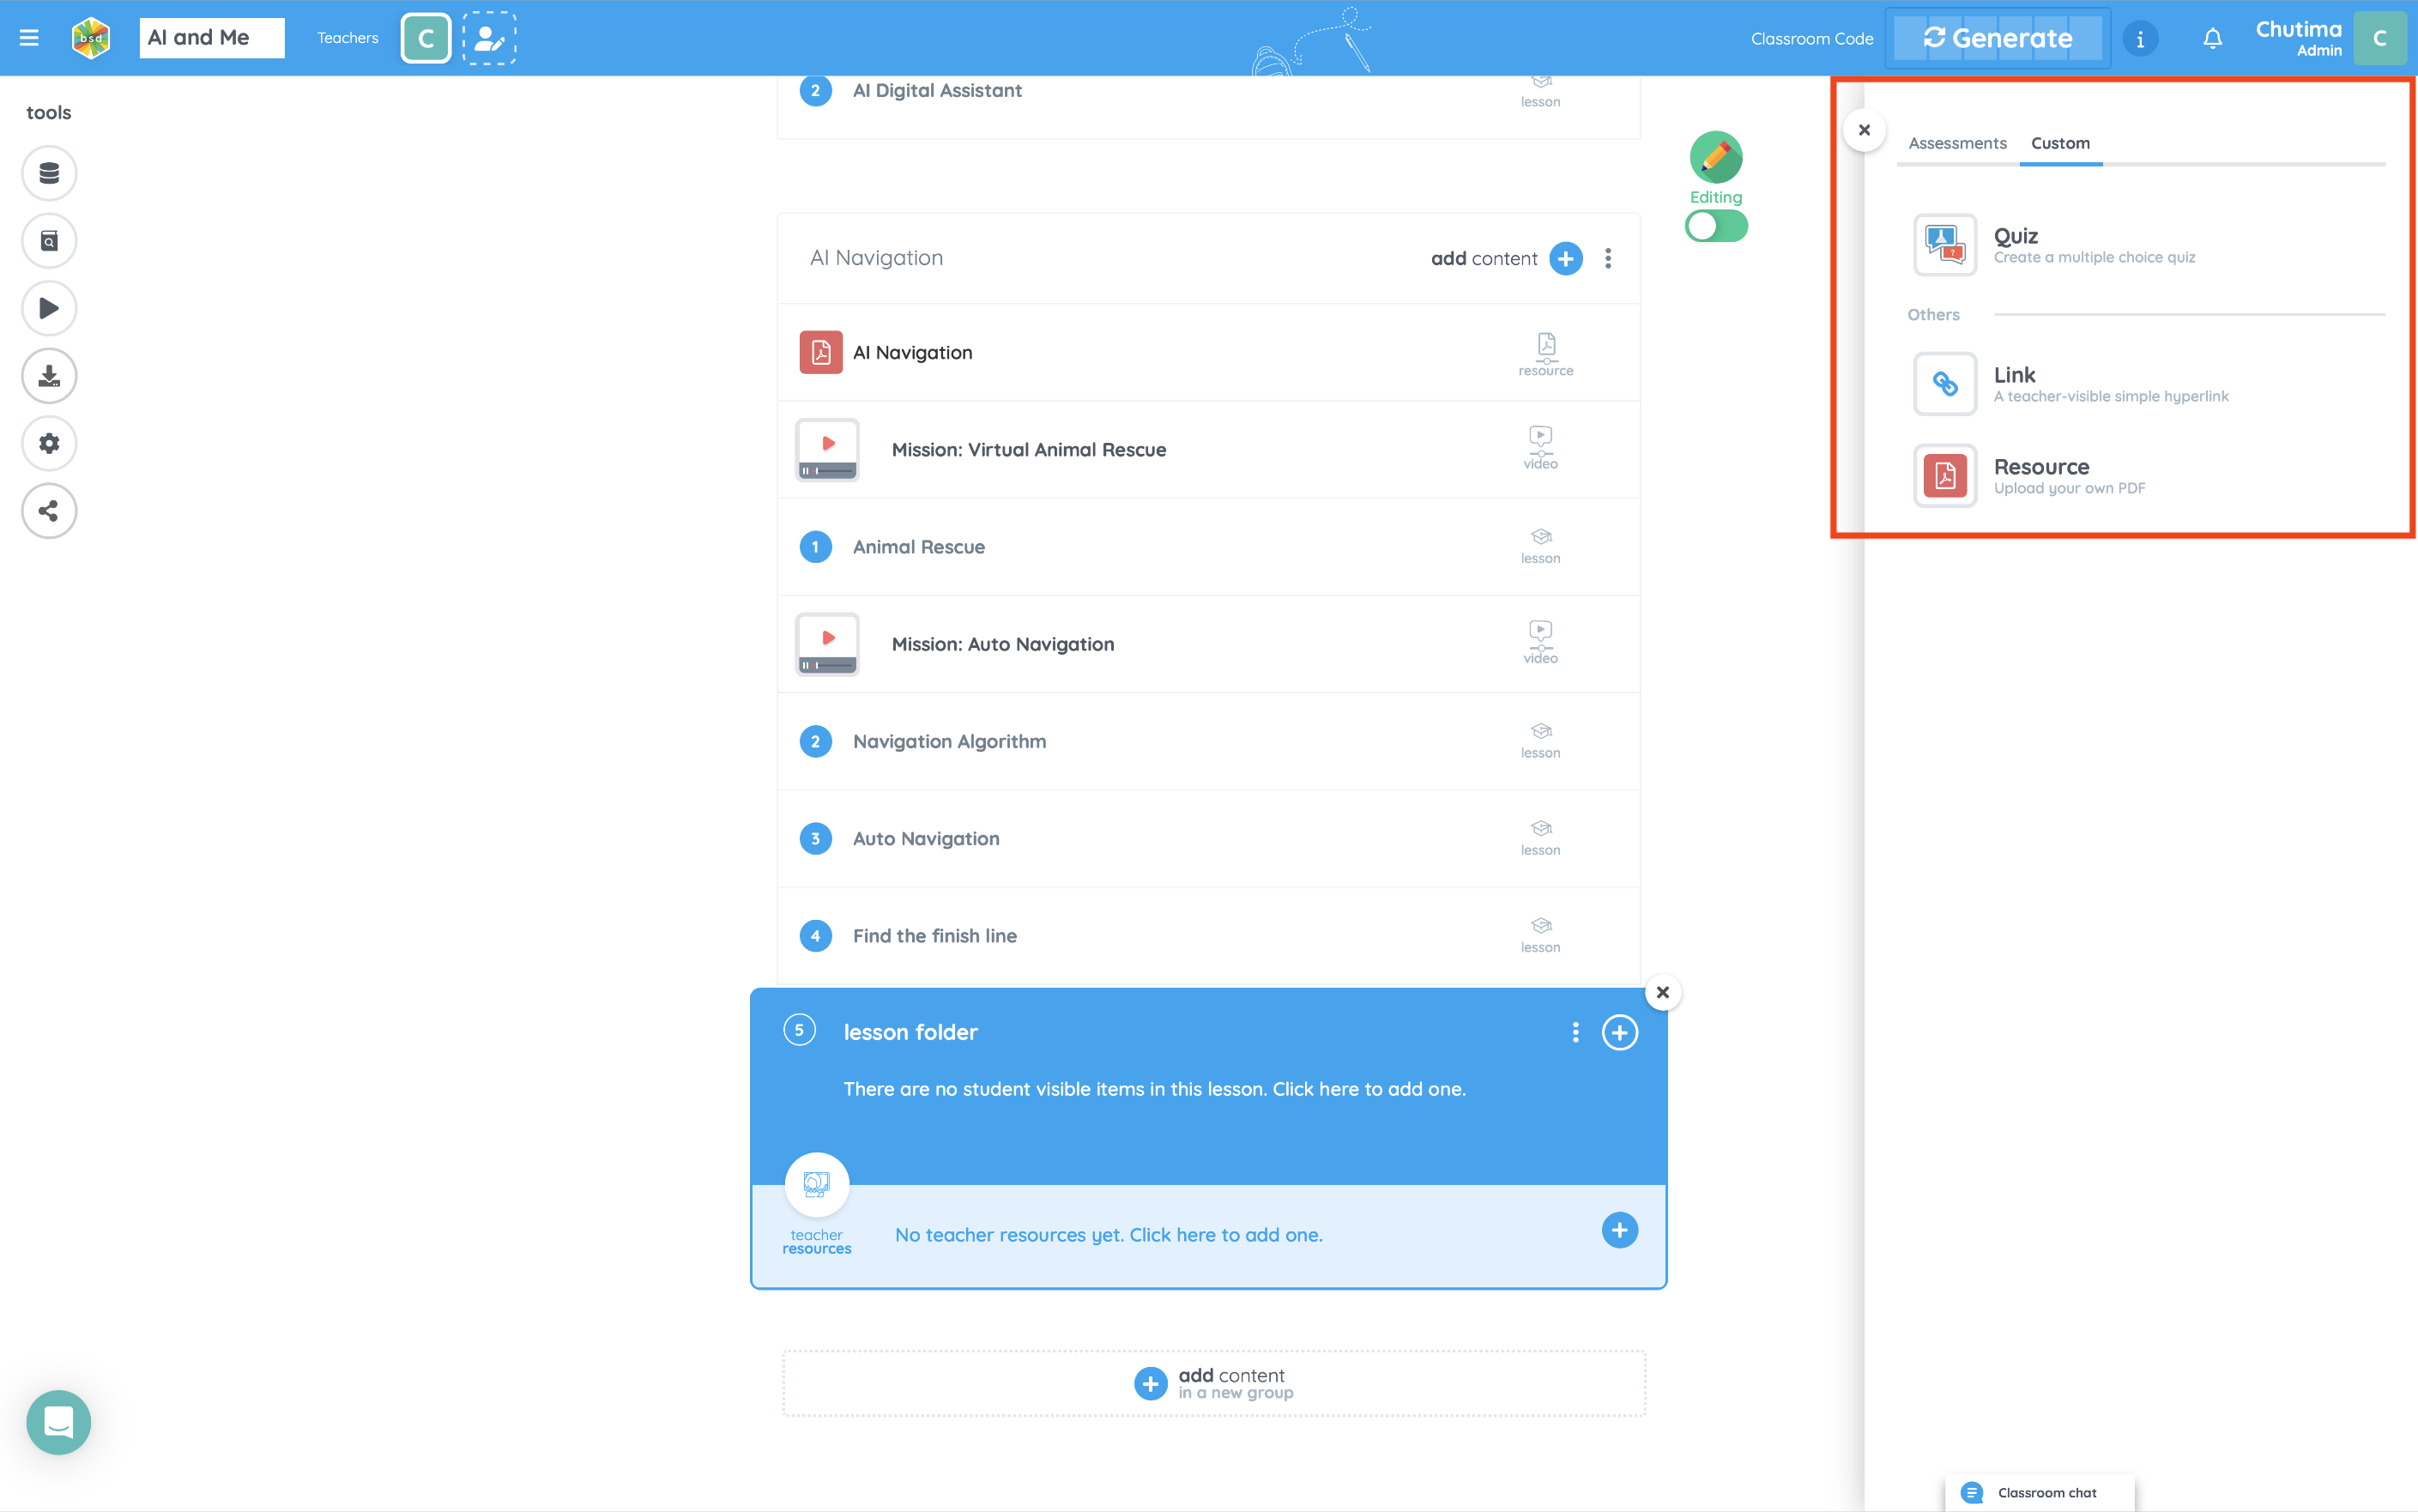
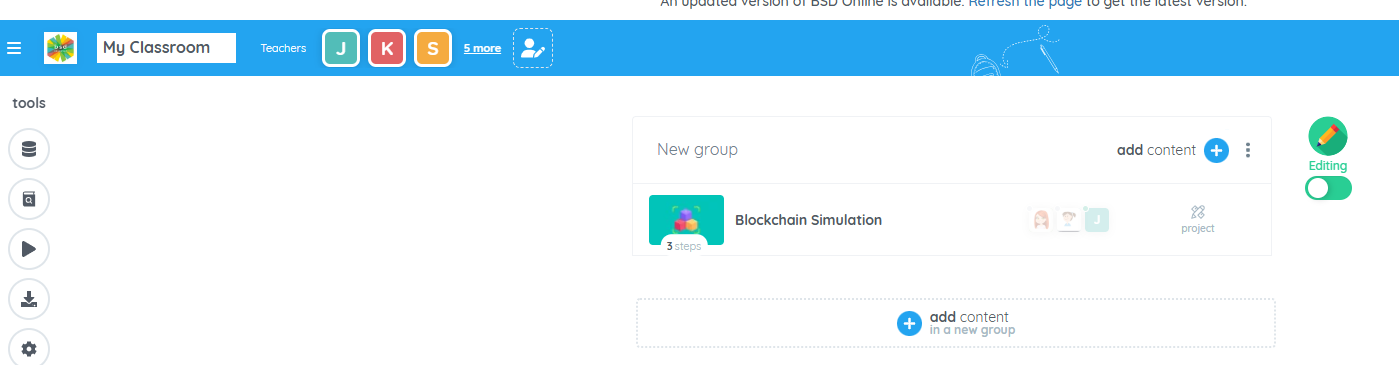
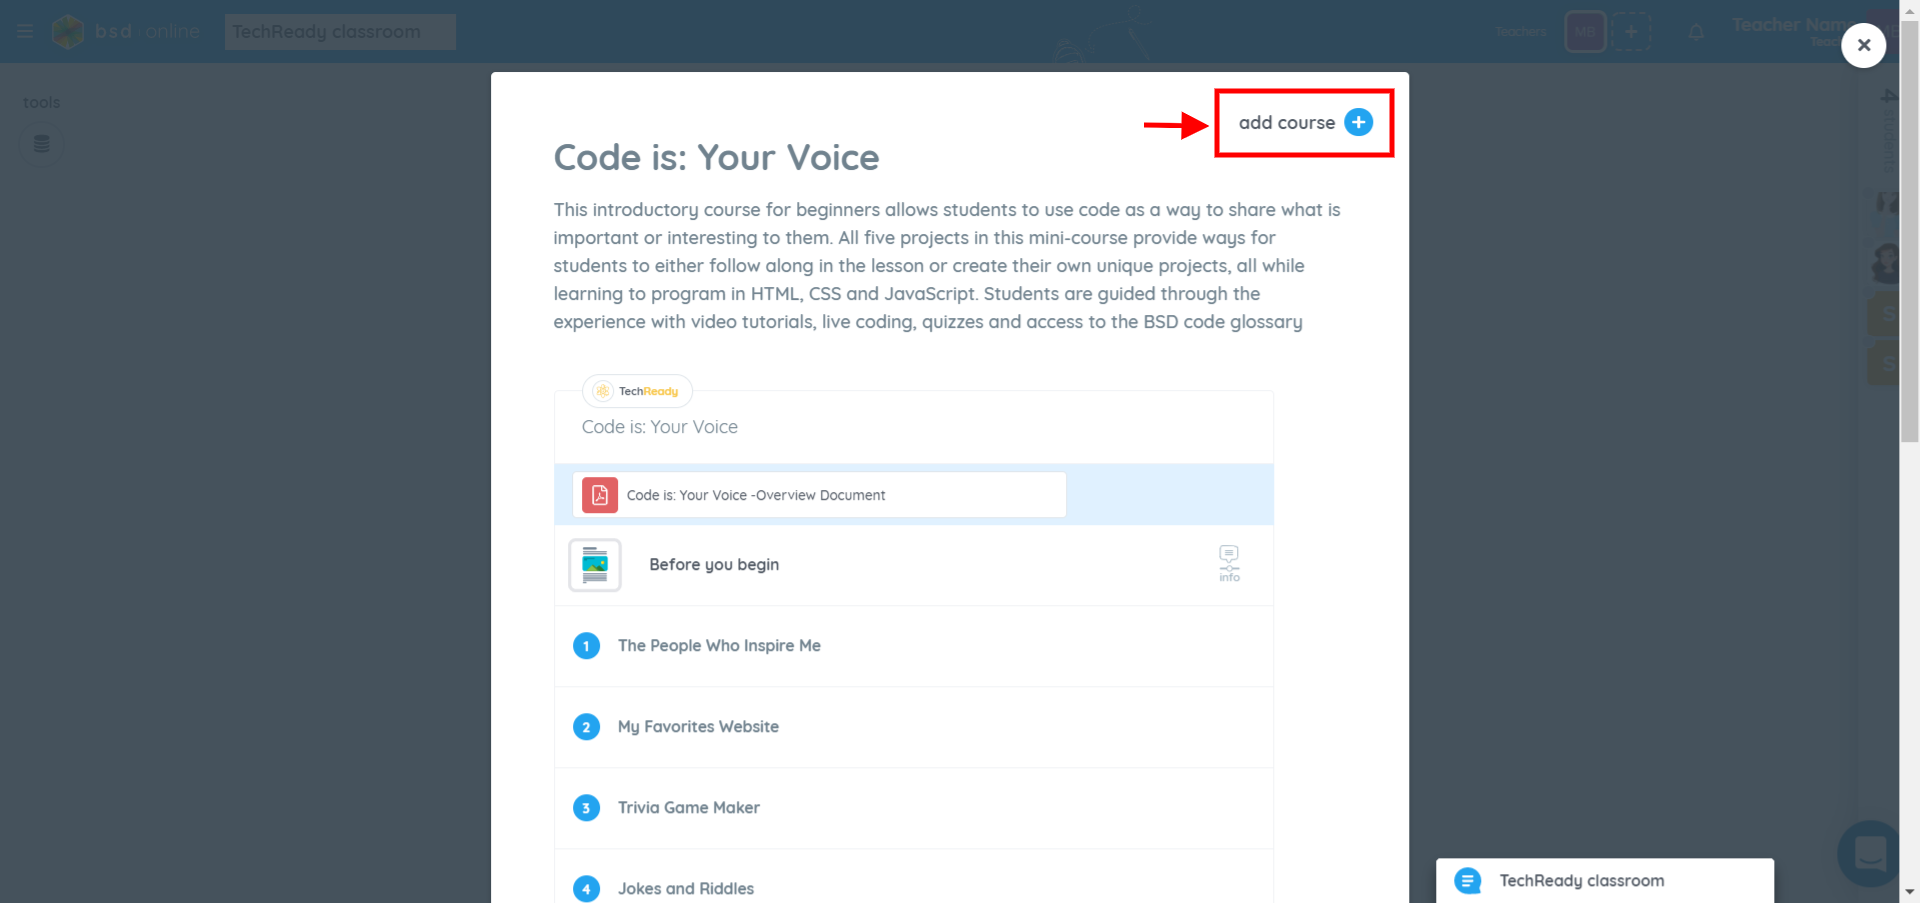
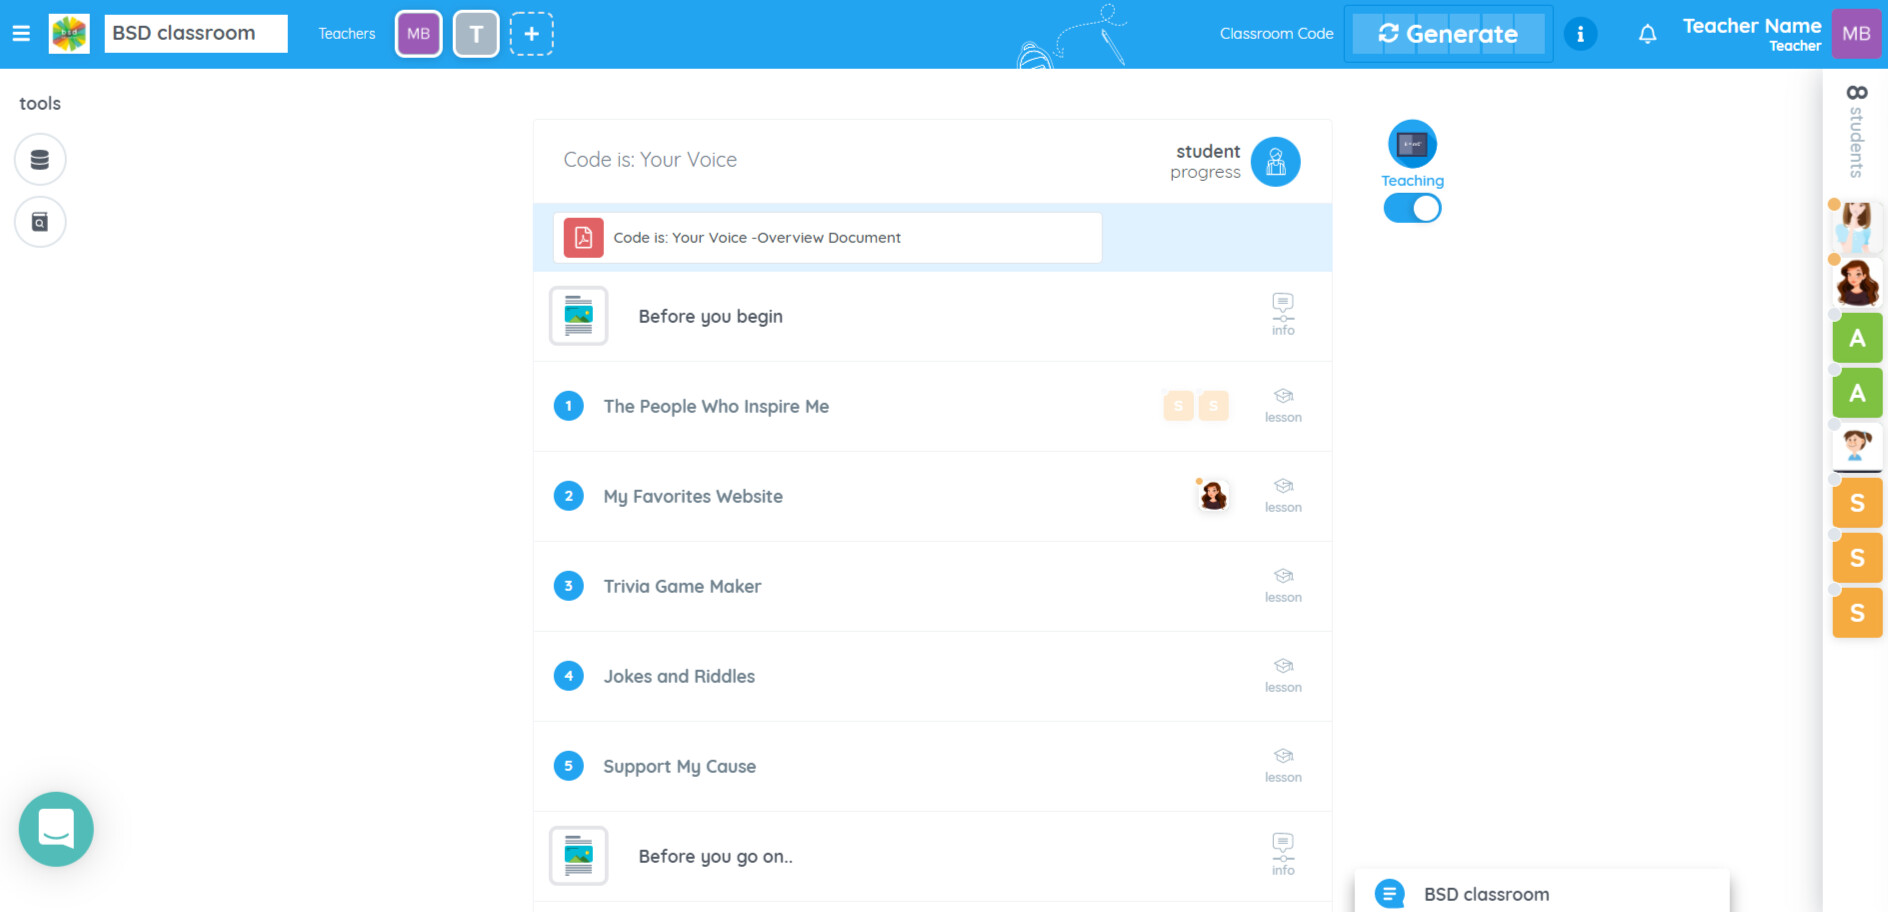
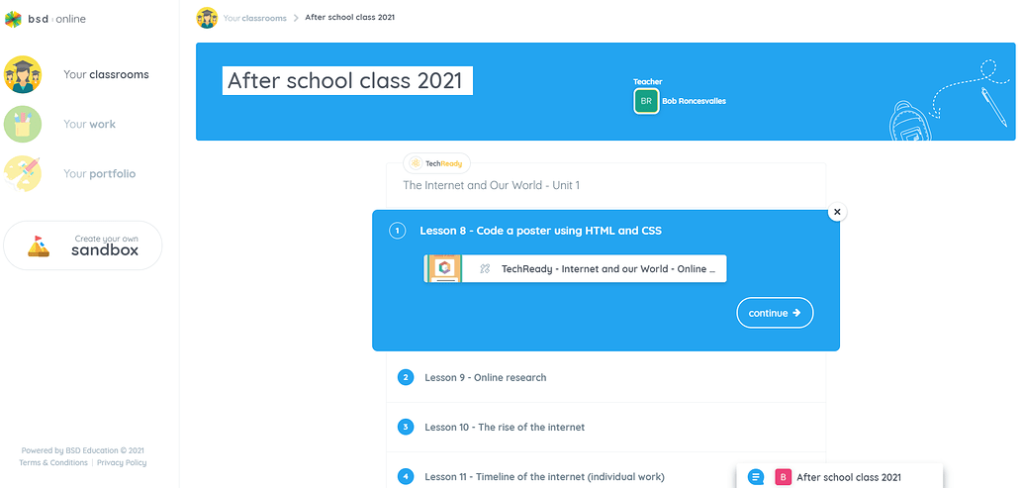
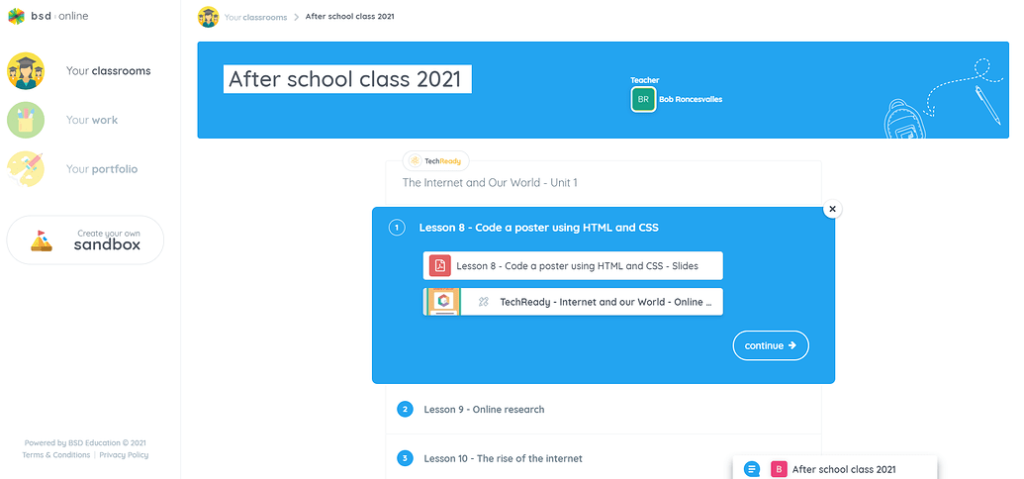
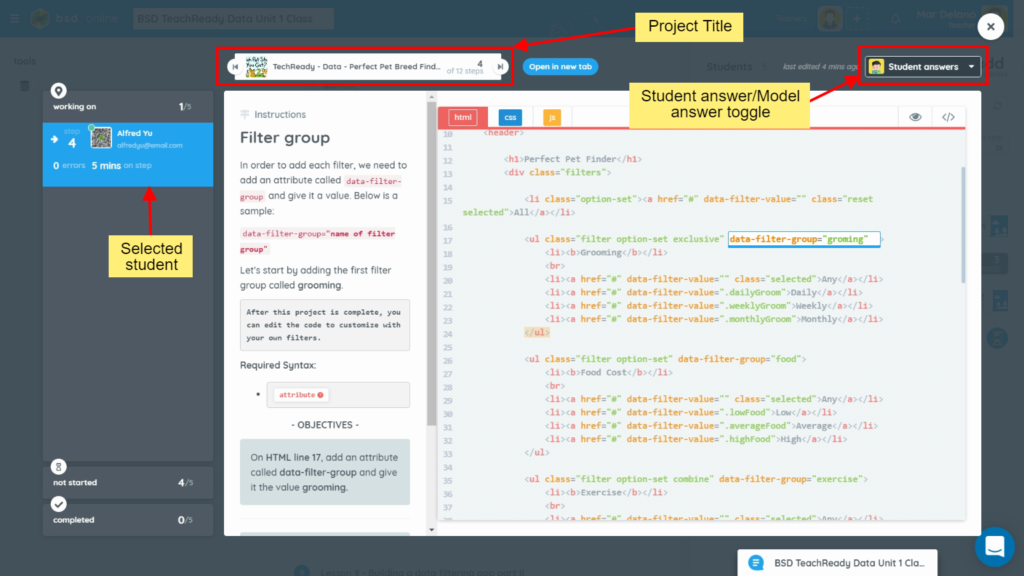
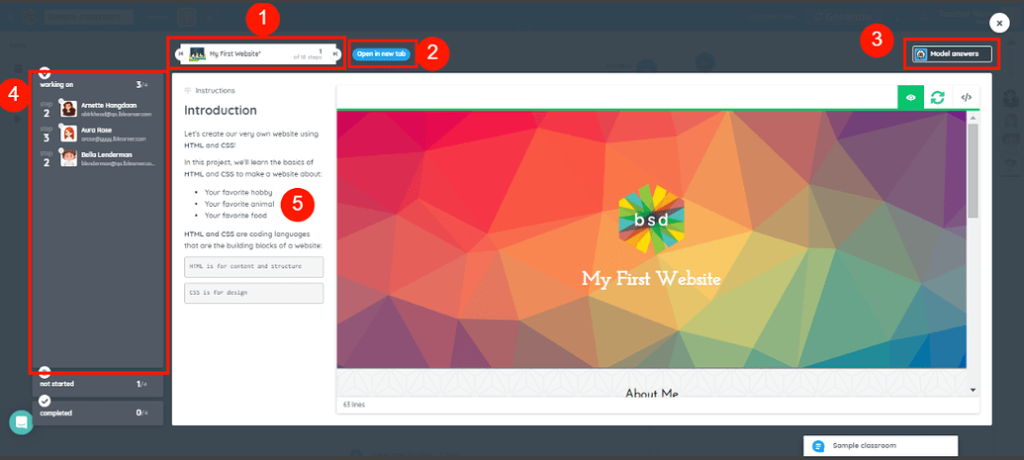
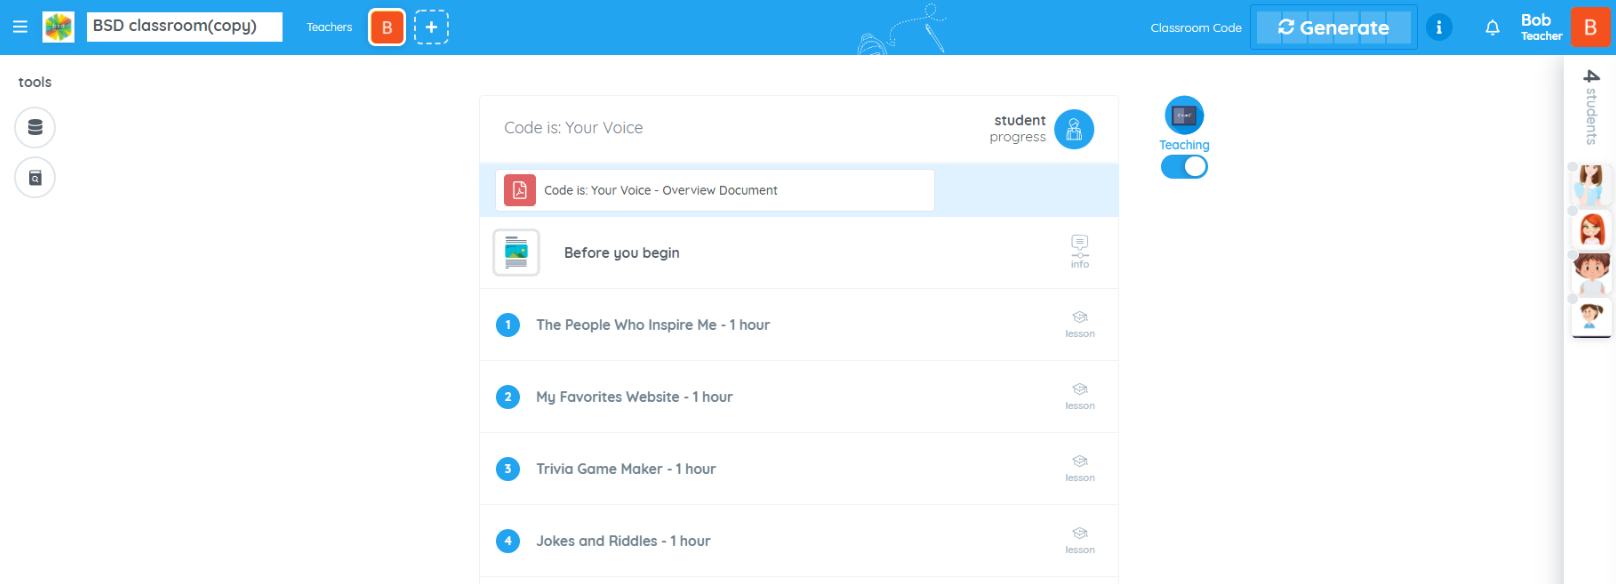
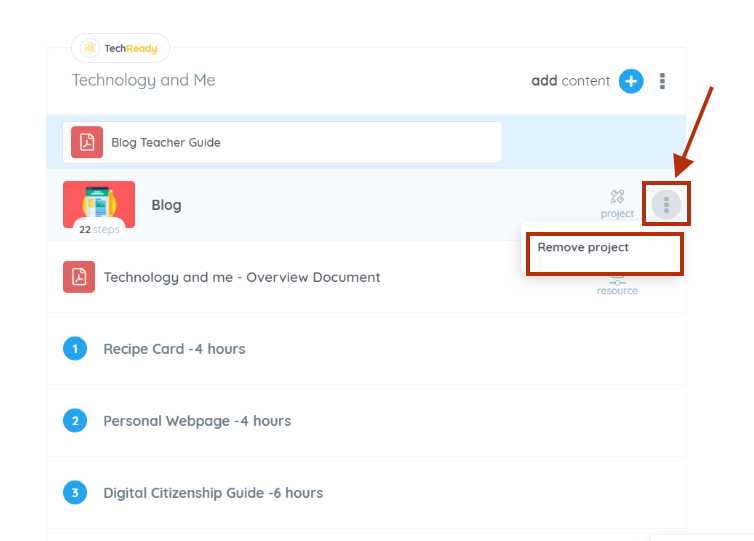
  1. Lastly, it will redirect you to the classroom you selected, click the “add course” icon. And you can see in the last picture, it is already inside your classroom.
screenshot-app.bsd.education-2021.01.08-15_03_33
screenshot-app.bsd.education-2022.02.01-05_40_46

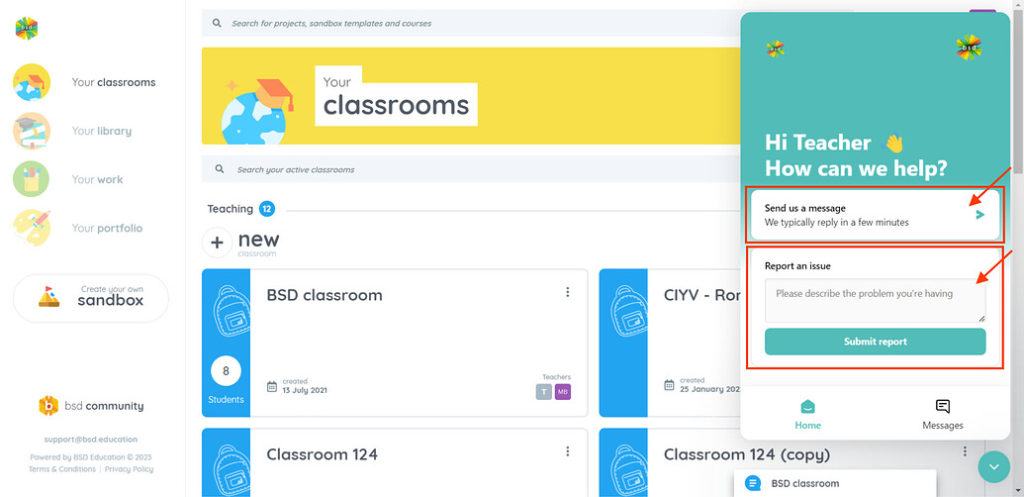
We hope you find this new feature helpful! If you have any questions or feedback, please feel free to send in a message through our intercom chat or email us at support@bsd.education.


Being able to guide your student even if physical teaching is not possible. To know and assist your student’s inquiry if they get stuck on a project step or sandbox templates right inside your BSD Online classroom. Now possible with the use of the “Ask for help” feature!

How does it work? The student clicks the “hands raised” icon on the step they need help.

Student view:

For example, on the “Online Poster” project step 3.

After clicking the icon, a message will pop up.

If the objective is not clear enough, then click the “Ask for help” button.

After clicking the “Ask for help” button, this confirmation message shows up at the upper right corner of the student’s page.

Note: “Ask for help” button is available only if the students are doing the project or sandbox templates inside the classroom.

The teacher/s will receive a notification on their account.

Teacher’s view:

Click the bell icon to see the help request from the student. It includes which project step the student needs assistance with. To see the student’s answer, click the project title.

Go to the tab pertaining to the objective and see the student’s current answer.

You will also see if the student makes an edit on the answer.

To toggle from “Student answers” to “Model answers”, click the drop-down arrow to select the option.

The teacher can respond to the student’s inquiry in any communication platform they normally use.

Keep posted here on BSD Community for more updates on new features. If you have any questions please reach out to our Support team via chat or email at support@bsd.education.

Have you ever wondered what BSD Online looks like on your students’ screen? In this challenging time where distant and hybrid learning is no longer an alternative but rather preferred by teachers, parents and students, we believe that familiarizing with student interface is worthwhile. In this article, we are going to see how BSD Online is from a students’ perspective so you can walk them through the platform without physically looking at their screens!

Let’s take a tour!

Your classrooms

This is the students’ landing page when they log on to their accounts. The student may be a part of different classrooms from different teachers. This is the area where they can see all classrooms they are part of together with classroom details like the classroom name, teacher/s, progress and when the last activity was. Also, we made students’ classroom interface more student friendly by adding a cool background.

Your work

On this page, we have Your projects – this will house all started(in progress) and completed projects. Project details like progress status and when was it last edited are available when hovered over the project card. We also have the Your sandboxes – this section stores all your sandboxes. Similar to projects, sandbox details are available when hovered over.

Inside a classroom

Once the student clicked or entered a classroom, this is a sample page that they will see. This will differ based on the contents added by the teacher.

Lessons like these are collapsible when clicked, showing all the lesson’s content, just like how it is shown in the teacher’s classroom. However, there will be a difference whenever the teacher decides to create a teacher-only pdf. Example:

A lesson with no pdf visible to the students:

A lesson with pdf visible to the students:

For more information about creating a teacher-only pdf, please visit How to Add PDF in a classroom.

Inside a project and a sandbox

Projects and sandboxes have slight differences when being worked inside and outside of a classroom. When a student is working inside the classroom, notice that the classroom name is indicated at the top left side of the page. Students do not have the capability to view model answers. Additionally, the “Ask for help” button is available for the students to send in help requests to the teacher/s.

Project inside the classroom:

Project outside classroom:

Sandbox inside the classroom:

Sandbox outside classroom:

Your portfolio

This section contains all of the students’ sandboxes. However, unlike in Your work section, Your portfolio allows students to generate a shareable link of their virtual portfolio that they can share to anyone, anywhere.

We hope that this article helps you get a better understanding of what the students’ interface looks like and will make virtual teaching easier for you and your students. If you have any questions or concerns, please feel free to reach out through our support channels- support@bsd.education and chat support.

For easier login, your students can use their Quick Login (QL) codes instead of using their email and password. This method is only available for students and please note that login codes expire after seven days.

Here’s how you can generate QL codes for students in your classroom:

  1. Go to your classroom.screenshot-app-staging.bsd.education-2021.06.30-01_41_03
  2. View the class list and click the Quick Login code link. A new page will open displaying the QL Codes of all the students in the classroom.ezgif.com-gif-maker (5)
    On the next page, you will see the date and time of QL code expiry.
    screenshot-app-staging.bsd.education-2021.06.30-02_06_10
    You can toggle the grid view by clicking the highlighted icon on the image below.screenshot-app-staging.bsd.education-2021.06.30-02_10_29
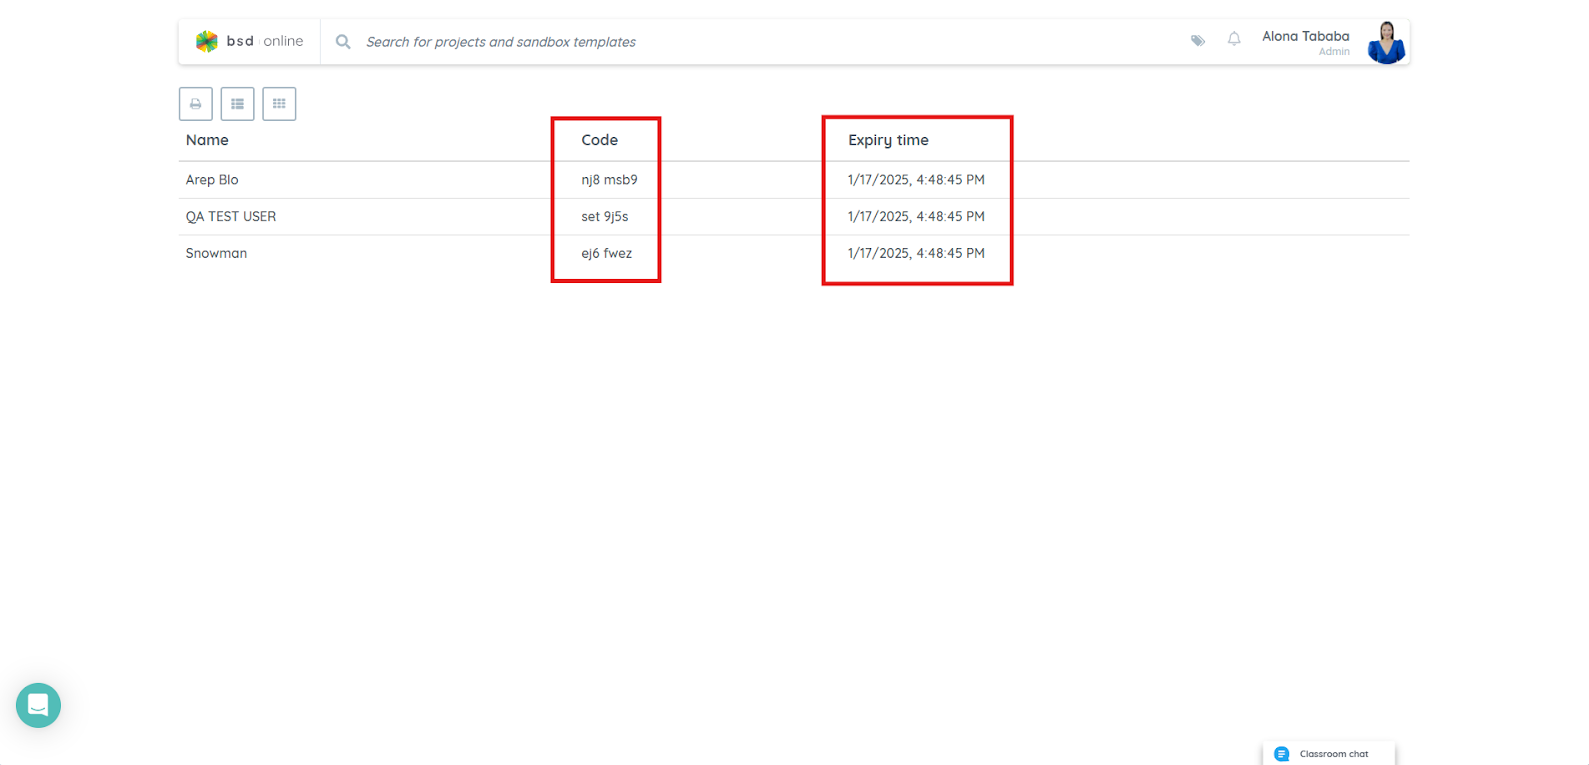
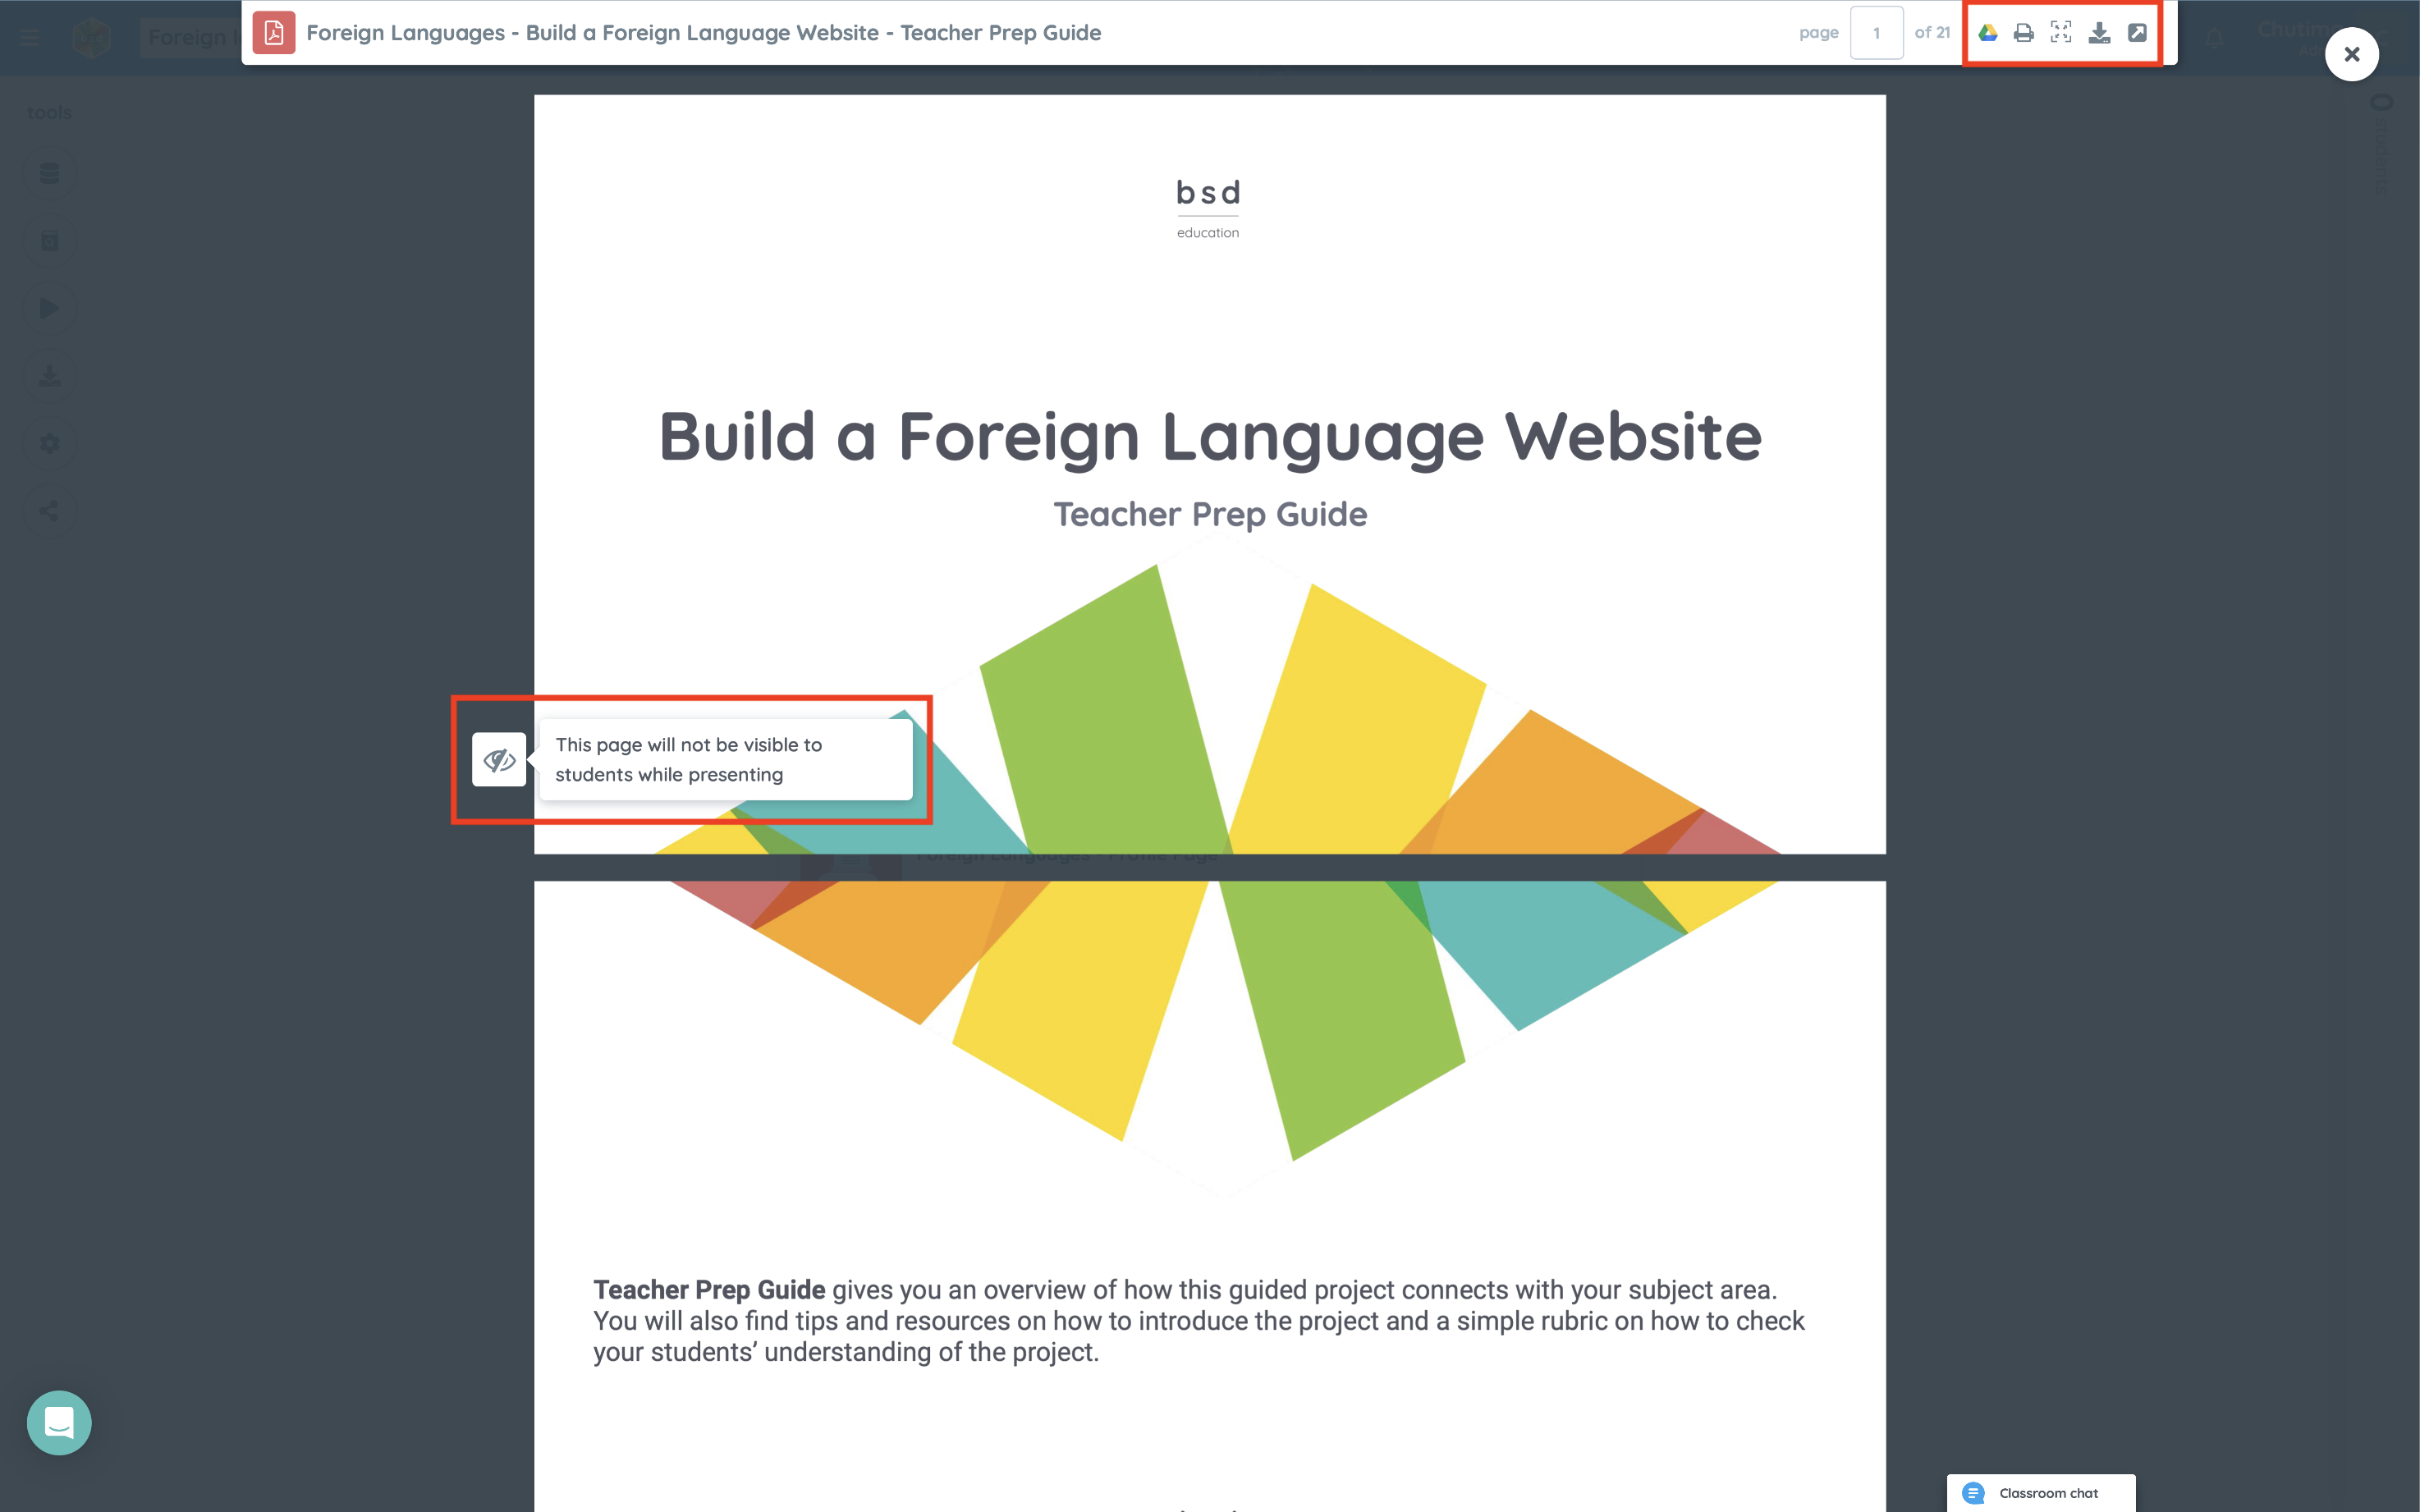
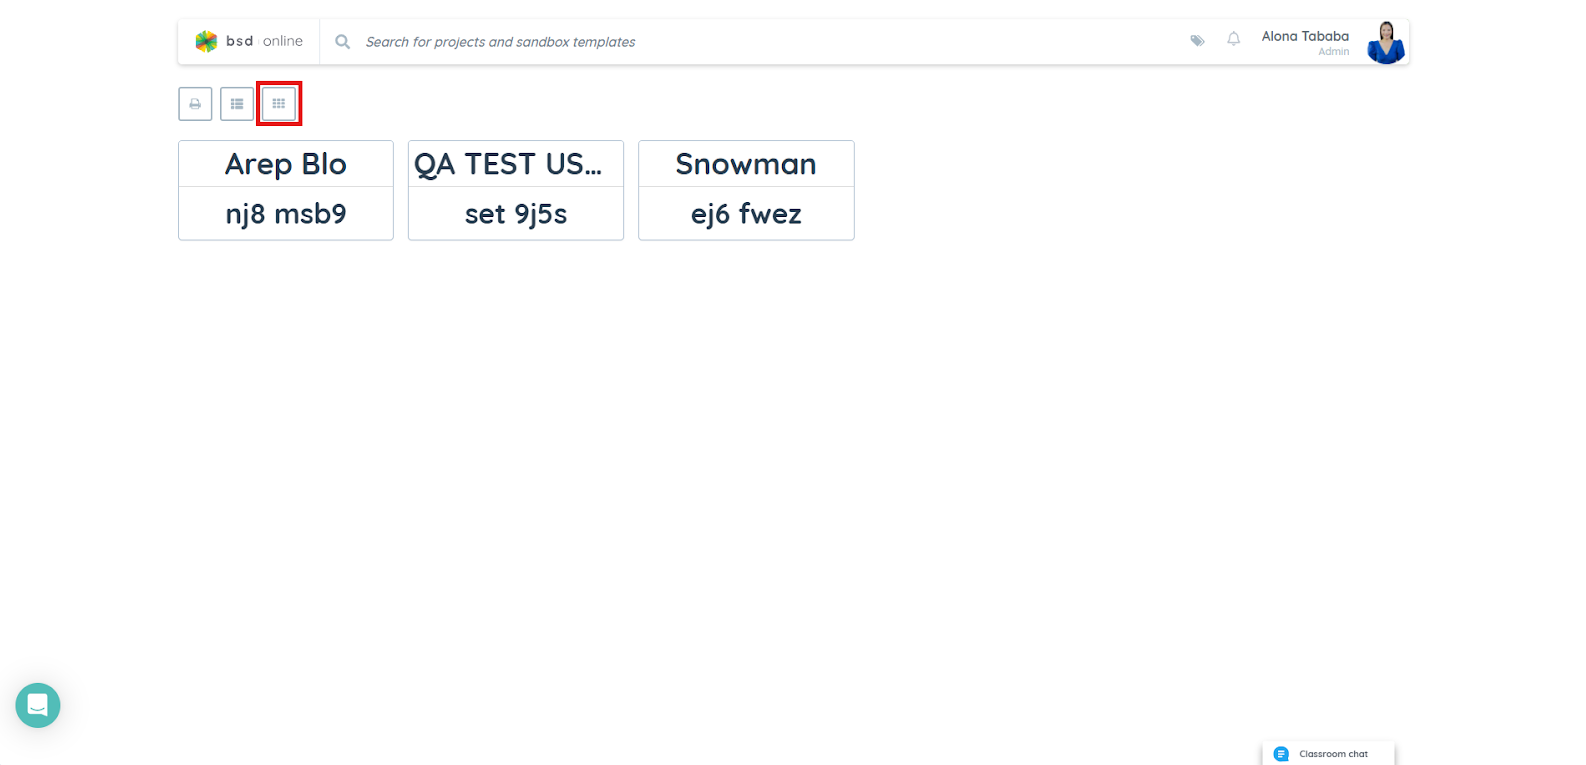
If you want to print the list, click the Print icon.
    screenshot-app-staging.bsd.education-2021.06.30-02_12_44

You can also view QL codes individually by following the step below. For this example, we will take a look at Alvin Yu’s QL code:

  1. Open the student list from the right panel and view the student’s profile by clicking his picture.
  2. Click the Generate button at the upper-right corner of the dialog box.
  3. The student’s QL code will then appear.

See the animation below to see how it is done:

ezgif.com-gif-maker (6)

Please note that clicking the copy button will copy the quick login link. The QL link looks like this:

screenshot-docs.google.com-2021.06.30-20_32_46

Once you copied the QL link, you can send it directly to the student. If a student copies and pastes this to the URL, he or she will be redirected to your classroom.

If you want to just send the QL code, just highlight and copy the code. The student can then use this code on the login panel as shown in the picture below:

screenshot-app-staging.bsd.education-2021.06.30-02_34_23

If you have futher question about QL codes, or help regarding BSD Online, please get in touch with us using Intercom.

Communication makes learning easier and efficient, it helps students achieve their goals, strengthens the connection between students and teachers, and creates an overall positive experience. However, in this incredibly challenging year where in-classroom teaching and learning may not be possible and virtual or blended learning becomes the best alternative, we want to make sure that communication will be maintained and easy for both teachers and students. We introduce the BSD student/teacher classroom chat!

This new feature enables teachers to communicate with their students inside the classroom, eliminating the need for a third-party communication channel in the process. This new feature will only allow teacher to student and student to teacher communication. Here’s a how it works:

The Chat box

The chat box is located on the bottom right side of the screen. It will always be available wherever you are on the platform for ease of access anytime a student sends in a message. Click this box to see all classrooms.

image

Classroom chat

All classrooms that you created or a part of will be listed here, including classrooms from other organizations if you have any other affiliations.

Classroom Announcements

This feature works as a group message to send a general message or class announcement once inside a classroom chat. All students inside the classroom will receive the message but if ever students responded, only the teacher will receive it as a personal message.

Example:

All 5 students will receive the same message from the teacher.

Students will receive this message. Classroom announcement logo will show up to indicate that the message was meant for the whole class.

When a student responds to a Classroom announcement, the teacher will receive it like a personal message.

Aside from communication, a student can also send an Ask for help through chat! This will enable the students to send in the exact step of a project that they have questions with. Whenever a student is on a project, they will have an option to click the Ask for help button and it will send a notification to the teacher through chat.

We hope you find this new feature helpful and we are excited for you to experience using this chat feature in your next class! If you have any questions or feedback about this new feature, please feel free to send in a message through our support channels support@bsd.education and chat!

More from
 

Real-Life Work Experience For High School Students

A high school internship is the best way to gain work experience, develop your professional skills, and fast-track a career.


In case your student got stuck on a question or a step in a project, you can access the answers to any step using the following methods:

First Method: From the Project
If you enter the same project as your students using your teacher account and go to the same step as your student, you can hover your mouse over the checkmark icon beside the “Objectives” button to display the “Model answers” button. Clicking on the said button will fill the correct model answer.

Checkmark icon for filling model answers

m1-2
Model answers button appears when you hover over the checkmark icon


Example of model answers after clicking the Checkmark icon

Second Method: From Classroom Mode
Here’s how you can check the model answers using the Manage classrooms under the Teacher Tools :

  1. Go to your classroom.
  2. Toggle the student list and click the title of the project which your student is working on.
  3. The student progress viewer will pop up. Here’s a screenshot of the viewer:
  1. The student progress viewer will show the step your student is currently working on. By default, you will see the student answer, so switch to Model answers to display the model answer for the current step. See the animation below:
  1. After switching, you will then see the model answer. You can use this model answer to help your student by giving him or her a clue.
  1. Screenshot of a model answer under the student’s progress view

If you have questions about this feature, please reach us through chat.

Once you have created your classroom, added your students and assigned them contents like projects and sandboxes, there is a great way to view and monitor what your students are working on! Here’s an example of a classroom with students and projects:

In this example, students have already started working on their projects. If we want to take a look at the project in details, click on the project title:

Once we click on the project, the classroom feature will be shown. This will provide information about the project, student’s progress, model answers and student answers as well. Let’s take a look at each parts:

Project Title and Time Machine- This is the title of the project you are viewing. If you click on this, it will collapse and show all the project’s steps. The back and forward arrows will allow you to move to any step you wish to view on the project.

Open in new tab – This allows you to open the full project in a new tab.

  1. Student panel – There are 3 panels on different statuses. Working on, Not started and Completed based on the students’ project status. This will help you track students’ progress as they work on each project. This section is very powerful as it gives you the capability to see what the student’s codes are as they work on the project using the “Student Answer” button.
  • 4a. Working on panel – this will have the list of students that have started the project. Information like current step number, number of errors and time spent on a step can be accessible when you click on the arrow icon and quick access to the student profile by clicking on the student’s name.
  •  

4b. Not started panel – This will list down students that haven’t started the project yet, giving you an idea who may need help getting to the correct project.

4c. Completed panel – All students who have completed the project will be listed here. Students who have finished early can be given other tasks or help other classmates who may be having difficulties.

Model answer/Student answer – This button lets you toggle to view the model answer for the step or the view live what the student’s answer is. The Student answers will only be available for students who are already working on a project.

Example:

Student’s view:

Teacher’s view:

Project view – This is the overview of the project. What will show on the screen will depend on if you are viewing the model answer or the student answers.

We can also use the Student progress button.

Once you click Student progress button, a page containing an overview and progress of the group or course you selected will show up. The information you can see here are the following:

  1. Group or Course name
  2. Project or Lesson – This will show the either the lesson number or the project image tile and the lesson name and project name when hovered over with the mouse pointer.
  3. Progress – The percentage indicates the percentage of completion for the whole lesson group or course while the blue chunk indicates the completion for a lesson or a project.

These are the classroom features that can help you be more effective in teaching BSD Online and your own materials to your students. As we continue to improve the platform to suit your teaching needs, always feel free to reach out if you have any suggestions or feedback. You can get in touch with us through support@bsd.education or through chat support!

The Glossary is a set of interactive cards which explain HTML, CSS and JavaScript codes, how they work and how to write them. They can be found in all guided projects and within sandboxes on BSD Online. These Glossaries are strategically placed on steps where the code or function will be used. Glossaries will give you an idea and a better understanding of the codes that you are going to use. There are 2 ways to access the glossary cards. Here is the first one:

1. Click on the icon below Required Syntax, like the one below:

2. Or you can use the new feature, the “Glossary search” by clicking the button below:

After clicking on the Glossary search button, a search box will appear. You have the option to type in the code, or use the scroll bar to search for the code you want to know more about.

Once you have selected the code, it will give you a preview of the glossary. To view the full glossary, click on the “Open glossary card” button.

image

When you click on a Glossary or open a glossary card, a window will pop up and it always starts with the “What is it?”

Tip: There are 2 ways to navigate the glossary. You can either use the mouse and click on the next glossary card to view it or you can use the keyboard’s left and right arrow keys to switch from cards to cards.

“Syntax” gives us the code’s description, uses, and function.

“See it in action” will show us how to use the code together with values.

Tip: Hovering on the code snippet will give you an option to “Copy to Clipboard” enabling you to paste it straight to your work.

ezgif.com-gif-maker (1)

“See it in action” gives you an idea of what the end result will be. The top panel has an edit feature, letting you type in your code and get a real-time result on the output panel below it. It also has a “Copy to Clipboard” and a “Reset” option to return to the original example after code customization.

Glossaries are color-coded based on the coding language. Red for HTML, Blue for CSS and Yellow for JavaScript. This will help students easily identify which language they are working on.

If you have questions or concerns, let’s talk! Feel free to send an email to support@bsd.education or “start a conversation” through chat support!

More from
 

Real-Life Work Experience For High School Students

A high school internship is the best way to gain work experience, develop your professional skills, and fast-track a career.


There are 2 ways to search for content i.e. projects or sandbox templates. The first way is by using the search bar at the top when you are in your BSD Online account homepage.

image

When using the search bar, you can enter keywords or the subject of the project/sandbox template you are looking for.

image

You can also use the toggle project tag chooser to filter out the projects by subject relevance. This will help narrow down your search to the specific content you are looking for.

image

Please note that projects and sandbox templates have different icons:

Project icon

Sandbox template icon

Another way of searching content is by browsing the “Your library” section that can be found on the left-hand side of your BSD Online homepage. This houses all the available courses in your organization.

image

You can also get back to your projects that are still in progress by clicking on Your work. This also lists down all the projects you have completed.

image

Access the sandboxes you want to customize by choosing “Your portfolio”,

image

If you have questions or concerns, let’s talk! Feel free to send an email to support@bsd.education or “start a conversation” through chat support!

Teaching the same students with different courses? Or teaching the same course to a different group of students? Creating a new classroom can be a little tedious. BSD created an easier and time efficient way of creating a new classroom for your teaching needs. Classrooms can now be duplicated and have the option to copy the list of students and contents too! This is how you do it:

  1. When you are in the Manage classrooms tab, click on the ellipsis (three dots) and click on “Make A Copy”.
image
  1. A pop-up window will appear and will have the customization that you need for your new classroom. You have the option to rename the classroom (recommended to avoid confusion) and 2 checkboxes to copy the contents and students from the original classroom.
image
  1. After clicking on the “Create classroom” button, you will go straight inside the classroom where you can make your desired changes like adding/removing contents and students. You can also rename the classroom here if you’re not able to on step 2.
image

If you have questions or concerns, let’s talk! Feel free to send an email to support@bsd.education or “start a conversation” through chat support!

More from
 

Real-Life Work Experience For High School Students

A high school internship is the best way to gain work experience, develop your professional skills, and fast-track a career.


In recent years, there has been a growing interest in leveraging technology to improve education. One area where this is particularly promising is the use of data analytics to better understand what is happening in the classroom. With the help of the “Export student progress report” feature, it is possible to extract data from a classroom setting and use that data to gain insights into students’ performance and engagement.

Inside the classroom page, a new button in the tools menu has been added that allows teachers to export a CSV file containing the list of students with their progress data from the classroom.

The student’s classroom completion percentage, number of started sandboxes, student’s current location, last activity, time on a project step, errors, total classroom session duration and online status are included columns in the progress report.

This feature will help you as the teacher to track students’ progress and identify areas where students may need additional support to help them improve. Teachers can use “Export student progress report” to track student behavior, engagement, and performance and educators can gain a better understanding of what is happening in the classroom and provide the best learning environment.

If you have questions or concerns, let’s talk! Feel free to send an email to support@bsd.education or “start a conversation” through chat support!

After creating a classroom, you can still edit the content if you want to remove or add lessons/projects. Follow these easy steps on how to do it:

Step 1: Click “Your classrooms”

Step 2: Click the classroom you want to edit

Step 3: Toggle from “Teaching” to “Editing” mode.

Now that the classroom is unlocked, you can do changes like removing and adding projects, sandbox templates and custom steps in the same course.

To add additional content to the classroom
Click the link “+” sign to see the classroom resources available. The additional content will go to the bottom of the classroom content list.

You can also add additional content inside a folder.

If you wish to re-order the classroom content, possible by just dragging it anywhere inside the same content group. Here’s a gif to explain the re-ordering of classroom content.

To remove content from the classroom
Hover over the content you want to remove and the three dots will display then click “Remove”.

Inside the folder, this button is also available. Here’s a gif for reference.

Another thing you can do as a teacher is to control the resources visibility 1 in the classroom.

If you have any questions or experiences to share, feel free to make a post here in the BSD community site.

There are many ways how you can check on your students’ progress status. One way is by looking at their profile by clicking their avatar (profile picture) inside the classroom. Teachers can click on any student and select the “Login information” tab to see their latest activity, total number of logins, and last login date. You can also see your students’ customized sandboxes or portfolio by clicking the open portfolio button. Now, with the new classroom feature which is the “selective user profile”, you don’t need to close the button dialog to see every student’s information.

Here’s how it works:

**Step 1: On your home page, click on “Your classrooms”, under your “Teaching” classrooms you will see all the classrooms you have created. Click one of your classrooms.

PD1

Step 2: Inside the classroom, click on the classroom dashboard.

screenshot-app.bsd.education-2022.02.01-04_42_54

Step 3: Click on the student avatar.

PD3

Step 4: The window showing the profile of the student will appear.

Upon clicking the selective user profile, you will see the previous profile and the next profile of your students.

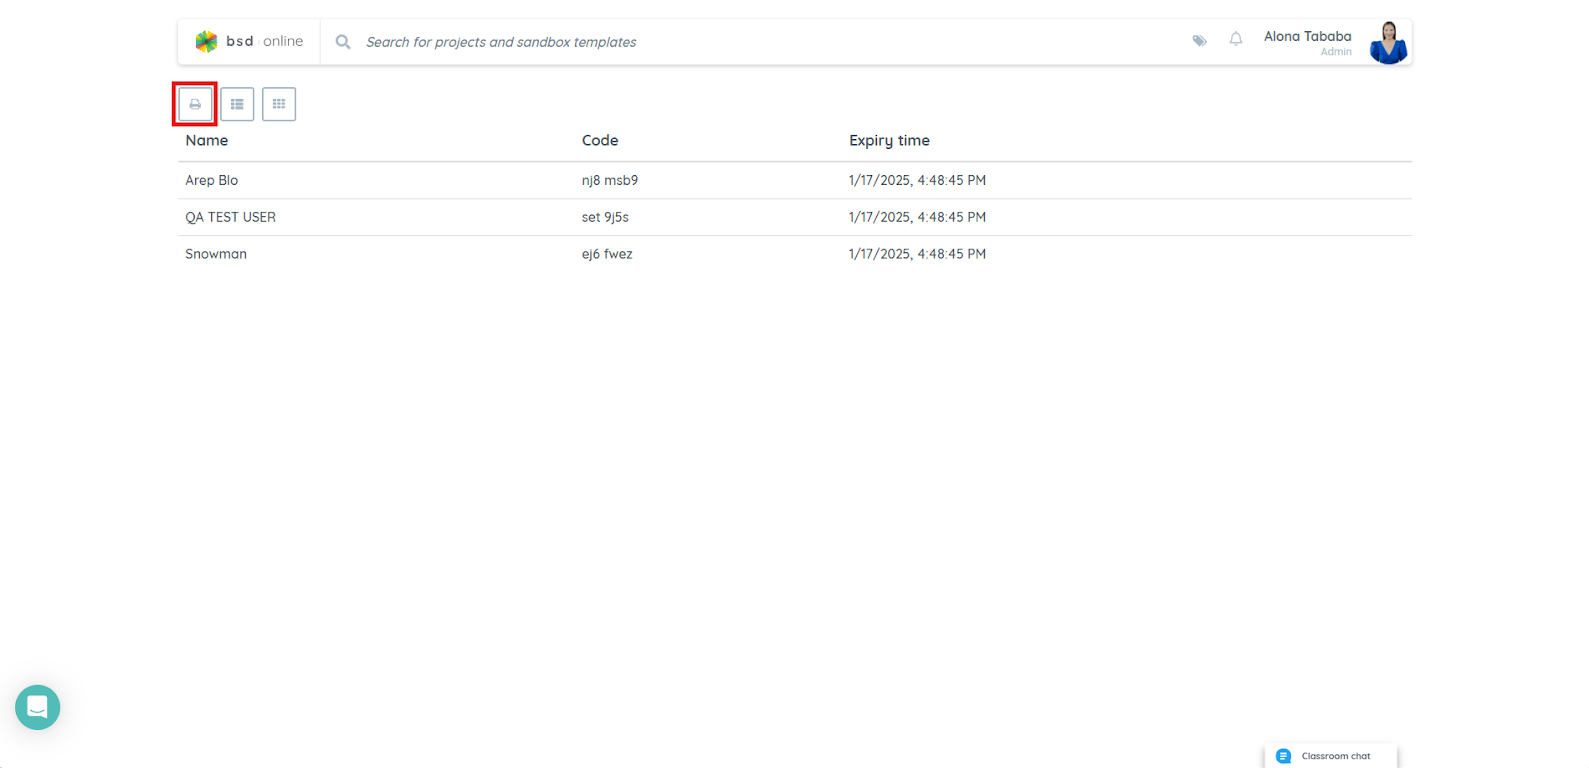
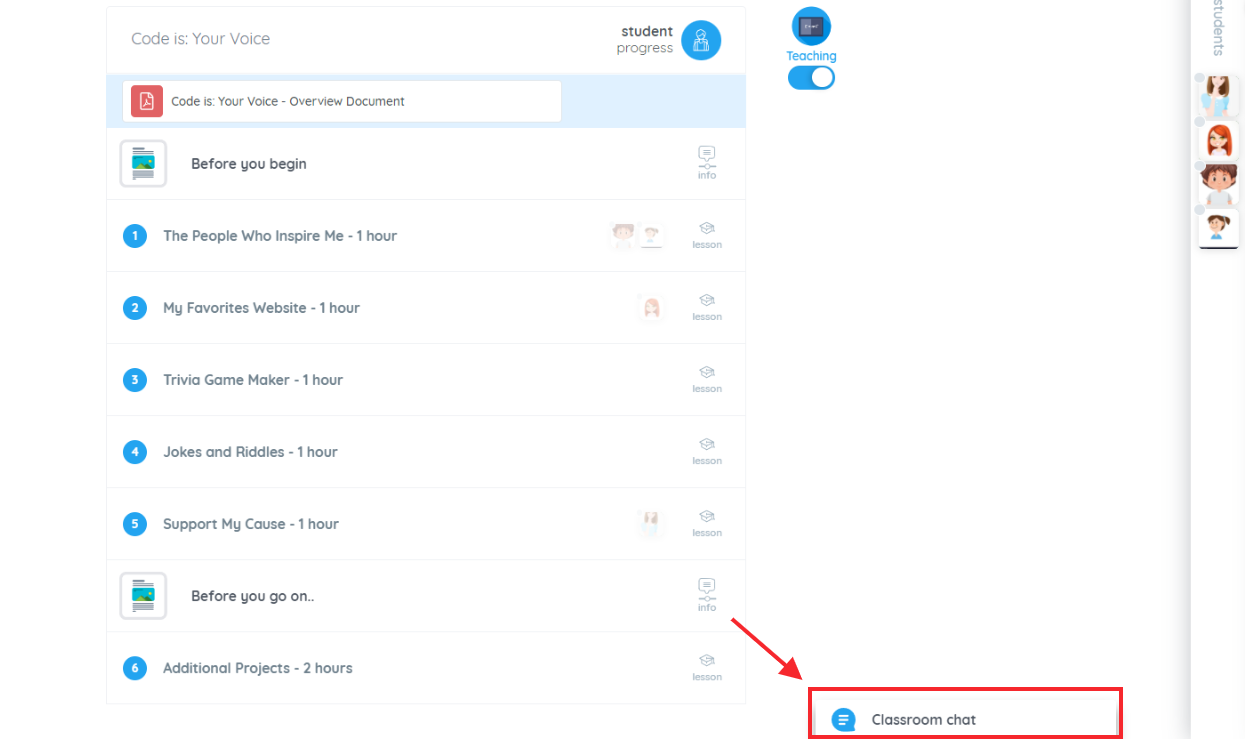
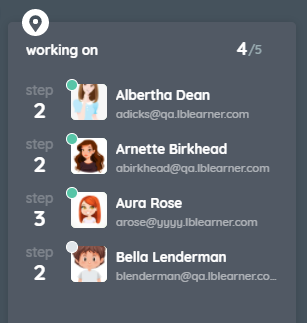
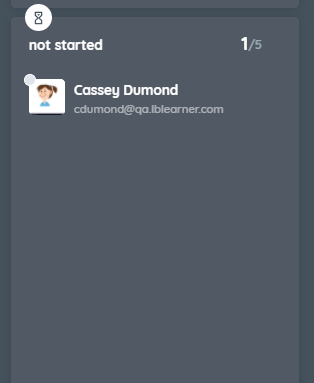
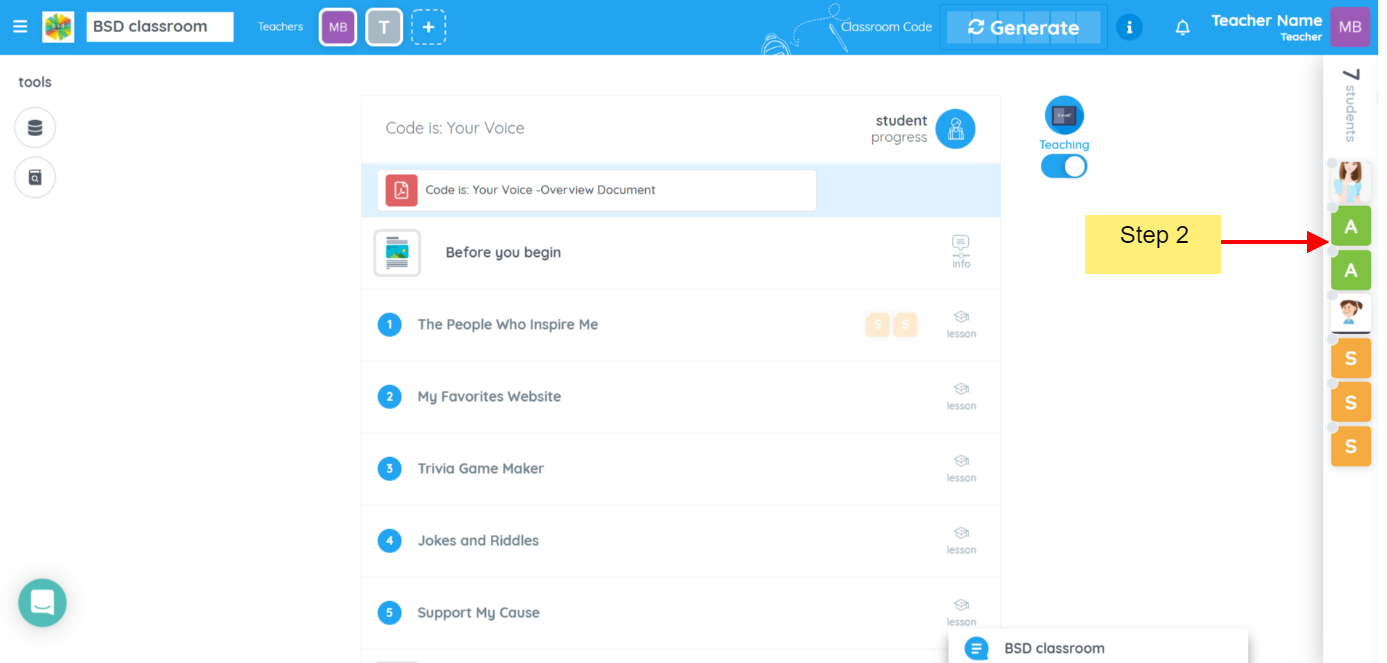
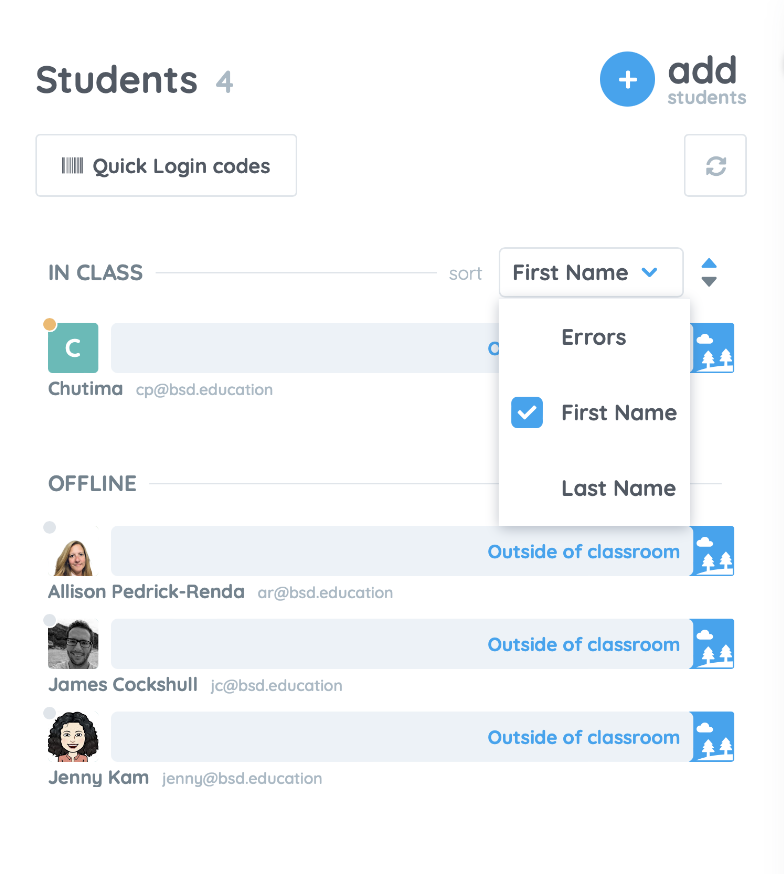
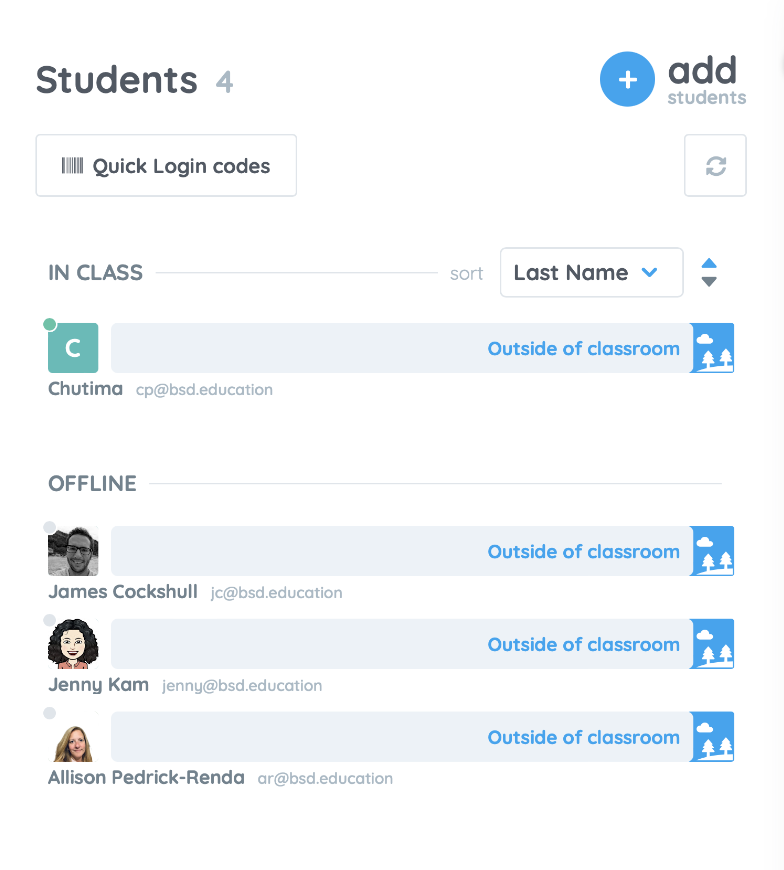
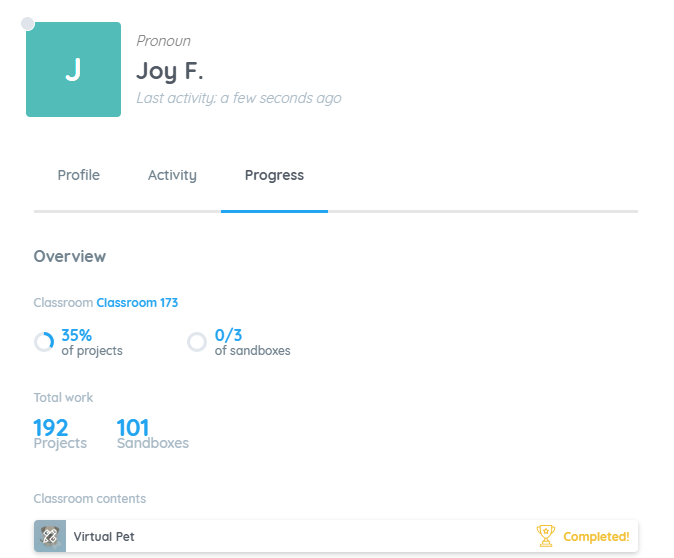
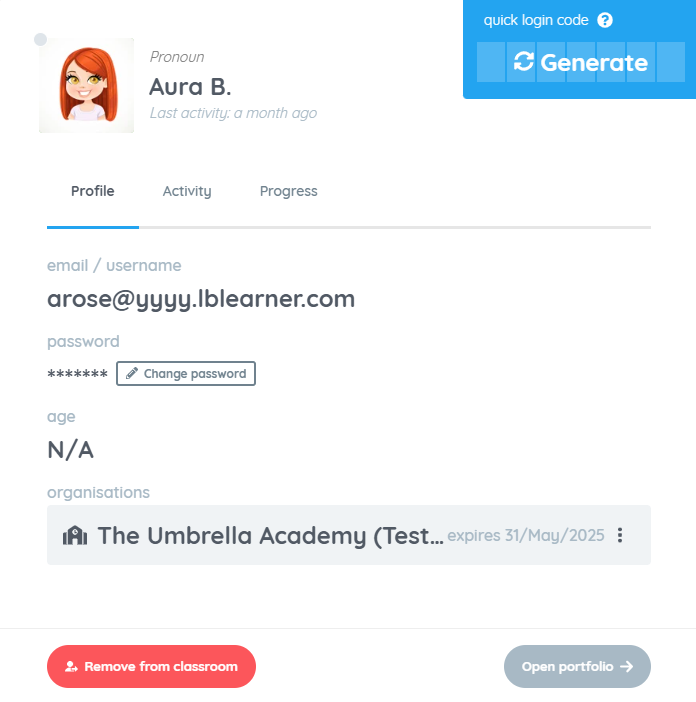
That’s how the selective user profile works! Next time, if you need to check on students’ profiles, go on and try this BSD classroom feature.

Copying a sandbox for various reason can easily be done by following the steps:

  1. Copy the sandbox link from the browser’s address bar.
  1. Share the link with your students. You can share it by projecting the link on the board, sending the link using Classroom Chat, email, or any means you may see fit and convenient for the class.
  2. Ask students to click/type/paste the link on their browser’s address bar and hit Enter.
  3. Now, this will only show them the output of the shared sandbox, view and edit the HTML, CSS and JavaScript codes but NO option to SAVE their customization.
  1. Ask students to click on the “Make a copy of this sandbox” button next to the Sandbox title.
  1. This will prompt to rename the sandbox. You can give suggestions on how they can name it. Click on the “Make a copy” button once done.
  1. Once a sandbox has been successfully copied, students can now start customizing it. The sandbox will also be included in their own portfolios which they can access anytime.

If you have questions or concerns, let’s talk! Feel free to send an email to support@bsd.education or “start a conversation” through chat support!

Have another question?

Click on the button below to reach our support team for any further questions you might have.